Tuesday, 23 April 2019

Zero Waste Culottes


Happy Easter! I've had two weeks off work and lots of time to be creative. I've helped my daughter with some fundraising and made her prom dress. I've done a fitting for a wedding dress I'm making and I've altered another wedding dress - lots of selfless sewing. So this Easter weekend it was time to refashion the pile of Jeans I've had lingering in the wardrobe.


I used some old jeans and offcuts from previous projects. This pile of denim had been destined for the bin until I decided to reuse some of it. The rest has not gone to waste and I'm in the process of piecing it together to get some usable yardage.


I pulled out my trusty culottes pattern, which is #114 from 03/2016 edition of Burdastyle magazine. This requires just 1.5m of fabric. after harvesting as much of the jeans fabric as I could I pieced the scraps together to make big enough pieces to get the legs out of. I took a pair of back pockets off one of the pairs of jeans I was using and kept them for the back of the culottes. I quite like that you can see the dark patch of denim where one of these pockets was placed originally on the front of the finished pair. I used offcuts of cotton for the pocket bags in order to reduce the bulk.


This pattern is an easy sew. The straight cut of the legs means that it is quite easy to cut from regular fabric with very very little wastage and made them a perfect option for a refashion. The legs are shaped at the waist using a pleat on the trouser front and darts at the back. I cut a size 38 but I increased the back darts by about 1cm each and took off about the same of the CB seam at the waist. It's what I need to do to make sure they fit at the waist and the hip. I also drafted a curved waistband to help with the fit. 


The culottes came together quickly and I used some grey extra strong thread for topstitching as It seemed to fit the faded denim quite well, rather than use a new brashy gold. Most of the topstitching went well but the waistband was problematic. My trusty Bernina struggled to go through all the layers and the tread caught frequently. From the right side, it looks ok, but the inside is a mess, despite hammering the seams and steaming the heck out of them. I really need to do the stitching again, but I think I might leave it until I've washed them a couple of times and the fabric has settled. I think using a bigger sized needle might help too.


I haven't added a button or buttonhole yet. I couldn't find the back to the Jeans button I had and I need to sort out the topstitching thread to get a good finish when I do the buttonhole.

I love the shape of these and I'm sure they will get quite a lot of wear over the summer months.


Sunday, 14 April 2019

Blooming Bomber Jacket - a review


What a riot of colour?
This is the Blooming Bomber Jacket. It is a design by Katie Jones and the pattern is available free on Love Crochet. I first saw this in Little Treasures blog a few weeks ago and knew that it would be my next make.


The recommended yarn was Paintbox yarns Arran weight. I managed to get all I needed for less than £20 - which is just what I had left of my Christmas money.


This pattern is classed as intermediate, but a confident beginner could handle it as it's not difficult.


I really like the finished jacket - it came up a little bigger than I was expecting, even though my tension was spot on and I think I might be tempted to use a DK yarn and a slightly smaller hook next time - I'd also like to see it made in Cotton or bamboo yarn.


So what drew me to this? Firstly the colour. I love bright colours and I am trying to embrace it in my clothing too. I love that the design is inspired by Frida Kahlo who is one of my favourite artists. I also loved that the pattern has statement sleeves and huge 3D floral motif pockets - what's not to love?


This was a very quick make (after the months it took to make my Eastern Jewels blanket), taking just 2 weeks to make.   I spent most evenings doing a bit and it came together very quickly. I'm sure this was helped by me using the time while my daughter was at drama rehearsals to get this to progress quickly.

So how easy is it?
The construction of the jacket is very simple and the challenge comes on the cuffs and the pockets. I did find the instructions a little sparse, as I'm very visual I like to see pictures and understand how what I'm doing relates to the garment. I think I'd been spoilt as the Persian Tiles instructions for the Eastern Jewels blanket were incredibly clear and well presented. The Instructions weren't difficult for the Bomber Jacket, just rather brief.


I like to know which part of the garment I'm starting with and the order of construction. The diagram for the pocket was clear and did help, but I spent the first few rows of the jacket wondering which bit I was starting with and working out how it was going to work. For those who need to know - it's the underarm point.


I also had to look up what crochet tapestry technique was - you use this for the popcorn stitch on the cuff. It wasn't hard, but it was terminology I hadn't come across before and I found a couple of youtube tutorials which made it clear. There were more complex stitches in the Eastern Jewels blanket, but they were explained more clearly. That being said, I have a jacket that looks like the one in the photo and I've worn it quite a few times. It looks great with my black Jeans and Docs and I can see me wearing it with my next Minerva make - which is very bright. All hail colour!!!!!!

Saturday, 6 April 2019

Red Floral Saraste Shirt Dress


This is my first version of the Saraste shirt dress from the Breaking the Pattern book by Named Clothing and it will not be the last. After a few recent makes with some tricksy fabrics, this was an absolute dream to sew.


I'm always a bit nervous when I first sew a pattern as I wanted an easy well fitting garment. This week has produced both an unwearable pair of trousers (which I won't go into here) and this stunning dress, which I love.


I compared my measurements to the size guide and finished measurements and based on these I cut a straight size 3. The pattern calls for just over 2m of 150cm wide fabric. Unfortunately I only had 2m of the fabric and it was narrower than 150cm wide too, which meant I had to shorten the skirt portion of the dress considerably and cut the inner yoke, inner collar stand and under collar in a contrasting fabric, which I also used to make bias binding for the armscye as there was not enough fabric for sleeves. I quite like the contrast effect if I'm honest.


I'm not normally a huge fan of floral fabric, but there was just something about the colour combination of this fabric that I really like. I didn't buy it myself and I'm not sure where it's from, but it has a really nice feel and a slight stretch. My sister-in-law gave it to me as a Christmas gift and I've been looking for a project to use it on since then. The contrast fabric was also a Christmas gift. My sister had bought me some yardage from Simply Fabrics in Brixton and had also spotted some remnants. This was one of those remnants - there was about 1/3m of this one.


Once I'd managed pattern Tetris to make all the pieces fit. I started on the construction. I followed this exactly as directed in the book. The bodice back and side front are constructed and stitched together at the side seams, then the gathered skirt is added before the centre front pieces are added and yoke are joined at the shoulder.


I can see why it's constructed in this way, but it doesn't leave many options for alterations. I really like the fit and won't be making any changes to this one, but I would normally have a closer fitting waist, so taking a bit off the side seams and back darts would help with this. If you think you might need to make similar alterations I would construct the back and front separately before joining at the shoulders and side seams.


The drafting is excellent on this and all the pieces matched perfectly. I left off the frill at the edge of the collar and used the grainline archer sew-a-long for the construction of the collar as it gives a great finish. The Saraste instructions are similar here, but the sew-a-long just gives a bit more detail.

I finished all inside seams with the overlocker. The hem was also overlocked and a narrow hem sewn in order to keep as much length as possible. The armscye is finished with contrast bias binding.


This dress is just completely my style. I will get a lot of wear out of it and I think there will be more of these.


Saturday, 23 February 2019

Eastern Jewels


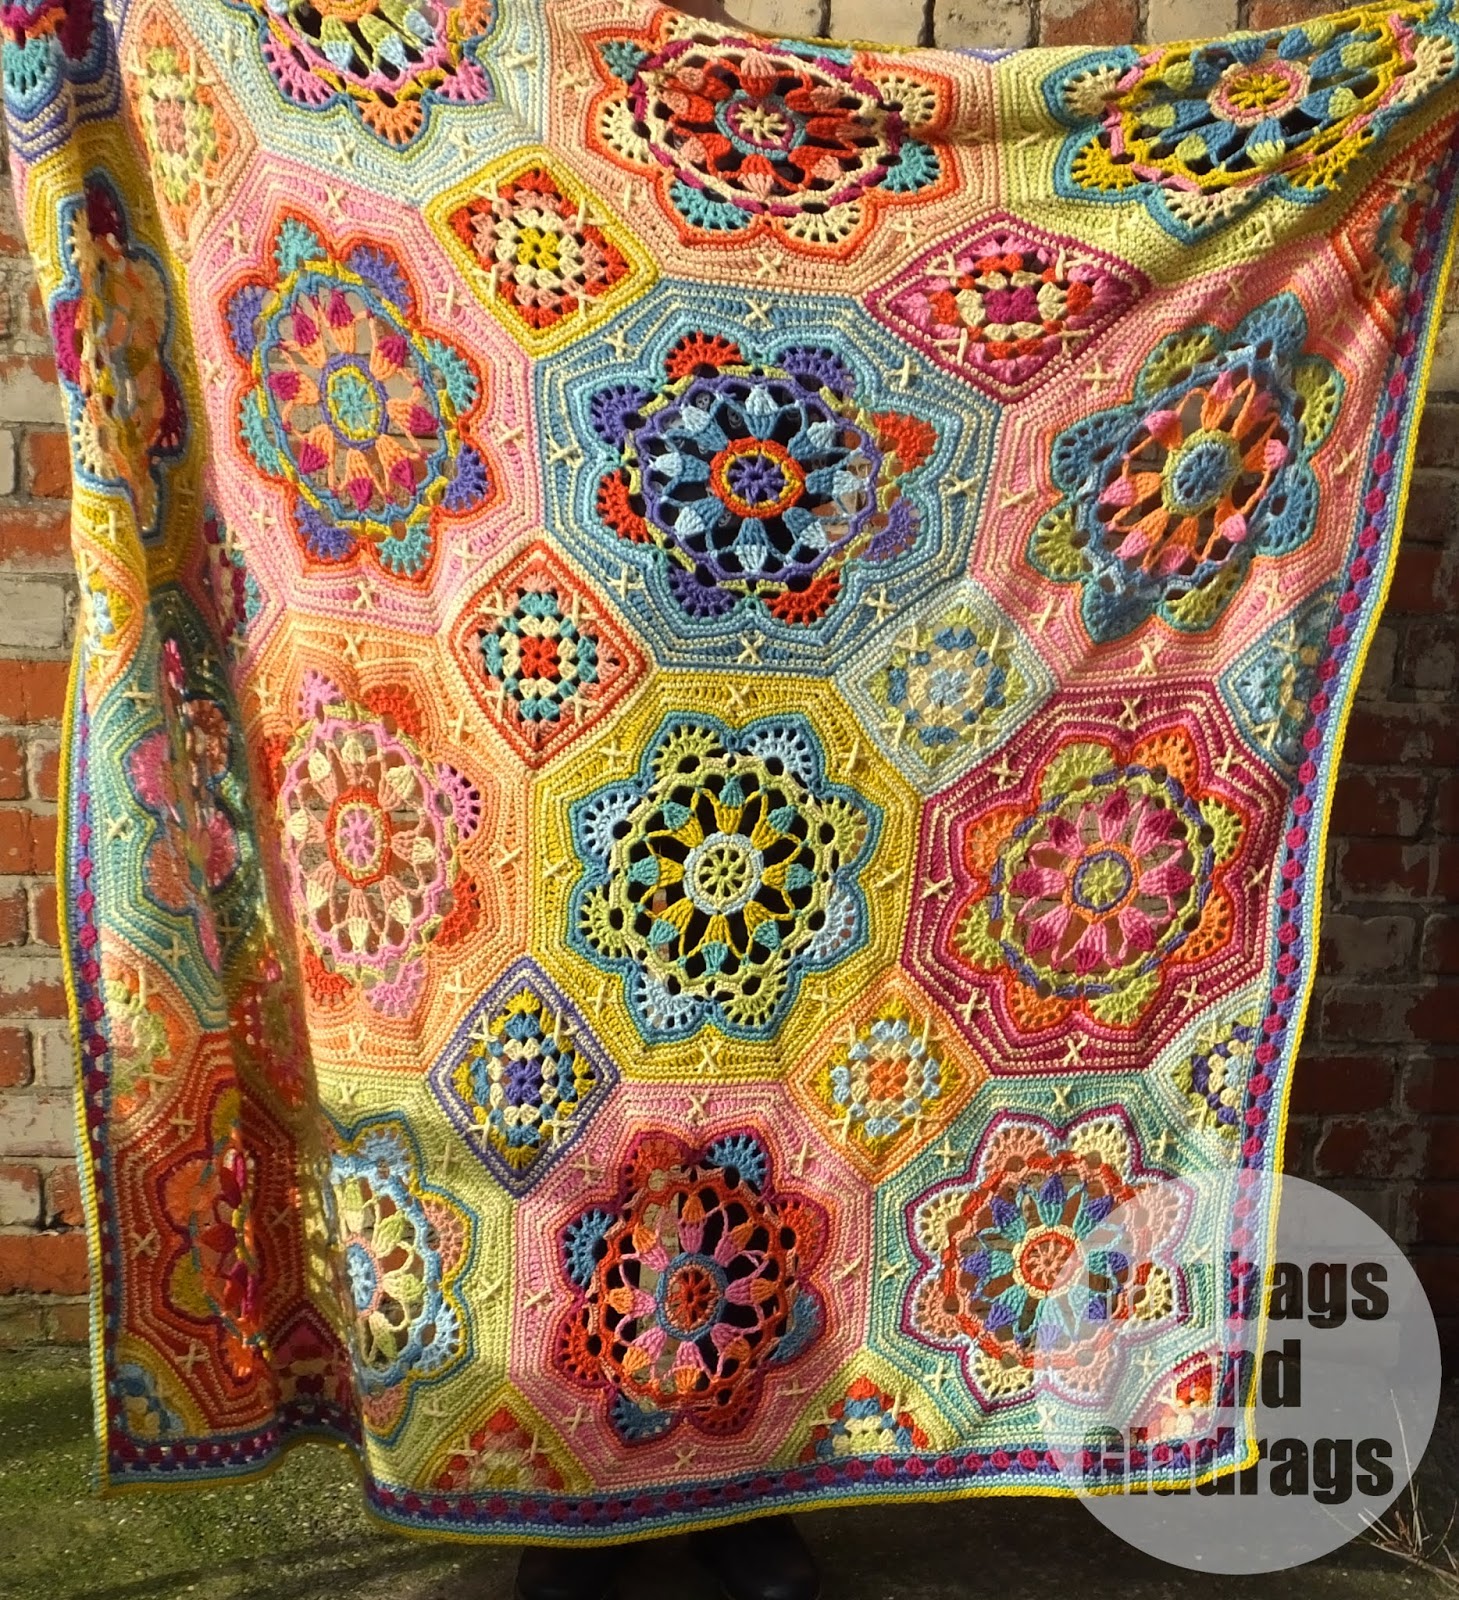
I first spotted this crochet blanket pattern on Pinterest well over a year ago. I was drawn to the colours and the 'random' way it all fitted together to give a very different afghan style blanket. I'd stalked other people's makes and once I'd seen it posted up on Minerva Crafts it went onto my 'want' list.


By July I still hadn't bought it, so when my mum asked what I'd like for my birthday; I knew exactly what to ask for. After being away for a few days in early August my gift arrived and I started making.


I decided to start on the octagonal sections first as I knew that they would take the longest. I worked row by row so that I would remember the stitches I needed to do, gradually increasing the size of the octagons until they were finally finished in early November. I found the pattern instructions easy to follow and the colour guide I kept on hand to make sure I was using the correct colours. I still managed to get some of the colours in the wrong place, but on this design, it really doesn't matter.


Once the octagons were complete I started on the granny squares, which were relatively quick to make up. followed by the triangular pieces.
Fastening it all together was quite quick and as long as the corner stitches were marked it was easy to match the edges. I wove the ends in as I went where possible, but did make a bit of a mistake here - more details later.

The edging really brings the blanket together, but I decided to change the colours suggested on the pattern and use some of the colours that I had most of left, so some sections that should be blue are now Fuchsia - and I like it.


I held up my newly finished blanket to show my hubby, and horror of horrors I discovered some of my granny squares had come undone in places. At first, I thought it was just one, and I replaced the whole square. Then I discovered more. I think it was where I'd cut the tails quite short when fastening off at the end of a row and where the next row did not have enough stitches to hold the tail ends in place.

Gutted I threw it into the bag I'd been keeping it in and sulked. Months of work ruined!
However on the 8th December, (look how long it's taken to get some finished photos!) it was our monthly crafternoon and I took the blanket, hooks, scissors and spare yarn and was determined to rescue the blanket.


Where the yarn had come undone - (due to the weight of the blanket as I'd moved it and it had stretched a little) - I found the dropped stitch and then knotted on some more yarn to make sure I had enough to fasten this off securely this time, and I fixed it. I gave the blanket a few good shakes so that any sections that were loose would show up and then fixed them all. I was going to use the leftover yarn to make other things, but I think I'm going to keep it in case any more sections need to be repaired.


This has been a labour of love and I really do love the finished blanket. but if you are going to make it, make sure you leave long tails on the ends of the rows so they don't come undone when you sew them in.

Saturday, 9 February 2019

The Assembly Line Hoodie Dress


I had my eye on this pattern since last August and my hubby bought it for me in September. I just needed to find the right fabric to make it up in. Minerva Crafts sent me 2m of this denim to review and I made the Hoodie dress with it.

I really do love this pattern and it works brilliantly in Denim. I've made two of these dresses. This was my first and it gets plenty of wear. Currently planning a summer version!


Pop over to the Minerva blog to read the full review.

*Disclaimer* The fabric for this project was provided free of charge in exchange for my review. All opinions are my own.

Thursday, 31 January 2019

Grey Wool Coat - Minerva Review


Hi Folks, just a quick post to let you know my latest Minerva make is up on their blog today. You can read it here.

I made my mum a lovely coat and I made my Brother in Law a waistcoat, but the photos didn't arrive until after I sent the post in. - but you can see them here.


Pop over and have a look

Wednesday, 16 January 2019

2019 Art Challenge


So here it is, something a little different...

A bit of background:
1. I am an art teacher. I love drawing and painting, but getting all my art kit out to make work can take up to an hour to set up and I don't have space for all my printmaking and painting stuff to stay out all the time. My sewing stuff sits on a small desk and is easily accessible. Hence I do way more sewing that art as my equipment is to hand and I can grab 5 minutes at a time if I want.


2. January is Manic! Once the schools have gone back we get into 3 rehearsals a week for Panto and the show week is next week You can book tickets here. Coupled with parent's evenings and CPD sessions I have very little time to prep and sew anything major (all I've done is mend my son's jeans).


3. My hubby bought me a new sketchbook for Christmas. Its an A4 spiral bound book made by Pink Pig sketchbooks.


So I decided that my challenge would be to try to draw every day, knowing that over these next few hectic weeks that I won't manage every day. I'm trying to follow a few Instagram prompts to keep me inspired. The idea is to draw something every day in any style, media, size and keep it in my book. I'm using the term 'drawing' as loosely as possible as I'm aiming to try a load of techniques I haven't done before or are not part of my normal art repertoire.

So 2 weeks into January and here are some of the things I've been up to.
You can follow more of my progress with this over on Instagram

LinkWithin

Related Posts Plugin for WordPress, Blogger...