Over the past few months I've been reading quite a bit about grading patterns and for the home sewing enthusiast it seems that doing this by hand using the cut and spread/ overlap method is the way forward. However, I have a simple pattern that I'd like to share soon, but my home drawn versions are a bit untidy. I needed something a little more professional looking.
I downloaded the opensource Inkscape programme, as I just can't afford Illustrator right now! I spent ages on Saturday getting to grips with drawing, adjusting objects, lines and curves and finding a grid that was accurate - generally getting to grips with the very basics of the programme. I still have a lot to learn, but it's looking promising.
To save time I used a basic size 10 bodice PDF from Ralph Pink as I didn't want to spend ages drafting in the programme. It's really easy to embed a PDF and use it to trace around.
I overlaid a grid and made sure all the default measurements were in mm and the grid lines were also at 1mm apart (you could set this to any suitable measurements cm/ inches)
The drafting process is based on the tutorial from Threads which you can find here.
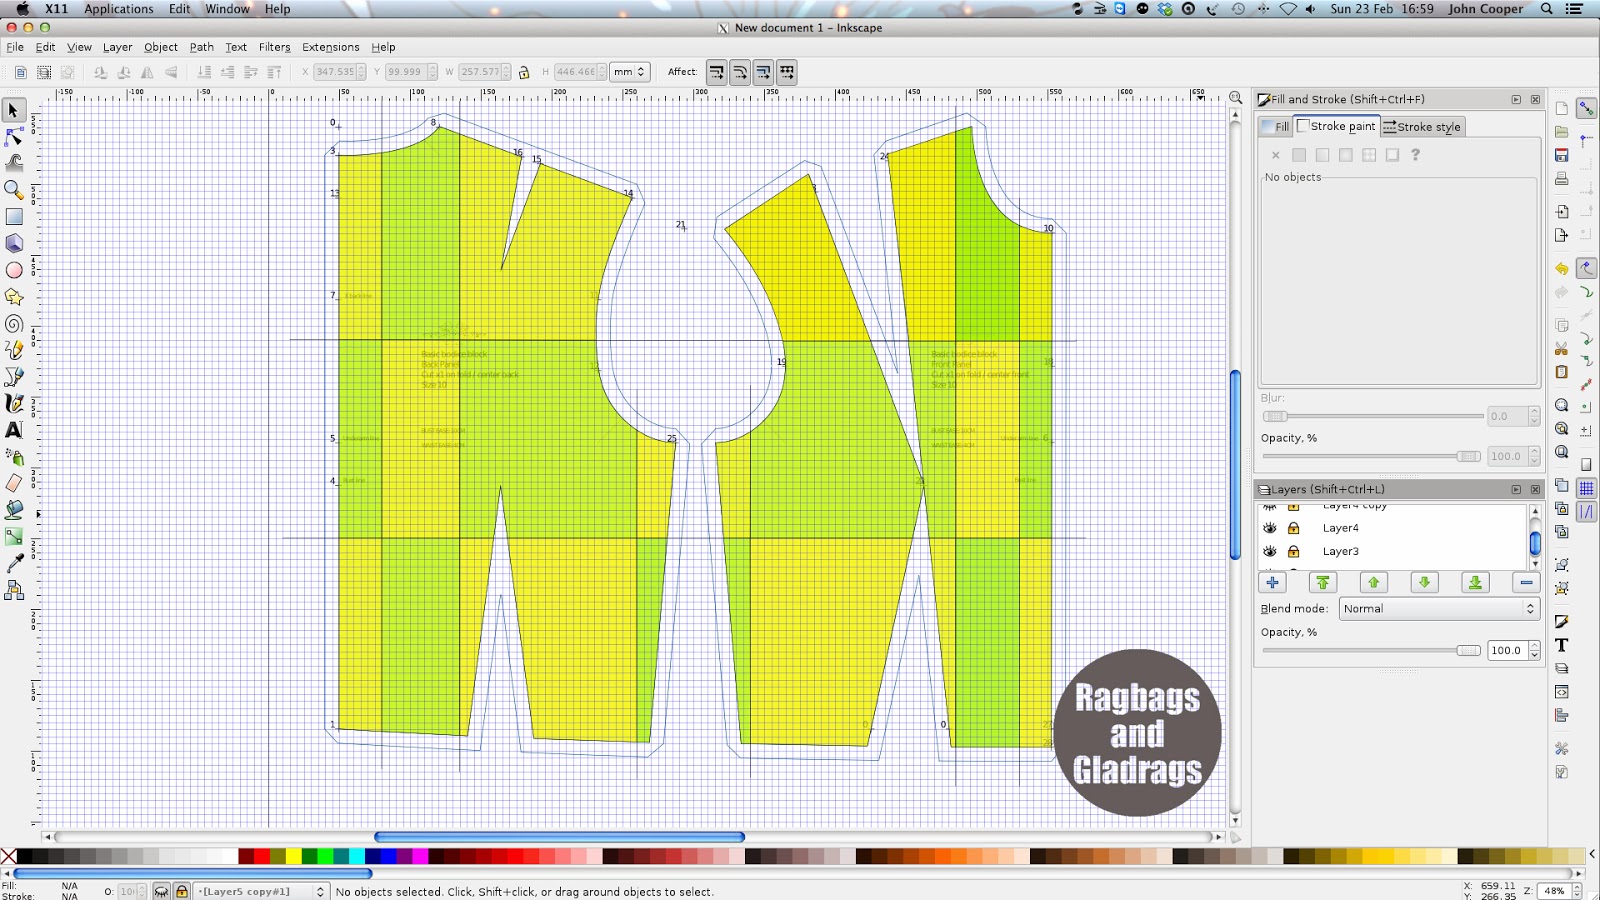
I added a layer and drew the horizontal and vertical lines that would form the 'cut' lines for grading.
Then on a new layer a created shapes, by tracing the blocks formed by the cut lines and the edge of the sloper. I filled these with slightly translucent yellow and green colour.
I zoomed in to make sure that what I was doing was accurate and started to move the pieces the required amount for the grade rule. I based my rule on standard measurement given in Metric Pattern Cutting for Women's Wear by Aldrich.
It took a while to get to this point, but once I'd done this it was quick and easy to adjust the gap or overlap for each size increase. I started with a size 10 and graded up two sizes and down two sizes. I wouldn't recommend doing any more than that.
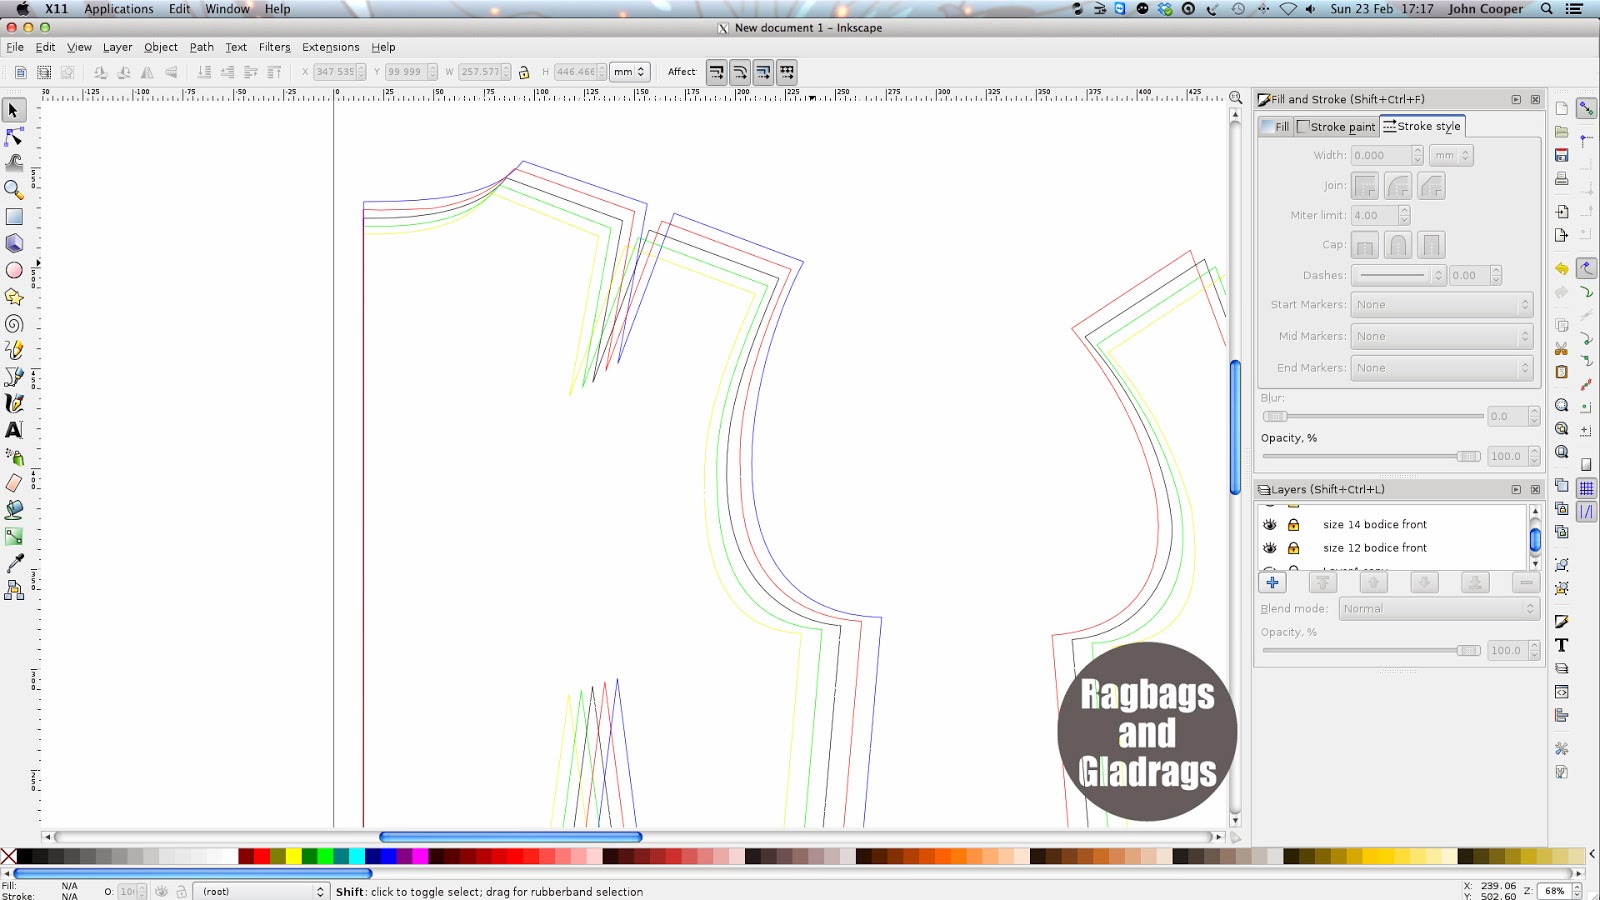
Once the pattern was spread I (again on another layer) traced the new outline and darts, using the bezier curves to blend neckline and armscye curves.
Once all the sizes were complete I alined them so that they were nested and hid the grid. I still have more experimenting and learning to do here, including converting to PDF for exporting the usable file, but feel that I have discovered a way to digitise and grade my patterns on a small scale. I quite like doing techy stuff, as long as I don't have to spend all my time doing it!
If you'd like to know more about what I've been doing, or can offer me any advice for further development please get in touch.


I think with the ones that are overlapping at the very least (= smaller sizes), you could utilise one of the object functions (forgot what it was called - the one that merges objects into one) to make the new pattern pieces.
ReplyDeleteHaven't tried it yet, though. Thanks for sharing this!
I'm just getting into using illustrator. Inkscape is a great little programme, but now I'm used to it AI is soooooo much better.
Delete