

My jeans making journey continues with the Megan Nielsen Dawn Jeans. Way back in 2018 I made my first pair of Closet Core Patterns Ginger Jeans, which you can read about here. I'm actually wearing these right now, which is a testament as to how well they have held up. I went with a stretch jean as I thought it would be easier to fit. And that first pair was easy - however every denim I've used since has had different amount of stretch which has meant lots of alterations for each version!

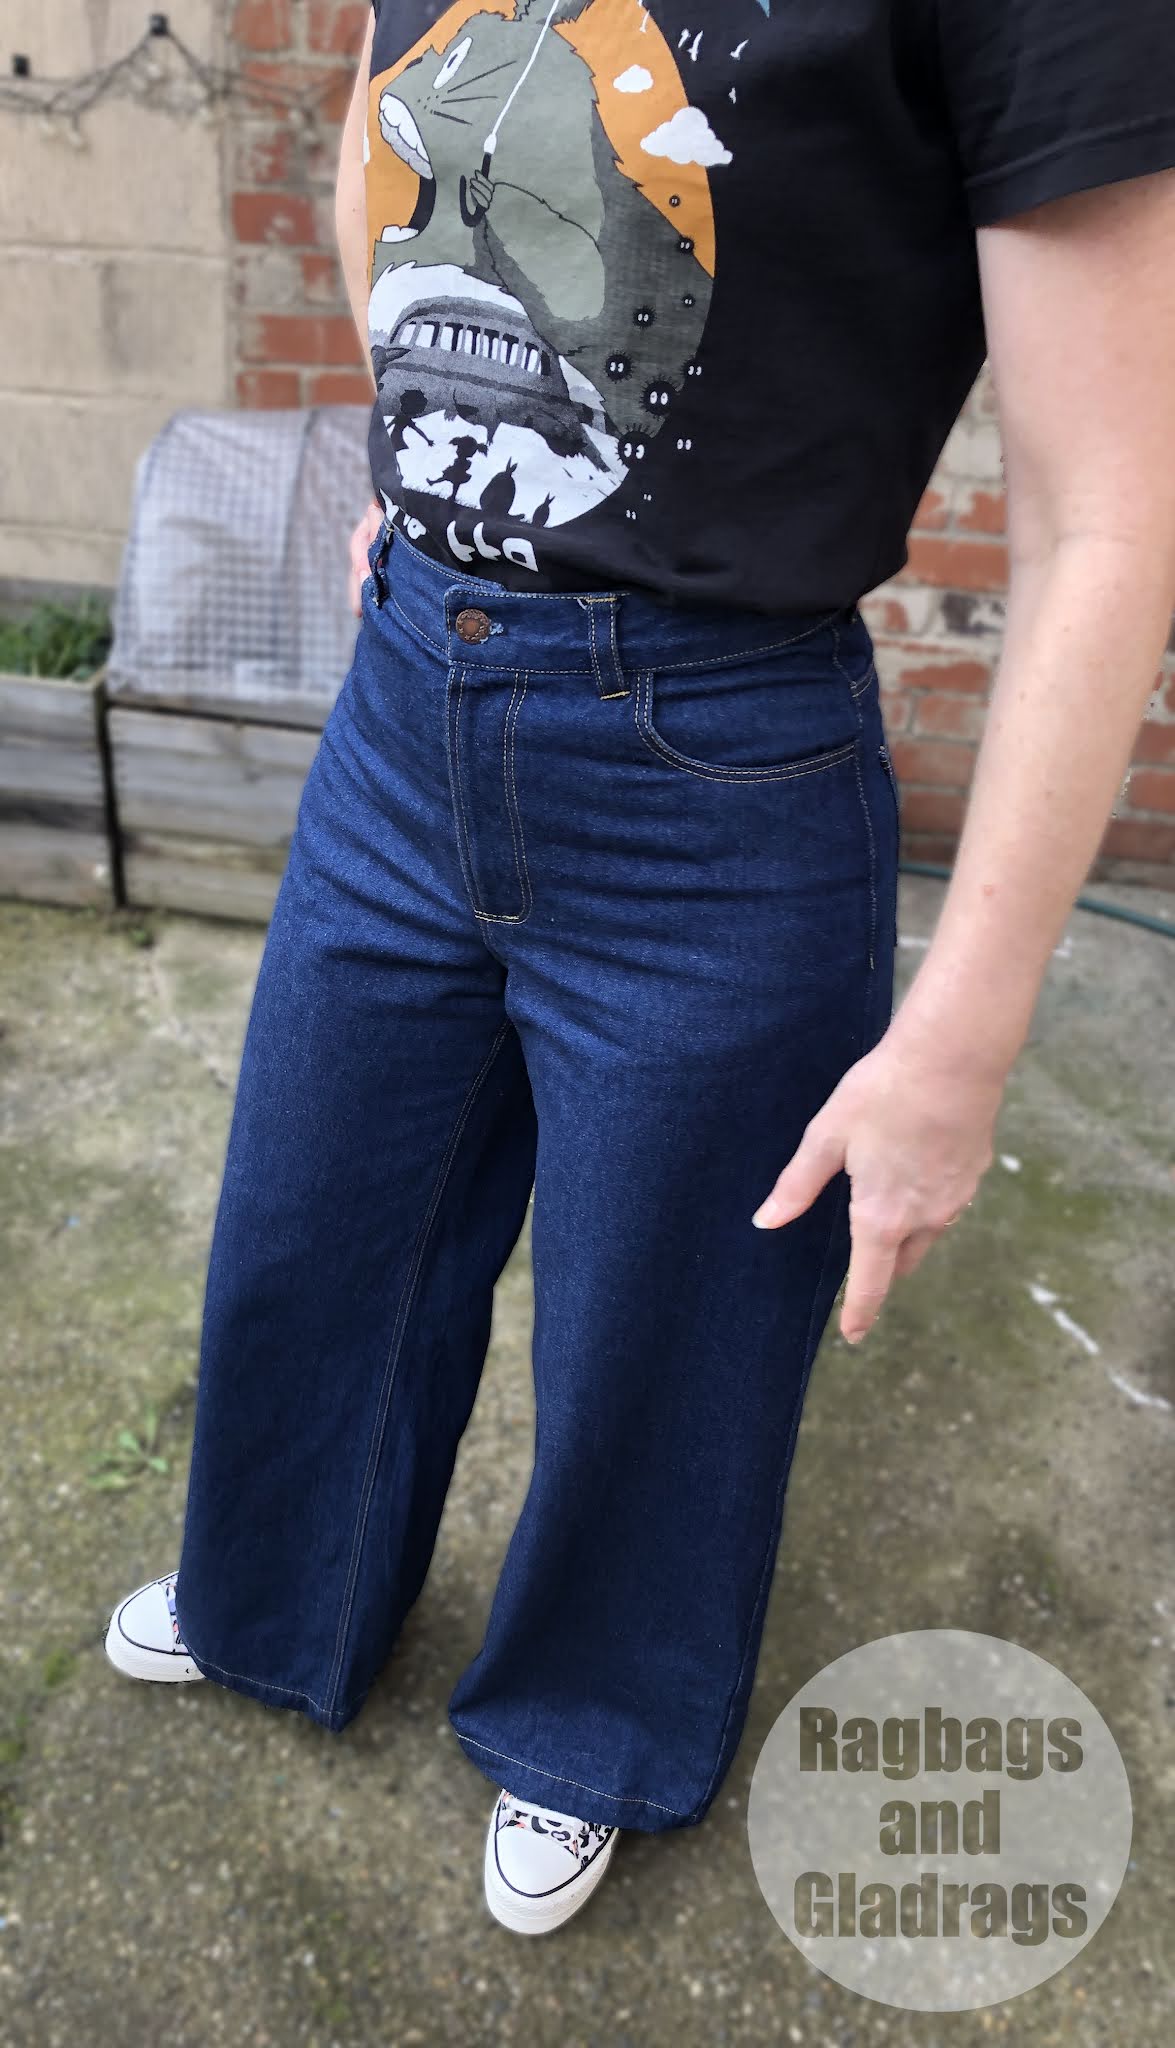
I've been loving the wider leg jean that has been so popular recently. I decided that I'd like to make myself some. Now with a 90's resurgence in fashion at the moment low rise is what many RTW style are going for. I still have a pair of low rise demin from the 90's (now cut into shorts) which get plenty of wear dueing the summer - BUT - I have a LONG torso, which can make my legs look short in comparison (I'm quite tall at 172cm). The low rise seems to accentuate the length of the torso, so I decided I wanted a high rise jean - the Megan Nielsen Dawn Jeans are certainly high rise. They hit right at my natural waist - which I love!

So, why choose the Megan Nielsen Dawn Jeans over other jeans that are out there? Especially when lots of folks have had fitting issues with these - simply this - Lots of super versions out there. All trousers will need some fitting. 4 different views, so lots of bang for your buck! I made the wide leg version, full length.

Right then - Fitting!
I made a toile up on some firm cotton I had in my stash. I cut a 12 at the hip, graded to an 8 at the waist. I had seen Liz Grylls (sewing bee 2020) had some fitting issues with the Dawn jeans and has documented these on her instagram highlights. After making my toile I realised one of the alterations she had done I needed to do too. In order to eliminate wrinkling and odd little pleats on the inseam. I needed to add some width to the inseam at the crotch. I added 2cm both front and back. This solved the issue.

I also found that I had some pooling of fabric just above the butt. so I took a 2cm wedge out of the centre back seam, graded to nothing at the side seams. As I have a small waist I still needed to take a bit out of the centre back width - I do this A LOT! About 1cm from the back piece = an adjustment of 2cm in total.

Construction
Once I was happy with the fit I prepped my denim. The denim is a medium weight rigid fabric which I bought from John Lewis with birthday vouchers. I prewashed it, pressed it and then cut the pieces out of a single layer. I had 2.2m and it was 150cm wide. As I was making the tall full length version I really did need the 2.2m and it fit perfectly. I did manage to leave a very good chunk of fabric left - theres enough for a skirt or bag or maybe evern the shorts version of the pattern - it won't go to waste!
As I made a zip fly I used the construction of the Ginger Jeans - I cut the front pieces with a cut on fly extension in order to do this. The zip I had bought was too small, but I managed to find a long metal zip in my stash and used that.

As with my Ginger jeans making I basted everything together without the waistband to check the fit and see if I needed to make any other alterations, but it was all good! I had my new overlocker set up (Jaguar 099) and it handled the super thick layers brilliantly with absolutlely no issues. My Pfaff select 3.2 was set up for the construction seams and My vintage Bernina 707 Minimatic was set up on the dining table for top stitching. I used Guttermann extra strong thread for this. Having two machines really helps with the process as you don't need to keep swapping threads during construction. The only top stitching I did on the Pfaff was the buttonhole as my Bernina doesn't have a buttonhole function.

I was going to use the Ginger Jeans waistband method, but I thought I'd give the Megan Nielsen technique a shot. It was actually very effective and It does mean the belt loops are secured very well. It's a good option as long as you don't have a super thick denim. I pressed all the thick bits light mad and gave the super thick areas a bit of a bash with a hammer to help compress the fabric and make topstitching easier. Both of my machines handled 8 layers of denim easily and the Bernina even managed 12 layers -where the belt loop sits over the centre back seam.
I thought I was going to need to lop a lot off the length of these, but once I tried them on with my boots I realised I only needed and extra 1cm off the length, so I just made the hem a little deeper. After the first washing they do seem to have shrunk a little more - and yes, I did pre wash the fabric.
Opinion

I LOVE THESE. They make my legs look long due to the high waist. They are super cool and will look fab with a fitted graphic tee and cardigan. I can't wait to wear these and I'm already envisioning a needlecord version and a linen pair for the summer - not to mention the shorts version. I think this is going to be a staple pattern that will get used a lot. The only minor additional alteration I will make is to reduce the height of the side seams by 1cm, grading to nothing at the centre front/ back. I think it will give a smoother line. I love that these will need minimum alterations to fitting for different fabrics rather that the whole massive alteration, depending on fabric stretch that the ginger jeans need!
