Friday 31 March 2023

Screen printed shirt


To accompany my hubby’s 3 piece punk-inspired suit he asked me to make him a punk-inspired white shirt. He had very, very clear ideas about what he wanted! The shirt had to be longer at the back, so it can hang out of the trousers, but be able to be tucked in at the front. Business at the front, party at the back. He also wanted the shirt to have a pop-over placket (not that he used that term).

We had several discussions about what sort of neckline he wanted and we toyed with the idea of a pussy-bow style, and a more high-necked regency style. Both of which we dismissed as he does not have a long neck and his beard would just get in the way of the shirt collar anyway. Finally, we opted for a grandad-style collar. This works really well with the suit, and my hubby’s styling, not to mention the nod to a clerical collar (He is a Baptist minister and was preaching at the wedding).


The shirt was drafted, using one he had, that was a good fit as a starting point and the design alterations added in. I used the pop-over placket pattern piece from the Kalle shirt and just lengthened it. I did forget to reverse it, so it buttons up as a woman’s shirt would. He’s not bothered by that, I think he just felt it was a bit strange buttoning it up the other way.


The shirt was constructed using the burrito method to enclose the raw edges of the yoke. The hem was finished with a bias facing, which in hindsight I’d have been better doing a baby hem, due to the curvature at the sides.


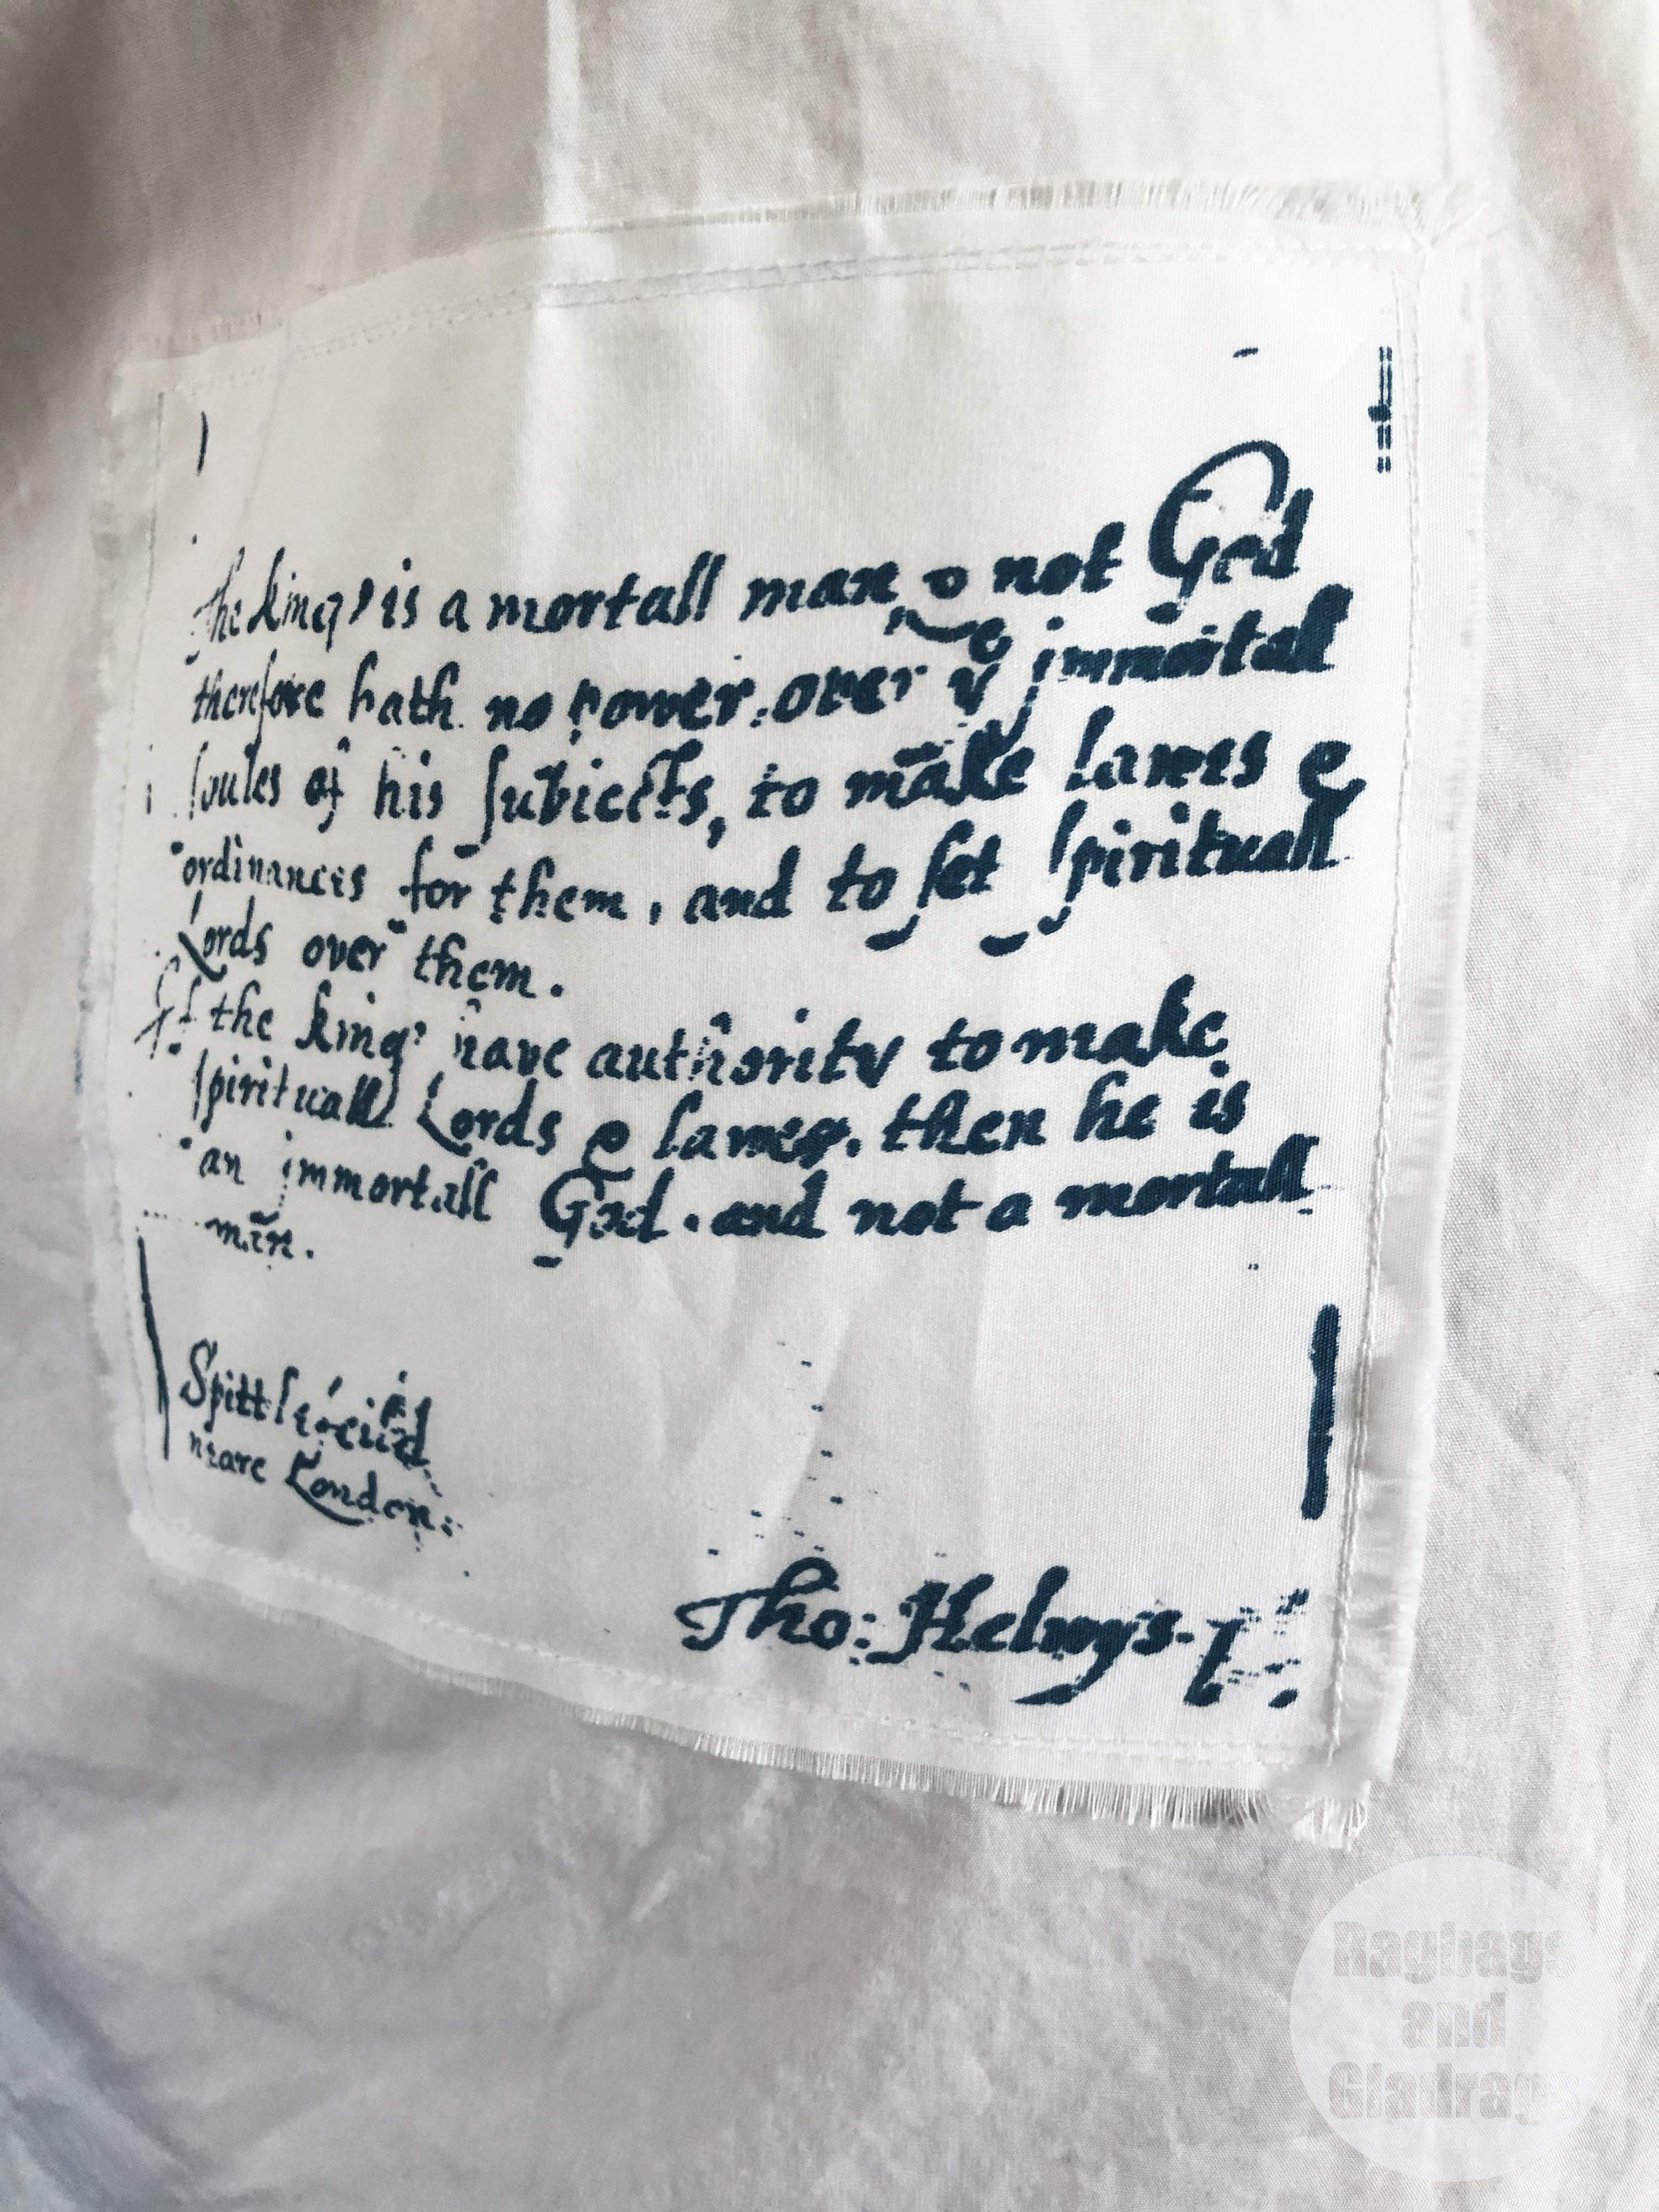
To add to the punk vibe of the shirt we added some appliqued design elements. A few months ago we bought a screen printing kit from Hunt the Moon and used it to create a design. The Text is a section of a letter written by Thomas Helwys, a baptist minister who was imprisoned by James I, who did not approve of his desire to separate church and state. He died in 1616 aged 40 in Newgate prison. The second screen print was made by using different letters from the piece by Helwys to spell the word ‘Dissent’. Both designs were printed on pieces of white cotton in blue ink, fixed by ironing and stitched into place - the edges were lightly frayed. The shirt was finished with blue buttons that matched the suit.


My hubby has already commissioned me to make more shirts, now he has a pattern that fits really well. I’ll just have to adjust the length and remember to swap the button packet to the other side!

Sunday 26 March 2023

Heyday Dungas - a review

This is one of those makes that has been on my radar to make forever. I have loved seeing the Lucy and Yak style dungarees that my friends have worn and fancied having a go at making some in a simialr style.

The pattern is the Heyday Dungarees by Waves and Wild (formally Made by Jack's Mum). The pattern is is simple and there are no zips or buttons to install, making this a super easy make for beginners. You do need to be confident sewing through multiple layers of fabric though.

The fabric is an 8 wale cotton corduroy from Minerva and I bought just over two metres for the size medium. I think this ois the perfect weight for this type of make and not too thick.

The sizing is easy to understand and clear guidance is given for the height this is drafted for and how to adjust for differeing heights. I was in two minds about choosing between the small and medium sizes, so I printed the pattern with both lines, but ended up going for the medium. The fit is good on a stable woven, but if I had chosen a fabric with stretch the small would have been a better option.

The instructions are very clear and easy to follow on this pattern and there are two different options for fastenings - loops or buttons. I opted for the loops.

The construction means that all the edges are concealed on the hems and facings and seams are neatened by overlocker and then top stitched. I took my time with this, but it was still a quick make. It would have been even quicker if I hadn't have made a mistake with the pockets and cut a pair upside down, resulting in the nap being the wrong way and the colour looking odd - moral of this story is don't cut out in poor light! I removed them and cut a replacement pair, which was well worth it as now they look fab.

I can't wait to wear these and I hope they might be a summer staple - not to mention perfect skatewear!


Punk'd


This has got to be the biggest sewing project I have ever undertaken. My hubby asked me to make his outfit for a wedding that we attended this weekend and he was very particular about what he wanted. The design process started months ago when he outlined the type of coat/ jacket he wanted. I began to think about drafting what was required. I tried a couple of other options but eventually ended up using Vogue 1853, you can read all about the pattern and changes that I made to it here.


The suit had to have a punk vibe and was heavily influenced by the work of Vivienne Westwood during the 70’s and 80’s. My hubby wanted bondage-style trousers and braces, a waistcoat and long jacket/ coat, plus a punk-inspired shirt, which you can read about here.


As this was to be worn at a wedding, the concept was that the straps and braces on the trousers and the back of the shirt would not be visible under the coat/ jacket, but once the coat was removed they would be very obvious. As my hubby was preaching at the wedding It was important to him that his suit didn’t distract anyone, whilst being completely and uniquely him! Definitely business at the front and party in the back!


The waistcoat is a standard classic waistcoat, drafted from the instructions in Aldrich’s Metric Pattern Cutting for Menswear. I realised my error once it was drafted as I had used the chest measurement - which for most would be fine, but I should have used the waist measurement for my hubby. I had to make some alterations to the pattern but made a toile to ensure the fit was good. It was a fairly simple construction. As with the coat, I interfaced the front pieces fully and used heavier interfacing for the facing. This worked very well for this fabric. The back and lining were cut in the same navy poly charmeuse that I used to line the coat with.


The trousers were drafted by using a rub-off method from a pair of well-fitting trousers that had jeans styling. I think the back would benefit from being reduced a bit more. This wasn’t evident in the toile, but they are a little loose above the bottom. I constructed these in the same way that I would make a pair of jeans. The back pockets are patch pockets and the front ones are curved. I did line the trousers to the knee, attaching the lining to the waist and fly, which gave a nice neat finish. If I did this again I would probably underline the front and back pieces before putting the pants together! As this would make these sections more stable and support the fabric more.


The bondage straps are removable and secured to the trousers by D-rings at the side seams. There is also an adjustable strap at the centre back, also tightened by D-rings. Buttons were added next to the centre back and front belt loops so that braces can be attached.

I tried to match the pattern, where possible and I’m happy with the results. My hubby is certainly very happy and received lots of positive comments about his suit at the wedding on Saturday. Although the drafting and making of these items have taken quite a bit of thought and effort. I now have patterns that fit my husband and I can adapt them to suit what he might need in the future. I love this punk styling and it’s probably the only suit he’s ever had that completely sums him up. This is John in his element! 


LinkWithin

Related Posts Plugin for WordPress, Blogger...