
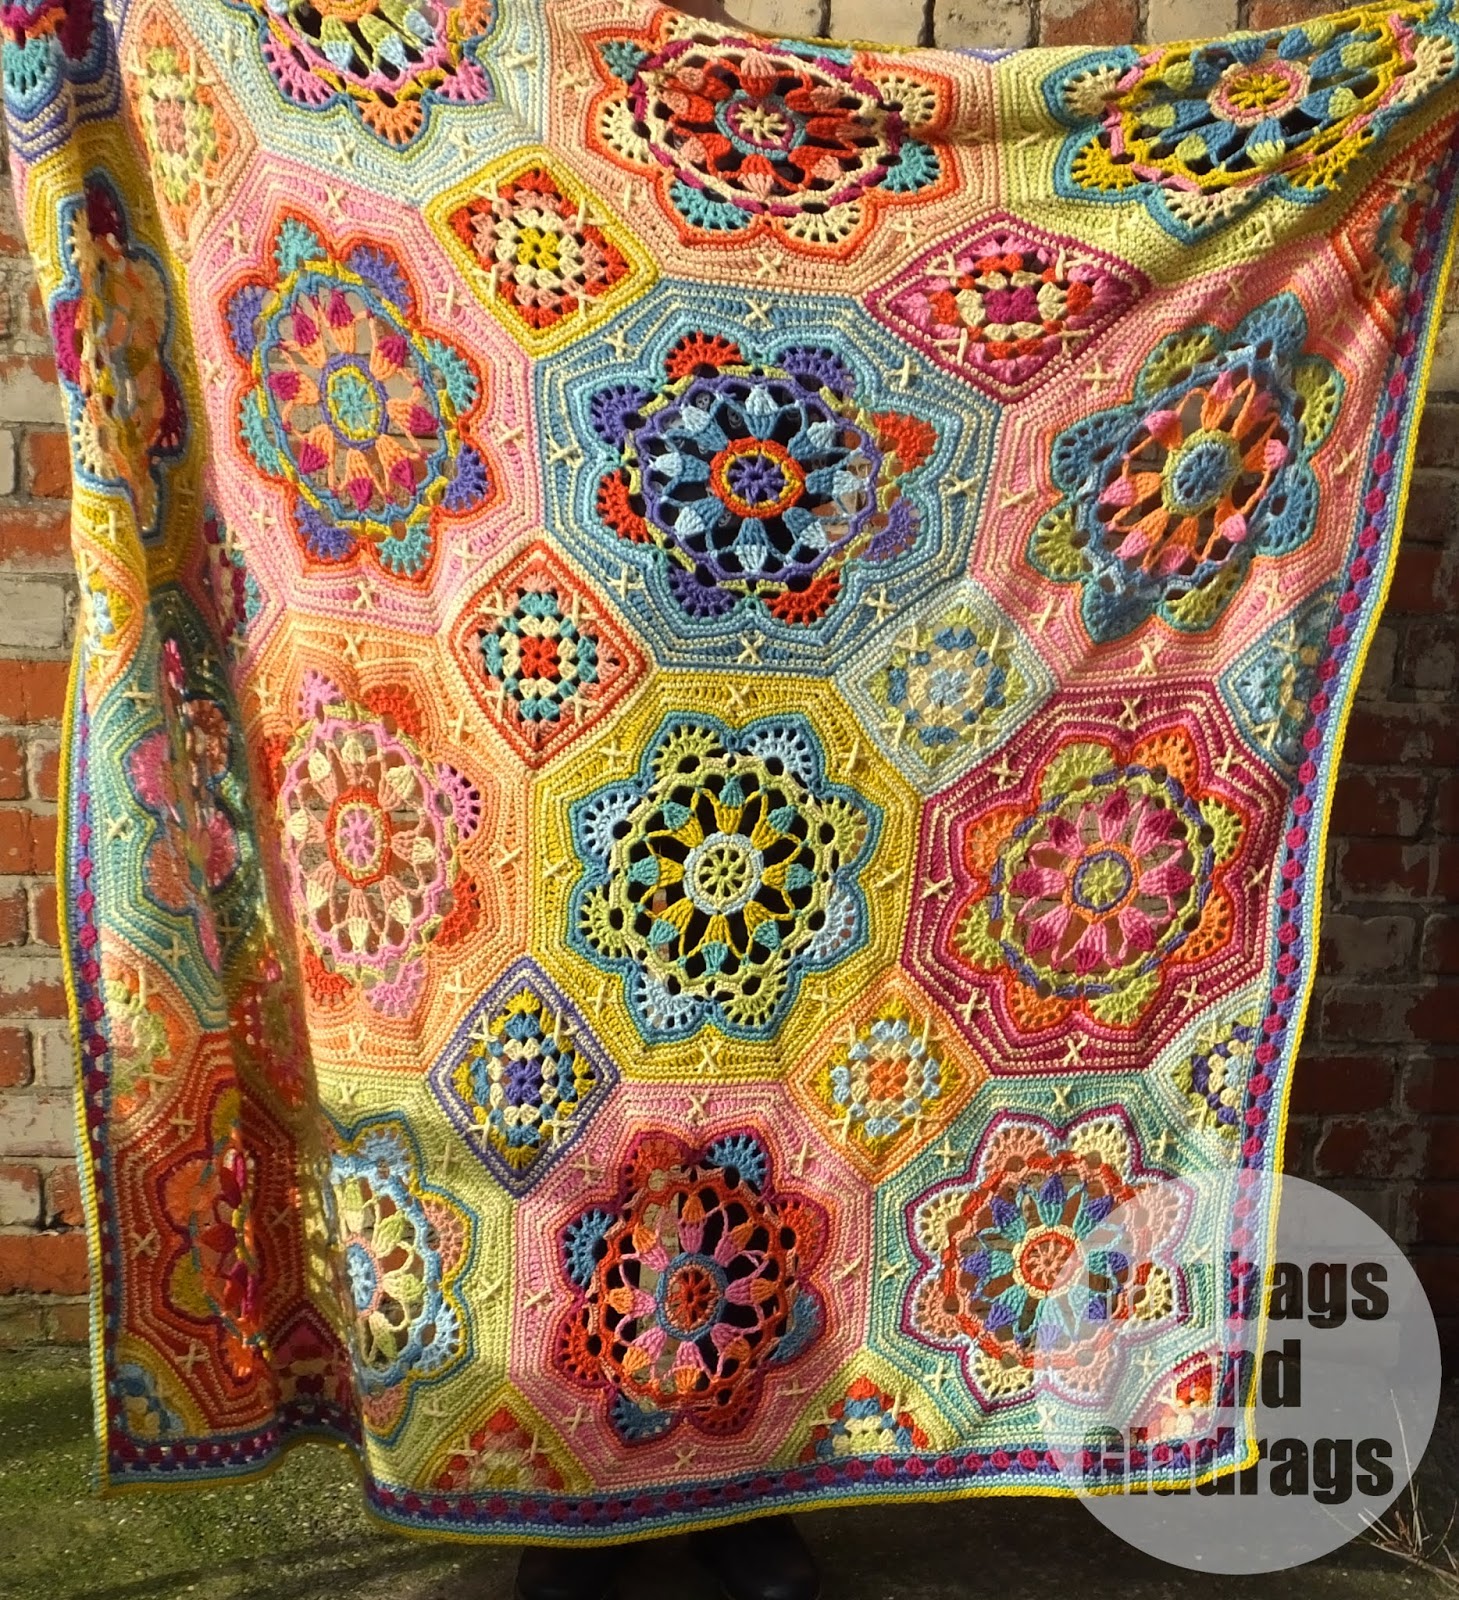
I first spotted this crochet blanket pattern on Pinterest well over a year ago. I was drawn to the colours and the 'random' way it all fitted together to give a very different afghan style blanket. I'd stalked other people's makes and once I'd seen it posted up on Minerva Crafts it went onto my 'want' list.

By July I still hadn't bought it, so when my mum asked what I'd like for my birthday; I knew exactly what to ask for. After being away for a few days in early August my gift arrived and I started making.

I decided to start on the octagonal sections first as I knew that they would take the longest. I worked row by row so that I would remember the stitches I needed to do, gradually increasing the size of the octagons until they were finally finished in early November. I found the pattern instructions easy to follow and the colour guide I kept on hand to make sure I was using the correct colours. I still managed to get some of the colours in the wrong place, but on this design, it really doesn't matter.

Once the octagons were complete I started on the granny squares, which were relatively quick to make up. followed by the triangular pieces.
Fastening it all together was quite quick and as long as the corner stitches were marked it was easy to match the edges. I wove the ends in as I went where possible, but did make a bit of a mistake here - more details later.

The edging really brings the blanket together, but I decided to change the colours suggested on the pattern and use some of the colours that I had most of left, so some sections that should be blue are now Fuchsia - and I like it.

I held up my newly finished blanket to show my hubby, and horror of horrors I discovered some of my granny squares had come undone in places. At first, I thought it was just one, and I replaced the whole square. Then I discovered more. I think it was where I'd cut the tails quite short when fastening off at the end of a row and where the next row did not have enough stitches to hold the tail ends in place.
Gutted I threw it into the bag I'd been keeping it in and sulked. Months of work ruined!
However on the 8th December, (look how long it's taken to get some finished photos!) it was our monthly crafternoon and I took the blanket, hooks, scissors and spare yarn and was determined to rescue the blanket.

Where the yarn had come undone - (due to the weight of the blanket as I'd moved it and it had stretched a little) - I found the dropped stitch and then knotted on some more yarn to make sure I had enough to fasten this off securely this time, and I fixed it. I gave the blanket a few good shakes so that any sections that were loose would show up and then fixed them all. I was going to use the leftover yarn to make other things, but I think I'm going to keep it in case any more sections need to be repaired.


