Showing posts with label sewing. Show all posts

Tuesday, 26 October 2021

Megan Nielsen Dawn Jeans Review


My jeans making journey continues with the Megan Nielsen Dawn Jeans. Way back in 2018 I made my first pair of Closet Core Patterns Ginger Jeans, which you can read about here. I'm actually wearing these right now, which is a testament as to how well they have held up. I went with a stretch jean as I thought it would be easier to fit. And that first pair was easy - however every denim I've used since has had different amount of stretch which has meant lots of alterations for each version!

I've been loving the wider leg jean that has been so popular recently. I decided that I'd like to make myself some. Now with a 90's resurgence in fashion at the moment low rise is what many RTW style are going for. I still have a pair of low rise demin from the 90's (now cut into shorts) which get plenty of wear dueing the summer - BUT - I have a LONG torso, which can make my legs look short in comparison (I'm quite tall at 172cm). The low rise seems to accentuate the length of the torso, so I decided I wanted a high rise jean - the Megan Nielsen Dawn Jeans are certainly high rise. They hit right at my natural waist - which I love!

So, why choose the Megan Nielsen Dawn Jeans over other jeans that are out there? Especially when lots of folks have had fitting issues with these - simply this  - Lots of super versions out there. All trousers will need some fitting. 4 different views, so lots of bang for your buck! I made the wide leg version, full length.

Right then - Fitting! 

I made a toile up on some firm cotton I had in my stash. I cut a 12 at the hip, graded to an 8 at the waist. I had seen Liz Grylls (sewing bee 2020) had some fitting issues with the Dawn jeans and has documented these on her instagram highlights. After making my toile I realised one of the alterations she had done I needed to do too. In order to eliminate wrinkling and odd little pleats on the inseam. I needed to add some width to the inseam at the crotch. I added 2cm both front and back. This solved the issue.

I also found that I had some pooling of fabric just above the butt. so I took a 2cm wedge out of the centre back seam, graded to nothing at the side seams. As I have a small waist I still needed to take a bit out of the centre back width - I do this A LOT! About 1cm from the back piece = an adjustment of 2cm in total.

Construction

Once I was happy with the fit I prepped my denim. The denim is a medium weight rigid fabric which I bought from John Lewis with birthday vouchers. I prewashed it, pressed it and then cut the pieces out of a single layer. I had 2.2m and it was 150cm wide. As I was making the tall full length version I really did need the 2.2m and it fit perfectly. I did manage to leave a very good chunk of fabric left - theres enough for a skirt or bag or maybe evern the shorts version of the pattern - it won't go to waste!

As I made a zip fly I used the construction of the Ginger Jeans - I cut the front pieces with a cut on fly extension in order to do this. The zip I had bought was too small, but I managed to find a long metal zip in my stash and used that.
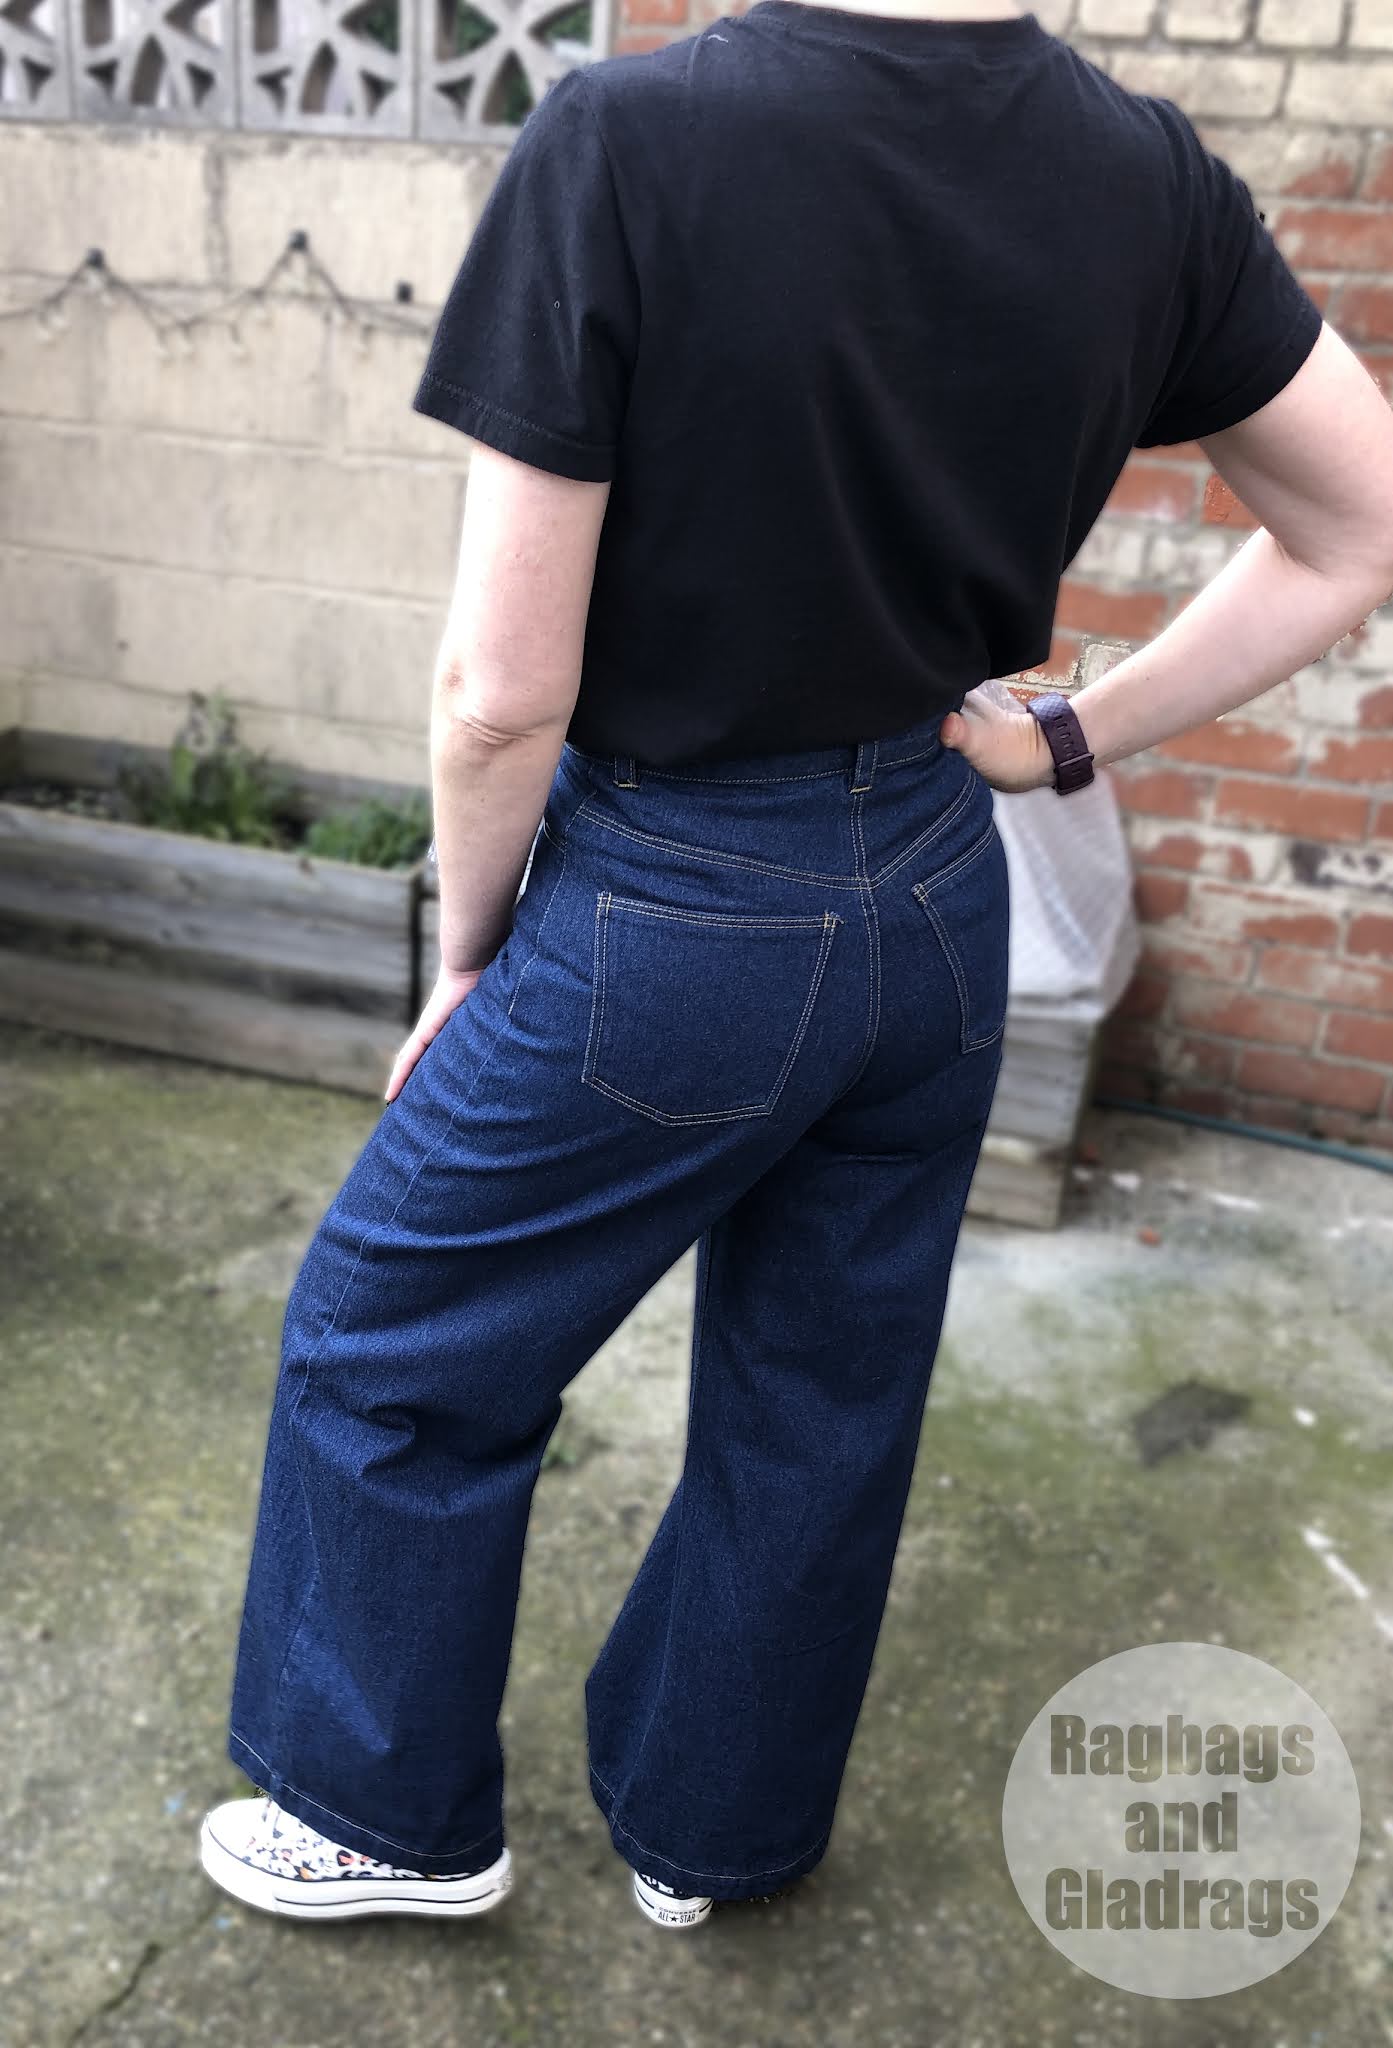
As with my Ginger jeans making I basted everything together without the waistband to check the fit and see if I needed to make any other alterations, but it was all good! I had my new overlocker set up (Jaguar 099) and it handled the super thick layers brilliantly with absolutlely no issues. My Pfaff select 3.2 was set up for the construction seams and My vintage Bernina 707 Minimatic was set up on the dining table for top stitching. I used Guttermann extra strong thread for this. Having two machines really helps with the process as you don't need to keep swapping threads during construction. The only top stitching I did on the Pfaff was the buttonhole as my Bernina doesn't have a buttonhole function.

I was going to use the Ginger Jeans waistband method, but I thought I'd give the Megan Nielsen technique a shot. It was actually very effective and It does mean the belt loops are secured very well. It's a good option as long as you don't have a super thick denim. I pressed all the thick bits light mad and gave the super thick areas a bit of a bash with a hammer to help compress the fabric and make topstitching easier. Both of my machines handled 8 layers of denim easily and the Bernina even managed 12 layers -where the belt loop sits over the centre back seam.
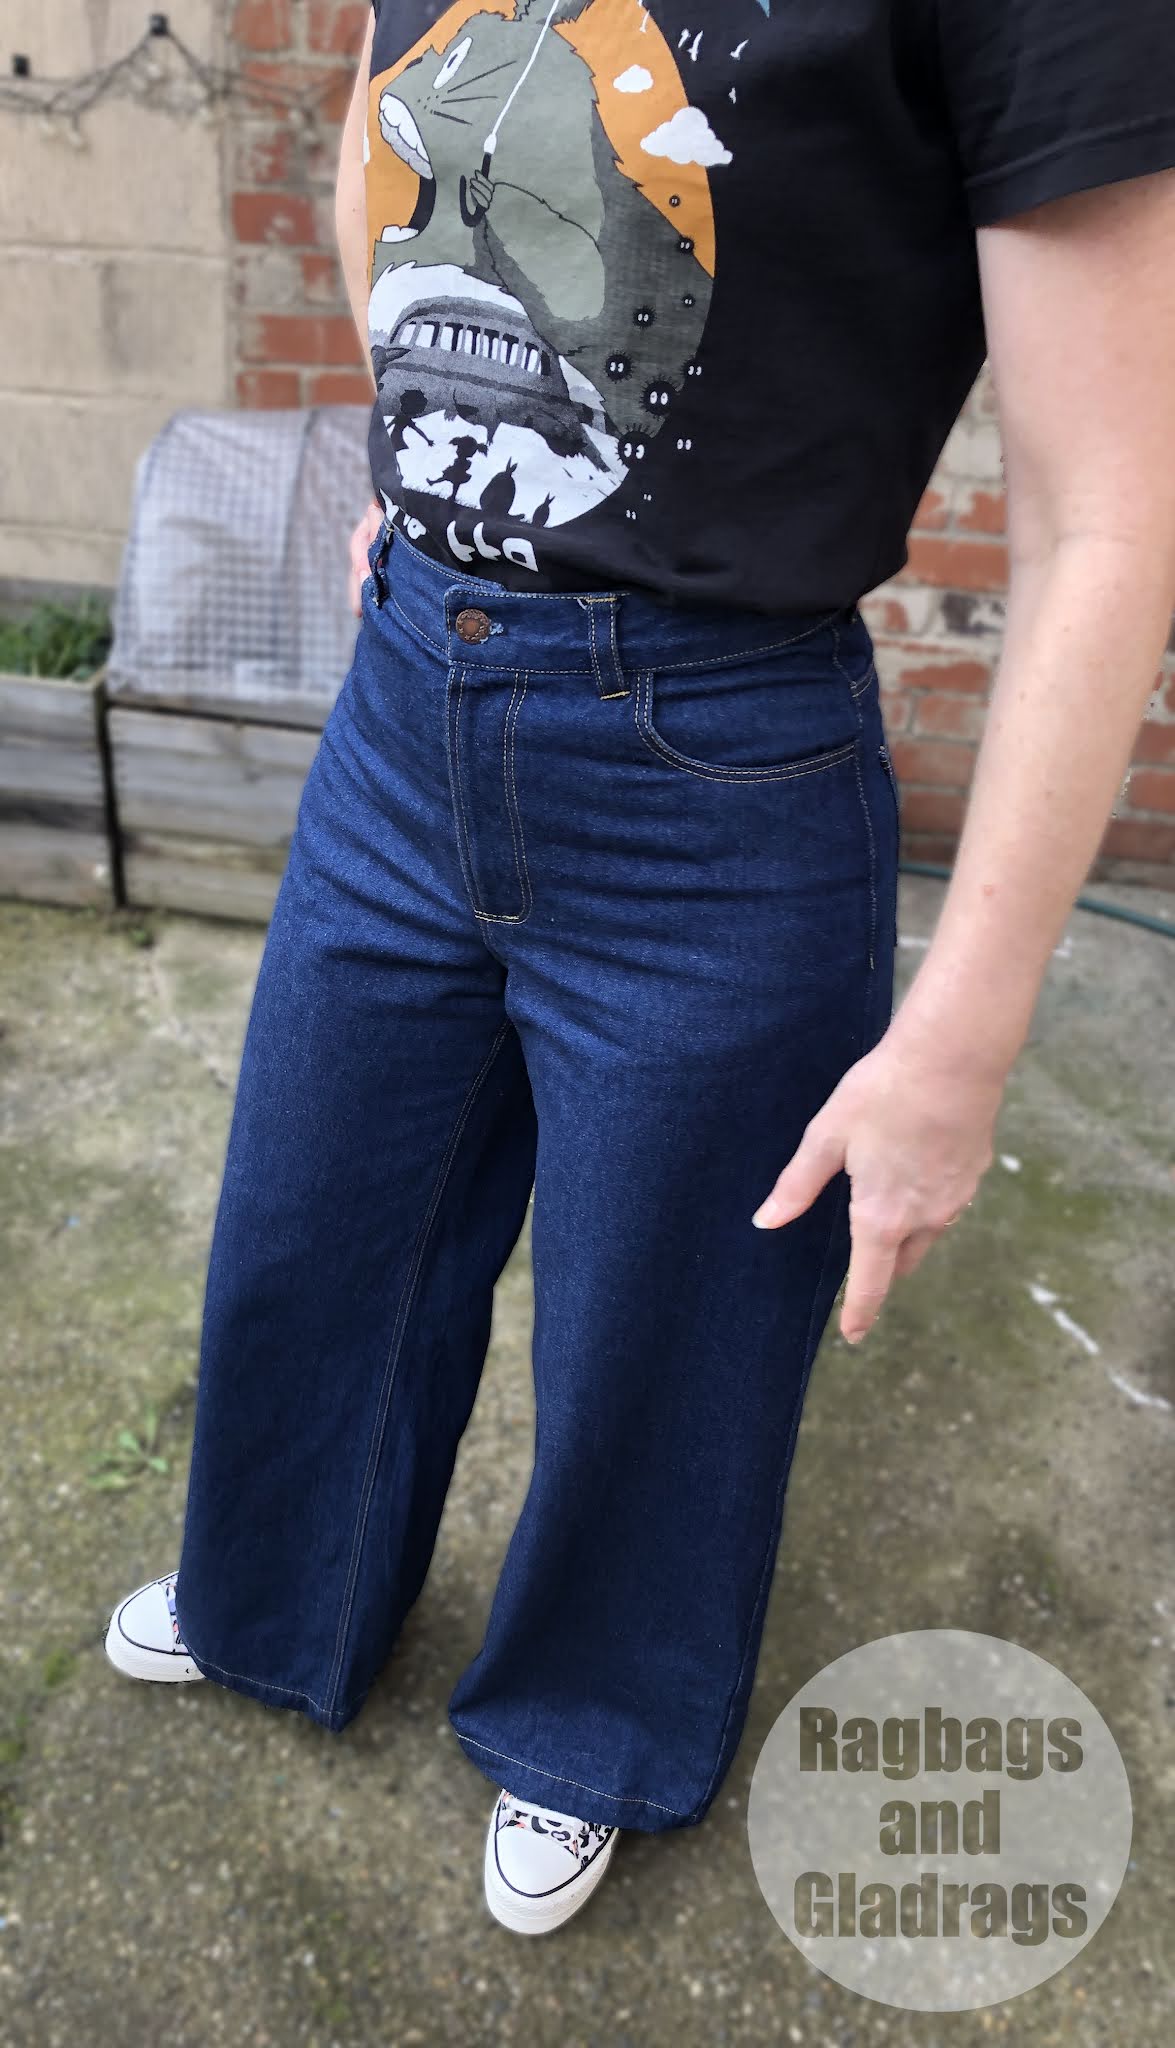
I thought I was going to need to lop a lot off the length of these, but once I tried them on with my boots I realised I only needed and extra 1cm off the length, so I just made the hem a little deeper. After the first washing they do seem to have shrunk a little more - and yes, I did pre wash the fabric.

Opinion

I LOVE THESE. They make my legs look long due to the high waist. They are super cool and will look fab with a fitted graphic tee and cardigan. I can't wait to wear these and I'm already envisioning a needlecord version and a linen pair for the summer - not to mention the shorts version. I think this is going to be a staple pattern that will get used a lot. The only minor additional alteration I will make is to reduce the height of the side seams by 1cm, grading to nothing at the centre front/ back. I think it will give a smoother line. I love that these will need minimum alterations to fitting for different fabrics rather that the whole massive alteration, depending on fabric stretch that the ginger jeans need!


Monday, 27 August 2018

On Sewing, Sustainability and Style


SOI Eve dress - All the spots. I love this one

I began sewing back in 2011 as part of my recovery from a stress-related illness. At the time it was one of two creative outlets I had, one was my art and the other was sewing. I sewed to make things that fitted and helped me feel good about myself. I really needed a sense of accomplishment.


My first make

Over the last few years, I continue to sew to make things that fit and I know that my self-image and esteem has improved as I no longer feel the need to fit into the box that the world would have me believe is in 'Fashion' or 'Style'. As a beginner sewist, I made simple clothes in nice fabrics and I have challenged myself to try more challenging things. However, recently I have felt uncomfortable that the sewing world is becoming just like a high street shop - just with better made and fitted clothes. I see the same patterns again and again as each new indie pattern gets an outing. Does every sewer in blogland own a Keilo Wrap dress, Ogden Cami, Kalle Shirt, Ginger Jeans or Lander pants, to name but a few!!!!!

I love this dress and I still wear it - even if it's a bit faded

Don't get me wrong - these are all great patterns (and I have a couple of them) and that's why they are popular. I thought quite a lot about buying the Ogden Cami and the Kalle shirt but have made my mind up that I don't want to jump on that bandwagon. I like the designs, sure I do, but they're not really me and I have other patterns that are similar but don't get as much airtime as these patterns. I still love the Colette Sorbetto and I hardly ever see it made in blog land these days. It's actually my go-to sleeveless top and I love it.

Eyelet Sorbetto top - still in rotation.

I think the point I'm trying to make is that we consume pattern after pattern and make constantly  - whatever is the next new sewing thing. The stash of fabrics increases and we create boatloads of waste pieces. I'm as guilty of this as the next person and I'm trying to fight against it. So I cancelled my subscription to Burdastyle Magazine - I have 6 years worth of magazines - more than enough to keep me going for a wee while. I also don't buy a pattern as soon as I see it. I like to consider if it's really me and if it's something I'll actually wear or I can make for others and I'll make more than once. Recently this means I didn't buy a pattern, which I really did like and now need to source as it's a foreign company and not easy to get here. Procrastination does bite me sometimes.

Pigs might fly - same style lines again. great print.
Big bold prints

I'm also more considered about the fabric I buy. I make a lot fewer trips to the cheap fabric stall on the local market and I buy less synthetic fabric than I used to; I take time over my makes (when I rush they go wrong anyway); I try to use patterns that I already own; I piece my scraps at the end of a project to make patchwork yardage - I'll be using these for some zero waste projects over the coming months. I'm trying to upcycle pieces that are a little unloved (i've just finished a Cambie dress refashion) and I'm trying to make only what I'll wear or make for other people.

A bold print and a full skirt

Then there's the other thing - Style. My style has changed a bit and I do sew more basics than I used to as I wear nearly all me-made clothes. However, I have an aesthetic I'm drawn towards, yet I find myself making things I just won't wear or that actually don't fit my style. I also make far too many occasion wear pieces and don't wear them very often.


One of my many party dresses - I've worn this twice, but love it.

This summer I've also found myself wearing slobby clothes, combat shorts and t-shirts - nothing wrong with that, but it's actually not my style.
I'm determined to identify shapes that work for me, colours that work for me and be willing to embrace the slightly odd side of my character a little more. After all, I'm an Art teacher I can get away with it.

I always get lots of compliments when I wear this one - It might be black but I love the style, nipped in waist and full skirt.

So here goes:
Dresses/ skirts - Fitted waist with either a full skirt or pencil skirt at knee/ midi length. Shift dresses Knee length.

The dress that nearly didn't make it. the fit was off and I lost patience with it.

Trousers - cigarette pants or wide-legged trousers - 50's style. Shorts not shorter than mid-thigh, culotte styles work well.

cigarette trousers - still need to perfect the fit.

Tops - boat neck, jewel neck or shirt neck. T-shirts, fitted with a curved hem, short or 3/4 sleeves. Sleeveless shirts and tops that can be layered or cap sleeves/ extended shoulders.
Knitwear - cardigans - lots, waist length, semi-fitted and 3/4 to full sleeves.
Casual - jeans - skinny or bootcut, mid to high rise. Hoody tops/ tunics. Black leggings.
Accessories - Tights -  as many different colours/ patterns as I can find - opaque; Jewellery - chunky and bright; scarves;
Footwear - mid-height Mary Jane style shoes - Bright colours. Flat ballerinas. Doc Marten boots - the chunkier the better. Converse all stars or similar.

Summer - it doesn't get much wear but I love it.  Self-drafted.

Fabrics - natural where possible; bright or black; unusual prints; no ditsy/ chintzy type prints; All the spots - every time. I try an avoid neutral colours except for black and white. and my colour palette is "spring" so most pinks and blues look good on me along with some greens. I have to be careful with reds near my face and orange is a no go unless it's part of a design with other colours.

In light of my list, I need to have a wardrobe clear out - time for a clothes swap.

Another Sorbetto top and this summer's winner - Burdastyle culottes with fabric gifted to me by a friend.


Monday, 7 May 2018

Sew Plastic Free


Since the Rana Plaza building collapsed in 2013, killing over 1000 workers. The fashion industry has become more aware of the poor working conditions in many areas of the world, just to keep us in 'Fast Fashion'. Slow fashion became a movement as well as the Who Made My Clothes campaign.

The big retailers have been forced to look at the conditions their clothes were made in as many of them were named and shamed in the months following the disaster. More recently we have become even more aware of issues affecting clothing production and waste. Companies are springing up all over who are trying to reduce the amount of cutting room waste going to landfill. Great examples are Zero Waste Daniel, Holly McQuillan and Tonle. ELUXE magazine has also identified a range of zero waste designers. These are all great ways to reduce the environmental impact and make fashion more sustainable. The creative Curator wrote a great post about this and you can read it here.


Holly McQuillan


Zero Waste Daniel
Tonle
Since the airing of Blue Planet a few months ago the world has certainly become aware of the issue with plastics finding their way into the world's oceans. Not just the obvious litter, but also the plastic micro fibres that are shed from our clothing during manufacture and regular washing. How will the fashion industry respond to this - Only time will tell.

Still from the Blue Planet
We can't bury our heads in the sand on this one. We need to reduce our manufacture and use of plastics, especially single-use plastics. But what about the things we use in home sewing? What can we do to make a difference - even a small one?

OK, so where are we using plastics in sewing? I thought this was quite a simple answer at first but then I really started to think about it.

From Plastic is Rubbish - a great source for plastic free living.
Fabrics
Yep - synthetics.
In Brief - We all know that there are issues in the manufacture of natural fabrics - pesticides and chemicals used in the large-scale manufacture of fabric and particularly dyes. However ultimately these fabrics will biodegrade over time and if you can find organic products  -  go for it. There are certainly more suppliers out there than there were a few years ago.
Then you've got the cellulose-based fabrics. Rayon, Viscose, Bamboo - all of which can be blended with other natural fibres or synthetics, and dependent on which will also biodegrade, although the process is more akin to the chemical process used in the production of true synthetics.
So Synthetics are made using completely chemical methods, Polyester - for example, is made from ethelyne which is derivative of petroleum. There are many variations of such fabrics, some that resemble natural fabrics such as silk and some that have their very own unique properties. Many of these fabrics have made their way into our lives and we hardly notice them. Synthetics have many useful properties and are used in performance wear, protective clothing etc. Until someone has found a way of getting rid of them they will forever exist, never biodegrading. The more we make the more there is. (My son wants to be a chemical engineer - maybe I can convince him that solving this issue would be a great thing to research).  You can read more on how different fabrics - and other things - are made at How Products are Made.

I must admit that I do prefer natural fibres - I tend to sweat a lot and polyester does not breath! I also find it smells like turps when it's being ironed! I normally avoid such fabrics but have found myself sewing them a few times over the last few years. I often do like the finished item and then feel guilty about making it! Am I alone in this one?

Plastic Spools

Notions & Supplies
Here's where it gets scary.
Polyester thread supplied on plastic cotton reels - do you recycle yours? Gutterman have started doing a wider range of high-quality cotton threads, but I think they still come on plastic spools.
Sewing machine needles supplied in plastic cases.
Plastic handled scissors - you can get metal ones.
Plastic zips - most dress zippers are plastic these days.
Plastic sewing machine feet - I know some machines have metal ones - my Bernina does.
plastic bobbins - again some are metal
Plastic sewing machines - given these are not single use, but if I'm listing stuff...
Plastic headed pins - I prefer glass, they don't melt if I accidentally iron them.
Various tapes, elastics and clips.
Can you think of more?

So what do we do about it?
Recycle as much packaging as you can - the stuff that you just can't get plastic free.
Buy natural where possible. You can buy cotton thread on wooden spools - go for organic if you can.
Use up your scraps rather than throwing away.
When you replace items go for environmentally friendly organic if you can. Check out Plastic is Rubbish to find where you can buy plastic free. This is a great website with lots of tips to get you started. Go explore.


Take the #Sew Plastic Free challenge in the month of June.

I know it's difficult to go completely plastic free, but what can you commit to for the month of June?
Could you sew only natural fibres? Maybe you could use alternatives to plastic zippers for your sewing projects? Could you replace plastic headed pins with metal or glass ones? Or search out ceramic or wooden buttons. One small thing at a time do check out Plastic is Rubbish if you are planning on signing up.

Sign up

Copy the pledge below and paste it into the comments section below,  include your details and your personal sew plastic-free challenge before 1st June 2018:
'I, (insert name and blog /Instagram handle if you have one), sign up to Sew Plastic Free. I endeavour to..........................................................................During June 2018' 


This post is a stream of conciousness, based on some reading and news I've seen over the past few months. I'm not an expert and I'm just trying to find my place in this issue. Please do email me with any corrections and I will edit.


'I, Claire of Ragbags and Gladrags/ @artcoopsville, sign up to Sew Plastic Free. I endeavour to find alternatives to plastic fastenings during June 2018'

Tuesday, 13 February 2018

The Tunic: Free Pattern


I don't know about you, but I love a freebie.

I've lost count of the free patterns I have downloaded from the internet. and it was a free pattern that got me started on my sewing journey back in 2011. so I thought it was time to give a little back.
You can download the pattern and instructions here


Let me introduce you to The Tunic. I drafted and made this for myself about 3 years ago. I had been given some beautiful pink baby cord and was needing a relaxed fit tunic to layer in the winter months and see me through from autumn to spring. I didn't know at the time just how much wear I'd get out of this, but it has been in heavy rotation over the last 3 years!!!! - washed and worn and washed and worn.
It's designed to have a comfort fit, easy to wear and it looks fab with a sweater and boots. The deep pockets are great for holding keys or a phone. The back does not have any darts but is shaped to allow for slight waist shaping. I originally included a zip, but quite often this just gets pulled on over my head with the zip still fastened, so you could omit it.


I used some self-coloured topstitching on my version. I think it would look great in a dark denim with contrast topstitching, especially along the front seams and the neck and hem bands.

I'm thinking of making a lightweight version of this for the summer, perhaps as a beach coverup. I might lengthen it just a bit though as I prefer long dresses when I'm not wearing tights or leggings under them.

So if you're looking for something relaxed and comfy this might just be the pattern to try.

It's a single size - women's medium  approx  UK 10/12  US 6/8  EUR 38/40

Please share your makes - I'd love to see them #R&Gthetunic

Do be aware. I digitally drafted this a couple of years ago from scans of my original pattern pieces before I used illustrator for my designs. Hence this is un tested. I suggest making a toile to check fit before cutting into any precious fabric.

This pattern is offered free for personal use only and should not be sold,  or garments made from it should not be sold for profit without my written permission.

Saturday, 5 November 2016

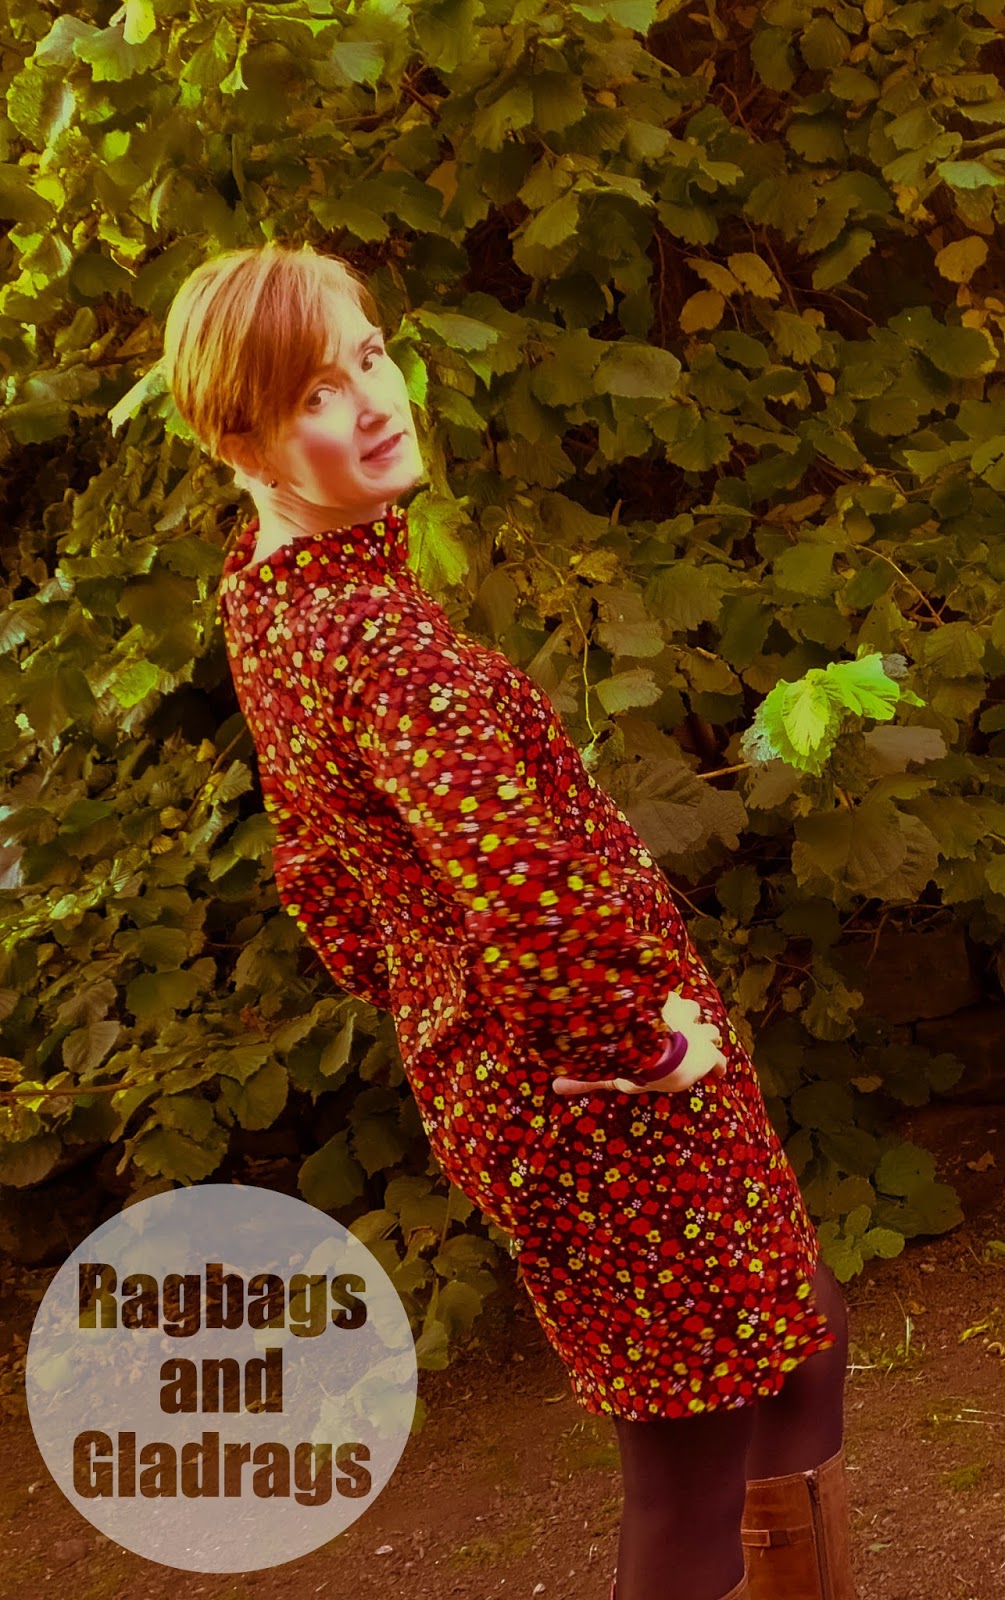
60's Shift Dress AKA Awesome Autumn Dress


Have you ever made a dress that epitomised the seasons?
I think this dress is my most amazing autumn dress. But it's also rather 60's in style.


Last week it was the school half term here. I took time to have a break and did a bit of sewing too. After making my Vivienne Westwood dress I had some fabric left. enough to make a skirt for myself and my daughter, but more on that another time. I also decided to make this dress. It's not the first time I'd used this pattern from Burdastyle 09/2015. I made my handbag dress from the same pattern last year.

I really wanted a long sleeve version and was considering drafting sleeve, when a closer look at the magazine revealed that there was a long sleeve option for this dress, but the sleeves were narrow and I wanted something that fit the 60's vibe a bit more.


The sleeve was a two piece one with a seam running from the shoulder to the hem. I decided that Id like to make a one piece sleeve, similar to a bishop sleeve. The bicep line was pretty narrow, so I spread the sleeve to keep the armscye line the same, but add more width and reduce the sleeve head slightly I lengthened the sleeve slightly and widened the hep to allow the hem to be gathered into a bias band at the wrist. The sleeves are very well drafted for this pattern and went in beautifully, first time, with no trouble at all.

I added the funnel neck collar, and like how it sticks up. It's actually very soft and comfy to wear.


I made the dress in a very very fine cotton corduroy. Its so fine that it only feels slightly textured. The fabric was bought from a market in Hengyang (Hunan province), when I was there in the summer and cost about £8. I bought the zip there too that cost about 40p. It's an invisible zip, the kind with the nylon tape. I prefer the cotton tape ones as the stretch less. but as I hand basted the zip in place first there was no issue with it.


I think I'm going to get a lot of wear from this dress over the cooler months.


Have you every used Lightroom for your photos? I used it for these ones and tried to achieve a more vintage effect with it. It was my first attempt at using the programme and I've got a lot to learn! The photos were over exposed to start with and I should have worked with the raw files to try to correct this a bit, but as they are so big I ended up deleting them to make space for other things. What tips do you have for working with Lightroom?

Sunday, 19 June 2016

Cute Culottes


I made culottes and the fit (kind of)!
I had seen the curved yoke culottes in the May issue of Burdastyle magazine, and thought they would be perfect for the summer.

 
I bought a cotton and linen mix fabric from 1st for Fabrics in Longbenton, which was a very well behaved fabric and comfy to wear.


The pattern is quite easy to sew up, as long as you know what you're doing with curved seams and only has 4 pattern pieces.

I made the size 38. I would normally go for a 40 at the hip and grade down to the waist, but these are wide and the 38 is fine. In fact it could do with just a smidge off the waist as I founf that the culottes teneded to slide down a little (as you can see in the picture) and a couple of cm off at the waist would prevent that from happening.

I've already made the adjustmwnt to the pattern and will be making at least one more pair this year.
I also think they'd be great shorter or made as full length wide trousers.

There is a side zip on the left, but I think a pocket on the right side would be useful, so will add one in next time.

The top is also Burdastyle cap sleeve crop top from 2015

Saturday, 13 April 2013

Tangerine Dreams - or how my daughter made her own dress part 2


 Last week I posted here about my daughter making her own dress. I had tried to get her to sew last year, but she wasn't really interested! This time, however, she was keen, wanted to do most of it herself and she did.


Through making this dress she is now confident in;
  • Pinning and sewing a straight seam (with even seam allowance).
  • Folding, pressing and sewing a baby hem.
  • Using the overlocker to neaten seams.
  • Pressing seams open and using a press cloth and tailors ham.

 She knows how to...
  • Make Bias binding (and she understands what bias binding does).
  • Insert a lapped zipper.
  • Insert set in sleeves.
She will need more help with these as they take a while to master, but at least she understands the basics.


I just love the contrast sash - matching shoes needed now. I like it that my daughter has her own style and taste. She designed this dress and we planned and made it together. I don't think it will be long before she is making her own things without my help!


LinkWithin

Related Posts Plugin for WordPress, Blogger...