Showing posts with label 1960's. Show all posts

Sunday, 31 May 2020

It's a Wrap


Continuing with my vintage sewing theme I've made up another of the vintage patterns I scored in a pattern haul a few months ago.
Cue this cute pattern:


It's Simplicity 7498, 1967 pattern. It's a simple wrap over skirt, with various different options for closure and come in two lengths, mini and just above the knee. However this is a single size pattern with a waist size of 25 inches, so I had to grade the pattern.


I traced the pattern pieces and used my book with grading rules to grade up two sizes. I think one would have been fine, but it's a wrap skirt so it's forgiving in fit.


I scoured my stash for appropriate fabric and found a piece of black denim which has a nice faded fold line right down it! - oh well, I thought I'd use it anyway. It was barely 70cm deep and I only just managed to cut the skirt from it. I used quilting cotton for the facing and pieced together denim to make the pocket.


I decided to leave the bottom unhemmed, but did sew a line of stitching to prevent any fraying from going mad. I really wanted a buckle and leather fastening, but didn't have one the right size or any black leather for that matter.


It's been sat waiting to be finfished for a few weeks as I needed to find a fastening solution. Today I managed to get my hands on a couple of D rings and used those instead, making the tabs from the very small offcuts of denim that were left (I added these after adding the facing and should really have sandwiched them inbetween the layers, but I don't suppose anyone is going to see them). I really did use every scrap of fabric for this!


This denim is hefty and even my trusty Bernina found some of the thicker layers tricky. I had to go really slow. The side seams are flat felled - my first attempt at this - super easy, but you do need a wider seam allowance than my usual 1.2cm. This pattern has 1.5cm.


My construction on this is a bit rough. The waist facing didn't quite meet the front edge - but then I realised it should have a facing along the edge too, which I decided to omit, just turning and hemming - I didn't look at the instructions and should have added a few cm to the waist facing to account for this.


It looks fine and has that edgy punky style I love, but decent topstitching thread would have helped with the finish of the garment, but I'll certainly make some more of these. A quick and easy sew.


I'm impressed with the coverage, the overlap is a decent width and you are not doing to get any accidental flashes of undergarments with this skirt. I can see this getting lots of wear - easy to throw on in the summer and would also look great with leggings/ tights and boots in the winter. Another Vintage winner.

Saturday, 5 November 2016

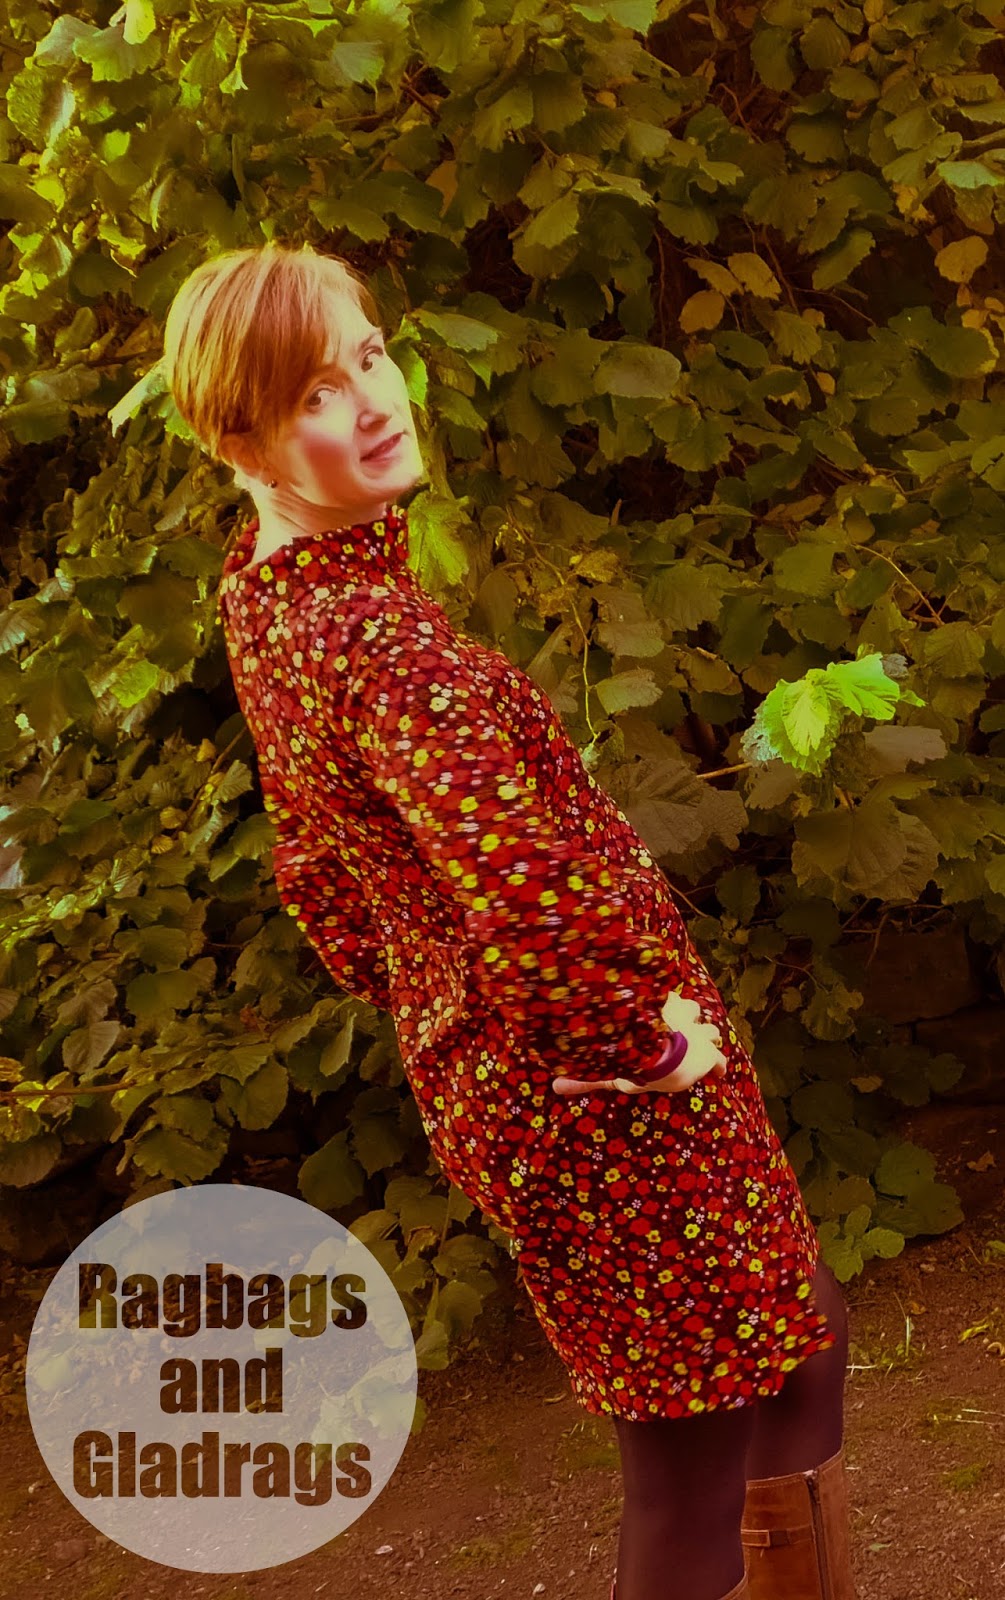
60's Shift Dress AKA Awesome Autumn Dress


Have you ever made a dress that epitomised the seasons?
I think this dress is my most amazing autumn dress. But it's also rather 60's in style.


Last week it was the school half term here. I took time to have a break and did a bit of sewing too. After making my Vivienne Westwood dress I had some fabric left. enough to make a skirt for myself and my daughter, but more on that another time. I also decided to make this dress. It's not the first time I'd used this pattern from Burdastyle 09/2015. I made my handbag dress from the same pattern last year.

I really wanted a long sleeve version and was considering drafting sleeve, when a closer look at the magazine revealed that there was a long sleeve option for this dress, but the sleeves were narrow and I wanted something that fit the 60's vibe a bit more.


The sleeve was a two piece one with a seam running from the shoulder to the hem. I decided that Id like to make a one piece sleeve, similar to a bishop sleeve. The bicep line was pretty narrow, so I spread the sleeve to keep the armscye line the same, but add more width and reduce the sleeve head slightly I lengthened the sleeve slightly and widened the hep to allow the hem to be gathered into a bias band at the wrist. The sleeves are very well drafted for this pattern and went in beautifully, first time, with no trouble at all.

I added the funnel neck collar, and like how it sticks up. It's actually very soft and comfy to wear.


I made the dress in a very very fine cotton corduroy. Its so fine that it only feels slightly textured. The fabric was bought from a market in Hengyang (Hunan province), when I was there in the summer and cost about £8. I bought the zip there too that cost about 40p. It's an invisible zip, the kind with the nylon tape. I prefer the cotton tape ones as the stretch less. but as I hand basted the zip in place first there was no issue with it.


I think I'm going to get a lot of wear from this dress over the cooler months.


Have you every used Lightroom for your photos? I used it for these ones and tried to achieve a more vintage effect with it. It was my first attempt at using the programme and I've got a lot to learn! The photos were over exposed to start with and I should have worked with the raw files to try to correct this a bit, but as they are so big I ended up deleting them to make space for other things. What tips do you have for working with Lightroom?

Friday, 22 June 2012

The Movie Project - Dress three - sort of.


I've been very inspired by the shift dresses I've seen on TV and film recently. Inspired enough to make a dress.
I may have mentioned that Last year my Hubby decided to watch the top 100 films - well this list crept up to more than 200! and we are still working out way through it. In response I decided to make movie inspired outfits. so Far I've managed 2, and this is the third.

A couple of months ago we watched Rosemary's Baby, but rather than following the plot I was following Mia Farrow's wardrobe and styling. Lots of classic shift and sack dresses.


And I just LOVE some of the styles worm by Megan in the latest season of Mad Men, in particular this very Mary Quant style dress.


So I thought I'd do my own shift dress. I wanted a black dress that I could dress up or down and I think I've achieved it. I made the dress in Black eyelet cotton with a black lining. It's just above knee length as I guess I may wear this for work - and modesty is a big thing where I work! As with the halter dress I made a couple of weeks ago I used the 60's dress by Alexandra from Burdastyle website as a starting point, but I ended up making quite a few adjustments to the pattern to make it fit my style.


I made the dress sleeveless - I extended the neckline to make a boat neck and a shallow v at the back. I chose the pattern as I only wanted bust darts in the front in order to keep the simplicity of the fabric as a feature. I lined up the fabric carefully before cutting, to ensure it was perfectly on grain. I fully lined this in a black poly cotton, understitching at the neck. the lining is caught to the invisible zip in the back and i'm really happy with the finish. I think it looks professional (no raw edges showing) I took the time to hand stitch the hem and it was worth it.

Now - how do I style it? would love to know what you think.

LinkWithin

Related Posts Plugin for WordPress, Blogger...