Showing posts with label Patterns by Gertie. Show all posts
Thursday, 9 August 2018
How to sew a Gertie dress from less than 1m of fabric
Over the summer I have been sewing with small pieces of fabric. Most less than 1m. I had this lovely black jacquard fabric, but there was less than 90cm of 150cm wide.
My original plan was for some capri pants, but there wasn't quite enough for that.
So I opted for the B6453 Gertie princess seamed sundress. I thought it would make a chic LBD. Due to the amount of fabric, the skirt is much shorter than I'd wear and I decided I'd make this for my daughter (for reference she's a UK size 10 in RTW).
I cut the skirt pieces out on the fold, using the pencil skirt version as a guide and extended the sides to form a subtle A-line shape - I think this looks really cute.
The rest of the pieces I cut from a single layer and used all but the tiniest of scraps. I did manage to cut all the pieces including the facings. I chose to make fixed straps rather than adjustable as they used a bit less fabric and I didn't have any suitable sliders and rings.
The front bodice went together well. As usual when sewing princess seams I sew a line of stay stitching 1mm inside the seam line. This helps keep the concave and convex curves accurately placed when pinning and stitching the curves.
I stitched the skirt pieces to the bodice fronts and backs before joining at the side seams. And that's where I went wrong.
Not paying attention - I joined the bodice backs the wrong way around - so the side seams are at the CB. I was really wondering why the side seams didn't match when I was sewing them - it didn't click until I'd sewn them together. I'm hoping I can get away with this as I really can't be bothered to take it all apart and re-sew...
Do you ever just leave something even though you know you should correct it? No? - Me Neither
My OCD got the better of me! I took it apart and re-sewed. Can you see the difference in the shape of the back?
Once the dress was sewed in the correct way I fitted it to my daughter. I ended up taking a little from each side seam from the rib to the hip line - otherwise, the fit was fine. I didn't want to overfit as last time I made her this dress I made it a bit snug and she didn't get much wear out of it.
Key advice for sewing with small amounts of fabric.
1. Check the yardage. I place the pattern pieces on the fabric before cutting out to check I have enough room. I usually find I can manage on way less than the pattern envelope suggests.
2. Cut out from a single layer. It takes more time but is much more fabric efficient - remember to flip the pattern pieces once you have cut one side so that you get the opposite piece.
3. If necessary us an alternative fabric for the facings. I've made this dress before and used a contrast facing as I didn't have quite enough of the shell fabric. understitch well and it shouldn't be an issue.
4. Check the pattern/ nap of the fabric. If you have a directional print or nap, cut all pieces in the same orientation. I will occasionally cut facings upside down or on the cross-grain (depending on the fabric).
5. Make a muslin/ use a TNT pattern. You need to know that the pattern will fit as there's no opportunity for cutting extra pieces.
6. Try not to make silly errors (unlike me) as its disheartening when you have to unpick loads of sewing!!!!
Sunday, 8 July 2018
A win and a lose
This week I have sewn two patterns from Burdastyle magazines - one a resounding success the other a fail.
First up - the win!
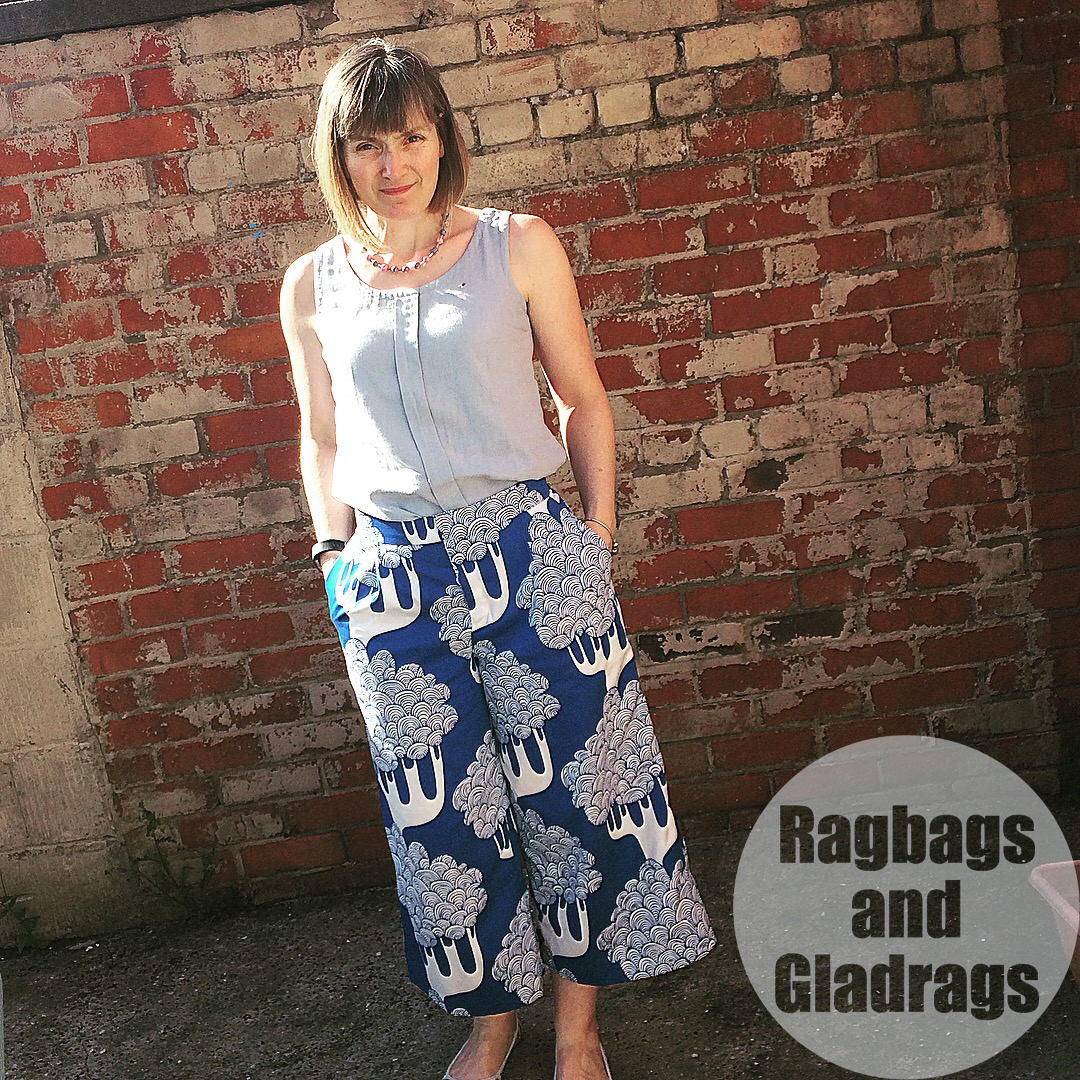
A friend gave me this fabric that was light furnishing weight. I think it's IKEA. I had 1.5m and it was 145cm wide. I thought it might work quite nicely as some culottes. This is a trend that I'm still not 100% convinced is me, so sewing up something in a non-precious fabric from the stash seemed like a good idea.
The pattern is 114 from the 03/2016 issue of the Burdastyle magazine. I cut a straight size 38, which is my normal size for Burdastyle, although I sometimes grade to a 40 at the hip on slim fitting styles.
The pattern came together really well. As usual, it's drafted well and was a good fit straight out of the box. I did pinch in a couple of centimetres at the centre back - both the back pieces and the waistband. If I sew this again I'd change the straight waistband to a curved one. I just didn't have enough fabric this time.
As usual, I sewed the hems by hand and also the inside of the waistband. I considered topstitching from the front but decided that a hand-sewn waistband would look better and I think it does. The stitches are all but invisible.
I'm pleasantly surprised with how much I like these. It's a bonus that I didn't need to make a load of adjustments to the pattern.
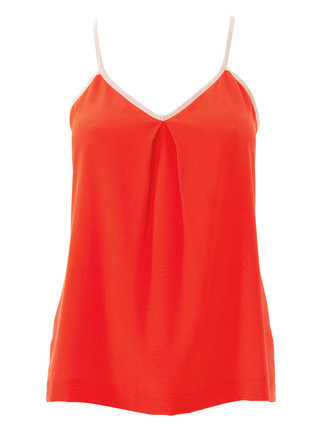
Secondly the fail - and I really thought I was going to like this. This was style 111 from Burdastyle 05/2016 it's a simple cami top with an inverted pleat at centre front. Easy right?
Yep. Easy to make and sew. It all came together really nicely the bias binding was easy to make and the fabric behaved itself - but...
I hate it. It gapes under the arms. the strap placement is too narrow and it looks odd on my frame. It's already been relegated to sleepwear form my daughter.
So why did I not alter it? TBH I really couldn't be bothered. I've tried a few cami tops and often find them too narrow. I do have broad shoulders and I think that the only strappy thing I've ever made that has been the right width is the Butterick B6453 Gertie princess seamed sundress.
I think I'll just stick with my tried and true Sorbetto tops, I'm wearing one with the culottes in the top picture. I love this pattern - we don't see many around the internet these days. It's such a versatile top and really should still be up there with some of the more recent offerings, it's been updated and there are several different options for it now - and it's FREE. If you've never tried the Colette Sorbetto - you can download it here.
First up - the win!
A friend gave me this fabric that was light furnishing weight. I think it's IKEA. I had 1.5m and it was 145cm wide. I thought it might work quite nicely as some culottes. This is a trend that I'm still not 100% convinced is me, so sewing up something in a non-precious fabric from the stash seemed like a good idea.
The pattern is 114 from the 03/2016 issue of the Burdastyle magazine. I cut a straight size 38, which is my normal size for Burdastyle, although I sometimes grade to a 40 at the hip on slim fitting styles.
The pattern came together really well. As usual, it's drafted well and was a good fit straight out of the box. I did pinch in a couple of centimetres at the centre back - both the back pieces and the waistband. If I sew this again I'd change the straight waistband to a curved one. I just didn't have enough fabric this time.
As usual, I sewed the hems by hand and also the inside of the waistband. I considered topstitching from the front but decided that a hand-sewn waistband would look better and I think it does. The stitches are all but invisible.
I'm pleasantly surprised with how much I like these. It's a bonus that I didn't need to make a load of adjustments to the pattern.
Secondly the fail - and I really thought I was going to like this. This was style 111 from Burdastyle 05/2016 it's a simple cami top with an inverted pleat at centre front. Easy right?
Yep. Easy to make and sew. It all came together really nicely the bias binding was easy to make and the fabric behaved itself - but...
I hate it. It gapes under the arms. the strap placement is too narrow and it looks odd on my frame. It's already been relegated to sleepwear form my daughter.
So why did I not alter it? TBH I really couldn't be bothered. I've tried a few cami tops and often find them too narrow. I do have broad shoulders and I think that the only strappy thing I've ever made that has been the right width is the Butterick B6453 Gertie princess seamed sundress.
I think I'll just stick with my tried and true Sorbetto tops, I'm wearing one with the culottes in the top picture. I love this pattern - we don't see many around the internet these days. It's such a versatile top and really should still be up there with some of the more recent offerings, it's been updated and there are several different options for it now - and it's FREE. If you've never tried the Colette Sorbetto - you can download it here.
Sunday, 16 April 2017
Easter madness...or how I sewed my way through the first week of the school holidays.
I have been procrastinating.
When I procrastinate, I sew.
I'm not even going to talk about what I should've been doing, but I will talk about the sewing.
This week I made
4 dresses and finished off one jacket.
Dress number 1 - I made a dress from my own self drafted Vivienne Westwood inspired pattern. I used a floral scuba fabric and virtually sewed it all on the overlocker. I do still need to do the hem. pictures to follow when it's finally finished.
Late Feb my hubby bought me Gertie's latest dress pattern - all the way from America. I planned, plotted and decided which fabrics from my stash would make the best dresses.
Dress number 2 - Butterick B6453 view B for my daughter. I had just over 1m left of this fab shot fabric that my sister bought for me at Christmas and that I used to make this dress in January.
I made her bodice in size 8 and skirt graded to 12 at the hip. I did make the mistake of taking the side seams in before adding the facings which meant the top is a little tighter than I would like it to be.
Dress number 3 - The same view for myself - using up some cotton from my stash. There was barely a metre of this and so i had the sew the facings in a different fabric. I cut a size 10 bodice and graded the skirt out to a 14 at the hip.
When I made my muslin the 10 bodice seemed really snug at the waist so I added a couple of mm at the side seams. I wish I hadn't as in both dresses I made I ended up taking the sides in a bit and they could still be a bit tighter. I did pinch out excess at the armscye and under the bust to improve shaping. I ended up having to increase the curve in the front armcye for comfort and also pinched out about 5mm under the bust on the princess seams to help the shaping.
I made fixed straps, as I don't really see the need for sliders on a dress. I know I won't use them. I also sewed the vent at the back like the one from Gertie's pencil skirt from her first book. I also used an invisible zipper as I had one the right size and colour in my stash.
Dress number 4 - Butterick B6453 view A. I sewed this up in a very light weight cotton I picked up in a market in China last summer. It's my last decent sized piece of fabric in my stash. As the fabric was so light I used cotton muslin fabric to underline the bodice pieces. I was going to add it to the skirt too, but thought it would add too much weight and I didn't want to add any strain to the waist seams.
The same adjutsments were made to the bodice as for dress 3. I didn't cut the skirt pieces from the pattern. I just used the full width of the the fabric for the front and the same for the back, adding a CB seam. I also omitted the pockets due to the lightweight nature of the fabric.
I sewed the lapped zip, following Gertie's instructions on the sew along. The finish was great, but I feel like it sticks out a little. I need to work on getting it to sit a little more flush to the dress. Maybe my interfacing was too firm!
I wore this dress today with a petticoat, tights and my favourite black shoes. paired with my red cardy. It was a bit to cold to wear on it's own as it was only about 7 degrees this morning! It will be a fab dress in the hotter days of summer and I'm sure I'll wear it loads on holiday.
The final make of this week was a refashioned wool jacket. Motorbike style, made from a long purple wool coat. I'd been working on this for some time as a gift for my friend Alli. It was her birthday this week, so I had to get it finished. Unfortunately I forgot to take photos so Alli said she'd take some and let me have them later.
Next up - repairs to the curtains. the dog has managed to catch and undo the hem - they are currently in the wash, then will be stitched again.
After that - My Hubby's suit jacket muslin. I've made myslef a jacket, but I'm not too hot on the tailoring techniques I need to use - Back to Gertie's first book! I also need to get on with my next piece of art - experiemental work at the moment.
Subscribe to:
Posts (Atom)