Monday, 27 August 2018

On Sewing, Sustainability and Style


SOI Eve dress - All the spots. I love this one

I began sewing back in 2011 as part of my recovery from a stress-related illness. At the time it was one of two creative outlets I had, one was my art and the other was sewing. I sewed to make things that fitted and helped me feel good about myself. I really needed a sense of accomplishment.


My first make

Over the last few years, I continue to sew to make things that fit and I know that my self-image and esteem has improved as I no longer feel the need to fit into the box that the world would have me believe is in 'Fashion' or 'Style'. As a beginner sewist, I made simple clothes in nice fabrics and I have challenged myself to try more challenging things. However, recently I have felt uncomfortable that the sewing world is becoming just like a high street shop - just with better made and fitted clothes. I see the same patterns again and again as each new indie pattern gets an outing. Does every sewer in blogland own a Keilo Wrap dress, Ogden Cami, Kalle Shirt, Ginger Jeans or Lander pants, to name but a few!!!!!

I love this dress and I still wear it - even if it's a bit faded

Don't get me wrong - these are all great patterns (and I have a couple of them) and that's why they are popular. I thought quite a lot about buying the Ogden Cami and the Kalle shirt but have made my mind up that I don't want to jump on that bandwagon. I like the designs, sure I do, but they're not really me and I have other patterns that are similar but don't get as much airtime as these patterns. I still love the Colette Sorbetto and I hardly ever see it made in blog land these days. It's actually my go-to sleeveless top and I love it.

Eyelet Sorbetto top - still in rotation.

I think the point I'm trying to make is that we consume pattern after pattern and make constantly  - whatever is the next new sewing thing. The stash of fabrics increases and we create boatloads of waste pieces. I'm as guilty of this as the next person and I'm trying to fight against it. So I cancelled my subscription to Burdastyle Magazine - I have 6 years worth of magazines - more than enough to keep me going for a wee while. I also don't buy a pattern as soon as I see it. I like to consider if it's really me and if it's something I'll actually wear or I can make for others and I'll make more than once. Recently this means I didn't buy a pattern, which I really did like and now need to source as it's a foreign company and not easy to get here. Procrastination does bite me sometimes.

Pigs might fly - same style lines again. great print.
Big bold prints

I'm also more considered about the fabric I buy. I make a lot fewer trips to the cheap fabric stall on the local market and I buy less synthetic fabric than I used to; I take time over my makes (when I rush they go wrong anyway); I try to use patterns that I already own; I piece my scraps at the end of a project to make patchwork yardage - I'll be using these for some zero waste projects over the coming months. I'm trying to upcycle pieces that are a little unloved (i've just finished a Cambie dress refashion) and I'm trying to make only what I'll wear or make for other people.

A bold print and a full skirt

Then there's the other thing - Style. My style has changed a bit and I do sew more basics than I used to as I wear nearly all me-made clothes. However, I have an aesthetic I'm drawn towards, yet I find myself making things I just won't wear or that actually don't fit my style. I also make far too many occasion wear pieces and don't wear them very often.


One of my many party dresses - I've worn this twice, but love it.

This summer I've also found myself wearing slobby clothes, combat shorts and t-shirts - nothing wrong with that, but it's actually not my style.
I'm determined to identify shapes that work for me, colours that work for me and be willing to embrace the slightly odd side of my character a little more. After all, I'm an Art teacher I can get away with it.

I always get lots of compliments when I wear this one - It might be black but I love the style, nipped in waist and full skirt.

So here goes:
Dresses/ skirts - Fitted waist with either a full skirt or pencil skirt at knee/ midi length. Shift dresses Knee length.

The dress that nearly didn't make it. the fit was off and I lost patience with it.

Trousers - cigarette pants or wide-legged trousers - 50's style. Shorts not shorter than mid-thigh, culotte styles work well.
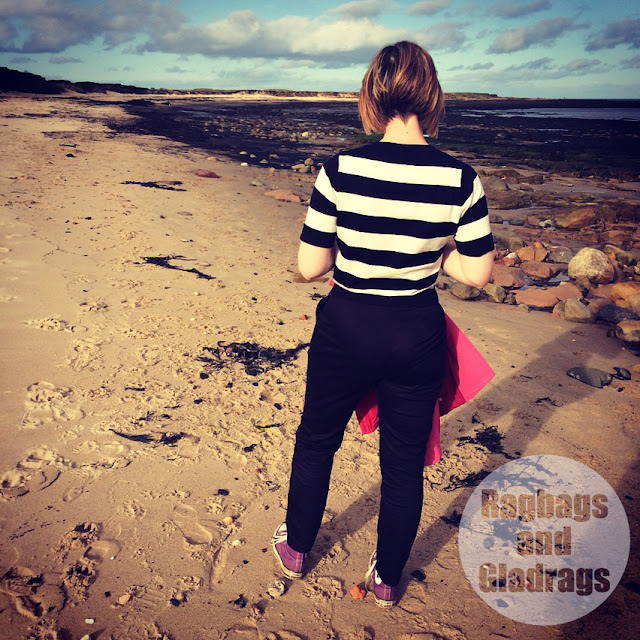
cigarette trousers - still need to perfect the fit.

Tops - boat neck, jewel neck or shirt neck. T-shirts, fitted with a curved hem, short or 3/4 sleeves. Sleeveless shirts and tops that can be layered or cap sleeves/ extended shoulders.
Knitwear - cardigans - lots, waist length, semi-fitted and 3/4 to full sleeves.
Casual - jeans - skinny or bootcut, mid to high rise. Hoody tops/ tunics. Black leggings.
Accessories - Tights -  as many different colours/ patterns as I can find - opaque; Jewellery - chunky and bright; scarves;
Footwear - mid-height Mary Jane style shoes - Bright colours. Flat ballerinas. Doc Marten boots - the chunkier the better. Converse all stars or similar.

Summer - it doesn't get much wear but I love it.  Self-drafted.

Fabrics - natural where possible; bright or black; unusual prints; no ditsy/ chintzy type prints; All the spots - every time. I try an avoid neutral colours except for black and white. and my colour palette is "spring" so most pinks and blues look good on me along with some greens. I have to be careful with reds near my face and orange is a no go unless it's part of a design with other colours.

In light of my list, I need to have a wardrobe clear out - time for a clothes swap.

Another Sorbetto top and this summer's winner - Burdastyle culottes with fabric gifted to me by a friend.


Sunday, 19 August 2018

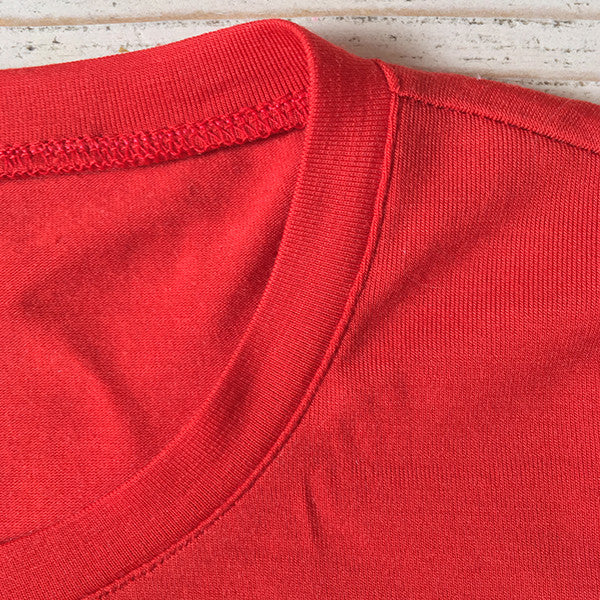
Knit binding/ band tutorials round-up.

Recently I have had some issues getting good results from knit bindings when sewing with super stretchy knits. and decided to do a bit of research.

I have had three failed necklines - two have been boat neck pieces (one was this dress I made for a Minerva Crafts review) one is a dress I'm currently making from a super stretchy burnout velour knit and I've made a real pig's ear of the binding - so much so that my seam ripper and I have been good friends over the last couple of days. As I carefully take it to bits in the hope I can do something to make it work.

The third disaster was a raglan sleeve top.  The stupid thing is I have had some real successes in the past with neckline bindings. I have had some excellent results on my Gertie boat neck t shirt and a couple of knit dresses. I'm not sure quite where I've been going wrong lately and thought it would be a good ideas to find a selection of tutorials that are out there by great sewing bloggers who actually know what they are doing. I'm sharing this in the hope that I'm not the only one who struggles with this from time to time. If you have any brilliant insight into where I'm going wrong, or have a preferred method - please get in touch I'd love to get this nailed.

Craftsy Blog


Craftsy Blog has a brilliant post offering several different techniques written by Emily Thompson. I have tried both options 2 and 3 from this post. Some times they work perfectly and other times they don't. You can read this post here.

Megan Nielsen


This method encloses all the raw edges and gives a very neat finish. I've used this on a cotton jersey dress with good success, but it's when I use a boat neck that the issues seam to occur with this type of technique. Megan's instructions are really clear. This is a great post with lots of clear photographs to help you alone the ways.

Simple turned edge - Grainline Lark Boat neck


I have used this technique on my ruffle dress for Minerva crafts and it worked beautifully. Jen explains a really simple way to finish the neckline - and it's easy; Take a look! Do we sometimes make knit bindings more difficult that they need to be. I might do this on the dress I'm currently making. I have had a good bound finish on a boat neck, but it was a much more stable knit. What are your experiences here

Colette Blog

This post covers some of the key basics between bands and bindings. Again I've used some of these on round neck pieces and they've worked brilliantly. This is a great post for a beginner to knit sewing as the post is comprehensive. You can read it here.

Made By Rae - invisible finish binding.


This post is the closest to the one I tried for both boat neck pieces - with one significant difference, I cut a 90% neckline and Rae suggests that the binding should be the same size as the neckline as it's flipped to the inside. This might be where I've been going wrong. What's your experience of this technique? Do you think this could be where I've been going wrong? I might try this version.

Pattern Fantastique - Neckband techniques


This post by Heather is a comprehensive post and covers how different types of fabric might behave in addition to techniques for a neckline band.

So what is your favourite technique for neckline binding? do you have a method that works without fail every time? if so I'd love to hear about it.

Thursday, 9 August 2018

How to sew a Gertie dress from less than 1m of fabric


Over the summer I have been sewing with small pieces of fabric. Most less than 1m. I had this lovely black jacquard fabric, but there was less than 90cm of 150cm wide.

My original plan was for some capri pants, but there wasn't quite enough for that.


So I opted for the  B6453 Gertie princess seamed sundress. I thought it would make a chic LBD. Due to the amount of fabric, the skirt is much shorter than I'd wear and I decided I'd make this for my daughter (for reference she's a UK size 10 in RTW).

I cut the skirt pieces out on the fold, using the pencil skirt version as a guide and extended the sides to form a subtle A-line shape - I think this looks really cute.

The rest of the pieces I cut from a single layer and used all but the tiniest of scraps. I did manage to cut all the pieces including the facings. I chose to make fixed straps rather than adjustable as they used a bit less fabric and I didn't have any suitable sliders and rings.

The front bodice went together well. As usual when sewing princess seams I sew a line of stay stitching 1mm inside the seam line. This helps keep the concave and convex curves accurately placed when pinning and stitching the curves.


I stitched the skirt pieces to the bodice fronts and backs before joining at the side seams. And that's where I went wrong.


Not paying attention - I joined the bodice backs the wrong way around - so the side seams are at the CB. I was really wondering why the side seams didn't match when I was sewing them - it didn't click until I'd sewn them together. I'm hoping I can get away with this as I really can't be bothered to take it all apart and re-sew...

Do you ever just leave something even though you know you should correct it? No? - Me Neither


My OCD got the better of me! I took it apart and re-sewed. Can you see the difference in the shape of the back?

Once the dress was sewed in the correct way I fitted it to my daughter. I ended up taking a little from each side seam from the rib to the hip line - otherwise, the fit was fine. I didn't want to overfit as last time I made her this dress I made it a bit snug and she didn't get much wear out of it.

Key advice for sewing with small amounts of fabric. 
1. Check the yardage. I place the pattern pieces on the fabric before cutting out to check I have enough room. I usually find I can manage on way less than the pattern envelope suggests.
2. Cut out from a single layer. It takes more time but is much more fabric efficient - remember to flip the pattern pieces once you have cut one side so that you get the opposite piece.
3. If necessary us an alternative fabric for the facings. I've made this dress before and used a contrast facing as I didn't have quite enough of the shell fabric. understitch well and it shouldn't be an issue.
4. Check the pattern/ nap of the fabric. If you have a directional print or nap, cut all pieces in the same orientation. I will occasionally cut facings upside down or on the cross-grain (depending on the fabric).
5. Make a muslin/ use a TNT pattern. You need to know that the pattern will fit as there's no opportunity for cutting extra pieces.
6. Try not to make silly errors (unlike me) as its disheartening when you have to unpick loads of sewing!!!!


LinkWithin

Related Posts Plugin for WordPress, Blogger...