

For the first time ever I have made my husband a shirt from a Burdastyle magazine pattern. Actually, it's the first time I have made him anything from a commercially available pattern. All his other shirts have been made by using a rub off of one of his favourite shirts, and jackets have been self-drafted. So why did I wait so long to make him a shirt from a pattern?

Well, most of the Burdastyle magazine patterns for men fall into a very small size range and they just wouldn't fit. However, recently John has lost some weight and now falls within the size range offered in the magazines and I can make a range of different items without having to draft them myself. This shirt was an experiment in testing fit and checking if the sizes run true to measurements. I know I can trust a Burda size 38 for myself but need to know which size to make for John.
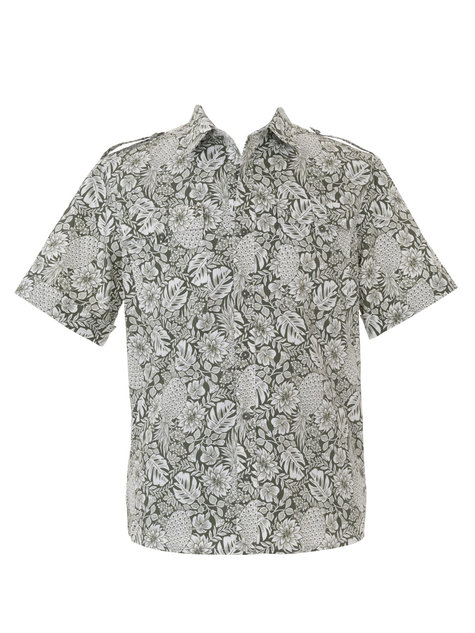
I did make some minor changes to the pattern. I added a couple of inches of length to the front as John often finds shirts too short. I omitted the pockets and shoulder tabs. I was going to include one pocket and the sleeve bands but decided against it during the making process. I also used more buttons than recommended.

As I have made quite a few shirts before the construction was simple. The back has two darts to add shaping and these were sewn first. The button bands were interfaced with a light stretch interfacing, which is my go-to for shirts as it doesn't bubble the way some interfacing does when it's been washed a few times. The collar and stand were interfaced with a layer of firm but soft sew-in interfacing which I have found perfect to give the right amount of support without being too stiff.
My fabric was a very light tana lawn in pale grey with a floral print. It's definitely a summer weight fabric and judging by the weather we are having may not get loads of wear this year!

Some people seem to find shirt-making difficult. I have come to the realisation that it's not a hard thing to do, you just need to take your time and be precise. I take time to mark the placement of the collar, stand and centre front as I have found it helps me to be accurate. For the first time, I fully enclosed all the raw edges. I felt that this very light fabric needed it. The back yoke, collar and stand are all enclosed anyway, but I used flat felled seams to attach the sleeves and french seams at the sides. The hems were double turned and topstitched.

I completed all of the construction on my Bernina 707 except the buttonholes which I did with the one-step buttonhole function on my Janome. I sometimes have issues with making buttonholes, but these all went in perfectly. The buttons were sewn on by hand. John chose the buttons at Abakhan Fabrics in Liverpool last week.


I think the fit of this shirt is pretty good. It has a slim shape but the width of the back is good and fits well. I particularly like the shaping offered by the back darts. They really do stop the shirt looking baggy.

I think John likes it. He even posed for photos - George Michael style!

Wish i could ask a question about this shirt what sew in interfacing did you use for the collar stand and collar, the front button placket i would use weft interfacing i have pellon shirt fusible interfacing but i am afraid it will bubble and be 2 stiff
ReplyDelete