Showing posts with label free tutorial. Show all posts

Wednesday, 13 May 2020

How to create Flat Felled Seams

I'm making a denim wrap skirt, it's the perfect place to use flat felled seams. They are neat, easy and look good inside and out. (Apologies for using black fabric, which makes some of the stitching tricky to see here, but I was midway through a project.)

First sew the seam with wrong sides together. I like to use a wide seam allowance for this - I used a 1.5cm (5/8 inch) allowance here.

Press the seam open.


Next trim one side of the seam allowance to about 5mm wide (sorry blurry photo here).


The other side of the seam allowance should be folded in half and pressed.


Press the folded side over the trimmed side enclose the trimmed edge in the fold if you can. and press into place.


Now topstitch close to the edge of the fold.


You should see two lines of stitching on the oustside of the garment and one on the inside.


There you go easy peasy.


Tuesday, 6 March 2018

Tutorial: Rolled hem


When should you use a rolled hem? How do you make one? What do you need?

A rolled hem is a fantastic finish for garments that are made of lightweight or sheer fabrics, they work very well on bias cut garments and on curved hems but work just as well on the straight grain. They are simple to make and look good inside and out, I've used them on shirts, dresses and skirts. If you have a fancy rolled hem foot these can be done in minutes. I don't have such a foot, but it doesn't stop me creating beautifully finished garments. It might take a bit longer to do with a regular foot, but the finish is still lovely. I've used this technique on the Sew Over it Eve dress as the hem is dipped and I didn't want overlocker stitches on show.

What you will need:
The garment you wish to hem
Matching thread
Iron and Ironing board
A sewing machine that sews a straight stitch

How to Sew the hem:
You will need between 1cm and 1.5cm hem allowance - depending on how tiny you make the hem.

Sew a line of stitching close to the edge

1. Sew a line of stitching about 5mm away from the edge of the fabric, all the way along the edge to be hemmed. I use the edge of my presser foot aligned to the edge of the fabric.

Turn and press the fabric - see the stitches?

2. Fold the fabric to the wrong side so that the line of stitching is just visible on the reverse and press in place.

Stitch the fabric on the fold

3. Stitch the folded edge down close to the edge. Try to stitch as close as you can to the folded edge - I aim for the line of stitching.

Trim the hem allowance as small as you can

4. Trim the fabric close to the stitching line, but not through it. Your hem should be 3-4mm wide at this point.

5. Turn the hem under again so that the raw edges are completely hidden. At this point, you can decide how deep you want the finished hem to be. If I'm making a shirt I tend to make this slightly wider than if I'm working on sheer or lightweight fabric. Press the edge again.

Last line of stitching

6. Stitch again. Try to sew an even distance from the folded edge for a high-end finish. You should see a line of stitching on the hem and the raw edges should be enclosed in the fold. Use your fingers to guide the fabric through the machine, ensuring the fold is in place as you sew. I don't recommend using pins as the hem is so small the pins can distort it.

Wrong side of the finished hem
.
Once finished you should see two lines of stitching on the wrong side of the hem and one line on the right side. Finish the end of the sewing with either a backstitch or by pulling the threads through to the wrong side and knotting.

Finished Hem
Give your hem a good press and admire a lovely finish!

Monday, 7 August 2017

How to hack a basic bodice into a halter style top - tutorial

A few people have asked how I created the bodice for my maxi halter dress. - it's relatively easy.

You will need:
A basic bodice pattern.
Scissors
Tape
Paper
ruler/ french curve.

I used the basic bodice from Gertie's ultimate dress book but any basic bodice will do. Make sure it fits you well before beginning -make a toile.

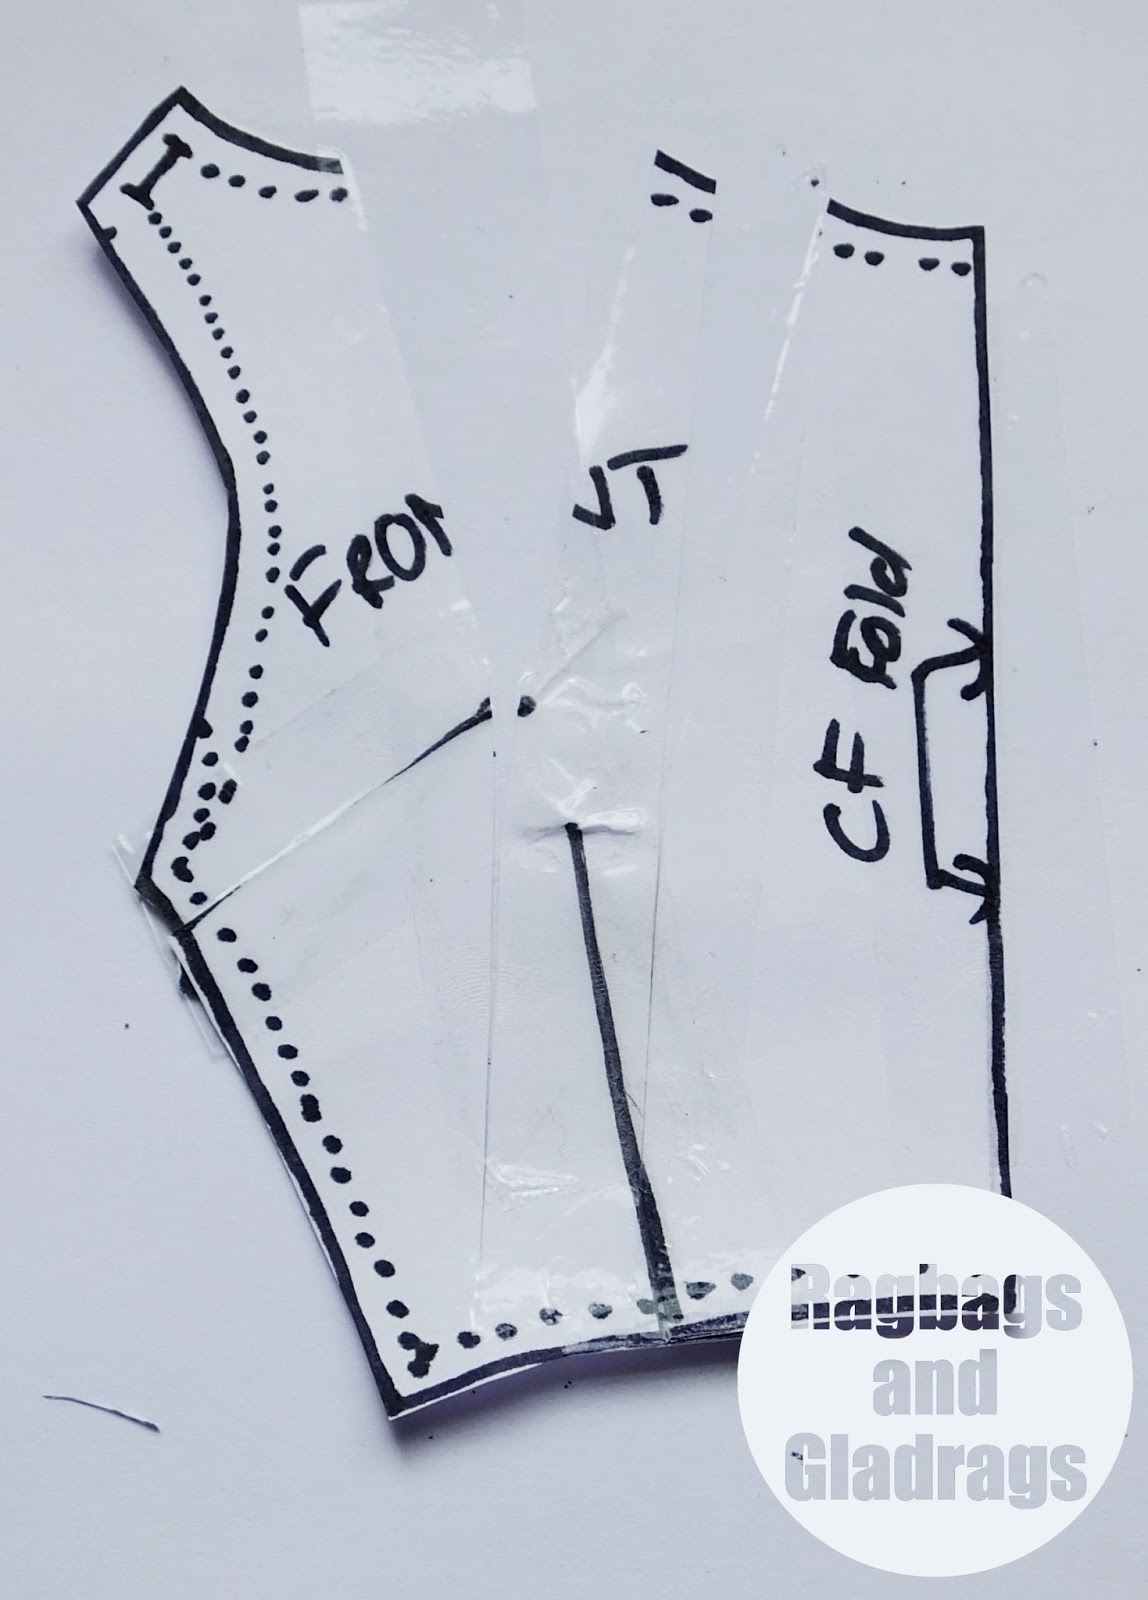
I have drawn out the steps on regular paper with sharpie as you could not see the changes to my actual pattern as I'd used a thin light pencil and tissue paper. However the steps below should give you the right idea.

1. Trace your basic block, front and back onto the paper you are going to use and mark in the seam lines. I would also measure the neck edge before you start adapting the pattern. If you are going to make a collar piece this will make this step easier. (you could also apply a bias binding to the finished edge.


2. On the shoulder seams mark your new seam length. I made mine 1.5cm. Don't forget to allow for seam allowance on the neck edge.


3. Draw new cut away armhole to your new marked seams from the underarm.


4. Add seam allowance (1-1.5cm)


5. Cut away the excess paper from the shoulder area. The back piece should be finished now.


6. On the front cut up one leg of each dart.


7. Tape the darts closed. You will end up with a curved or pointy piece of paper. (you can also do this with patterns that only have one dart. the principle is the same)


8. Cut a straight line from the neck edge through the point of the bust dart, and one through the waist dart. The closer you are to the dart point the flatter your paper will lie.


9. Tape paper behind your pattern, spreading the neckline edge open - it will look quite wide.


10. Join the neck edge seam line with a smooth curve from the shoulder to the centre front - use a french curve to help - then add your seam allowance.


11. This is the edge that will be gathered into the collar or neck binding. My collar piece was approx 22cm (folded in half) before I added the seam allowances.
To gather the neckline either sew two rows of basting stitched into the seam allowances and pull the ends of the thread up to ease into the collar or sew a zigzag over dental floss or cord and pull that up to gather the neckline.

Order of construction:
Sew darts in back bodice and press towards centre back. Sew shoulder and side seams together, press. Gather neckline and sew into collar. Sew collar facing and finish CB seam. Buttons, a tie, or zip work well.

Sunday, 7 April 2013

How to make and use bias binding


My Daughter and I need to complete her lovely orange dress. I’d decided to use bias binding at the neckline. As I don’t have a fancy bias binding maker as demonstrated on the Great British Sewing Bee, I’ll have to make it the old fashioned way.
How to make bias binding.
Rectangle of fabric
First take a rectangle of fabric cut on the straight grain. I use the selvedge edge as my long edge, which helps line up the fabric. I’m using the same fabric as the dress as I want the binding to match – you could always use a contrasting colour if you wished.
Marking the strips
Mark the fabric with tailor’s chalk of a special water-soluble pen designed for fabric. The lines should be drawn at a 45-degree angle to the selvedge edge and no less than 1 inch (2.5cm) wide. A clear quilting ruler is ideal for keeping an even width between the lines. You could also apply inch wide masking tape to the fabric and remove once the strips are cut. Personally I use the width of my metre ruler, as I find it gives the perfect finished width to the bias strips.
Cut the strips.
Pin strips together
If you need a long piece of bias binding you will need to join several lengths together. You need to join to create a straight length with even edges.  Pin the strips together at the end, creating a V shape as shown in the photograph. The ends should overlap in such a way as to create small triangles at either end. This will ensure that your bias strip has a straight edge. Stitch and secure with a backstitch.
Sew strips together
 Press the seam open and trim the seam allowance.
Press open and trim seam
 As bias binding often encloses the raw edge of another piece of fabric it is folded in half and its raw edges are enclosed.  To do this fold and press the strip in half along its length.
Press the strip in half
The fold after pressing
Open the strip out and fold the edges into meet the centre fold and press. This can be quite fiddly and can take a little practice to get the hang of it. 
Partially pressed strip
Fold along the centre line again and press once more. This completes the bias binding.
Completed bias binding

How and why to use bias binding.

So what’s so special about bias binding?
Bias Binding has a lot more stretch than fabric cut on the straight grain. Just try gently pulling a woven fabric across, then down and then at an angle (bias) and you’ll see what I mean. This means that it will follow curved edges much better and is therefore ideal for necklines, armholes and curved hems.
Bias strips also tend to fray a lot less than the straight grain which makes them ideal for finishing a garment, both on the outside as decorative features and to give a couture finish to the insides of a garment.
I’ll show you just 3 ways to use bias binding to finish a curved edge.
Enclose the raw edge. 
This is the easiest and most straightforward technique. 
Pin through all layers
Simply pin the bias binding to the edge making sure that you pin through all (5) layers of fabric and stitch them together. 
Stitch through all layer
 I’ve used this method when making summer dresses and tops with spaghetti straps.
Summer dress technique
Stitch in the ditch. 
This takes a little more time but will almost hide your stitches. 

open the strip and pin to the curve
Open the bias strip out and pin the first fold (right sides together) to the curved seam. Stitch carefully.

Stitch along the fold line
Fold the rest of the bias binding to the wrong side and ensure the raw edges are enclosed. Pin to cover the stitching.  
fold over and pin through all layer
Stitch from the right side, along the seam line. Using a matching thread will mean the stitched as less obvious. You could also hand stitch from the wrong side to avoid any stitched showing.
stitch in the ditch
Bias facing
This can be used instead of a regular facing. Begin as you did for the stitch in the ditch method, but this time trim the seam allowances to 1/8 inch, fold the bias strip to the wrong side and pin down, enclosing the raw edge. 
Fold all the bias binding to the reverse and pin in place
 Hand stitch using a whipstitch, this should only catch a few threads and very small stitches can be seen on the right side.
Stitch the facing in place
Completed whip stitch from the wrong side
Completed whip stitch from the right side
There are many more ways to use bias binding, but I hope you found this tutorial useful.

LinkWithin

Related Posts Plugin for WordPress, Blogger...