Showing posts with label self drafted. Show all posts

Thursday, 11 April 2024

Spotty Circle Skirt


This is a ¾ circle skirt. As such there is no pattern. You can work out the sizes you need to cut using an online calculator. I had decided That I wanted a maxi-length skirt. I can’t remember which online calculator I used, but they are app pretty similar. You input your waist measurement, the width of your fabric and the length and fullness of the skirt you would like. It tells you which measurements you need and how to cut the fabric. The issue with using an online circle skirt calculator for this length of skirt is it will tell you that you do not have enough fabric to cut the skirt out - this is not true, but you do need to cut out more than one piece. You need to cut a front and a back and a waistband.

The calculator does give you the radius that you need for your type of skirt. I used this to help me check that I had enough fabric and could fit the front across the width of the unfolded fabric. As this fabric is 150cm wide, it fits well.

I spread the fabric out on our laminated floor which is part of the issue I had. The fabric moved around a lot, resulting in rather uneven cutting. If I were cutting smaller pieces for a smaller project I would use tissue paper to prevent the fabric slipping or a gelatin soak. For this project I should have cut out on my carpeted floor as it would have prevented the shifting, but it is a nightmare to cut on.

I used tailors chalk to mark the pieces directly onto the fabric. I also interfaced the whole of the straight waistband to give enough structure to hold the weight of the skirt. I stay stitched the top of the skirt pieces to prevent them from stretching out and interfaced where the zip was going to be inserted. I only had a green concealed zip in my stash, but as I always use the Kenneth King method I was happy to use this. At some point, I’ll use a bit of black nail polish on the pull so it blends in.

Unfortunately midway through this project I managed to break my overlocker - not sewing this, but it did mean I had to wait almost a week until I managed to get it sorted. Shout out to Ian at The Sewing Machine Guy in Ashington for getting it back to me in super quick time.

Once it was fixed, I finished sewing the skirt up and then hung it up for a few days. As part of the skirt is on the bias, it stretches out and can be much longer than the seams, which are cut on the straight grain. Once it had time to relax, I trimmed it level and sewed the hem using a baby hem method. I find this is perfect for heavily curved hems on very light fabrics. A good press at the end, meant that it hangs nicely. When wearing this it is slightly translucent and needs an underskirt/ leggings underneath. I hadn’t realised this as I made it or I would have added a lining. But you might want to consider that if using this fabric.

This type of skirt is flowy and ideal for the warmer weather I hope we’ll be getting soon. This is going to have to wait a few weeks for it to warm up though before it gets much wear as it’s flipping freezing right now!!!!!


Sunday, 17 September 2023

Going Green


I have had a few projects in mind that required drill fabric. When Minerva offered me the chance to review this cotton drill, I made those projects a reality. First up was a utility kilt for my husband.

Last year he bought a bright blue one last year, thinking it was a little darker than it was. Of course, when it arrived I studied the construction and announced that I could make him one, and make it better - TBH it was very crudely made! 

I asked him what he liked about it and what he didn’t. He announced that although he liked the pockets, the loosely attached one was annoying. So I went for a welt pocket on the back and D rings added to the belt loops so an additional pocket/ bag could be added if required. He also asked for a slightly longer length. 

The purchased one had all the pleats stitched down in order to prevent them from falling out and this is wise in this type of fabric. I used the basic measurement of the original one to guide my making of the green drill one. This fabric is a little lighter than the original and needed some interfacing in the waistband.

I started with the centre back of the skirt. Each half was measured and the fabric was cut to length following the grain. I halved the fabric on the cross grain and used about 3m of length. This was less than I thought (look out for my next make!). The pieces were joined to make a long 6m by 70cm strip.

The hem was created first, using a double fold to encase raw edges. This was then pinned into pleats, pressed down and stitched in the front and reverse of the fabric. The original had some grading in towards the waist, but as my hubby has narrower hips than the waist I kept the skirt straight. The top 15cm of each pleat was stitched down to create a yoke effect. 

I then added a single welt pocket on the back. Making this nice and deep as he has a habit of losing things from them falling out of pockets! The apron pieces at the front were temporarily pinned to approximately the correct width while the waistband was made.

The waistband included buckle straps at each end, Belt loops anchored in the seam and a couple of button holes to thread the inner strap through to allow it to be fastened on the outside. Once the length was checked the inner waistband was added and it was top stitched in place. The belt loops were secured and an additional strap was added to the top of the skirt to enable the hip to be adjusted.

The belt loops were added at the correct place and I used 5mm eyelets in the holes. 

The fabric is perfect for a lighter-weight utility kilt for the warmer months. It was a joy to sew with as it pressed really well and kept its shape - perfect for pleats. It also didn’t stretch out too much when sewing and was beautifully stable.

I just need to add the removable pocket bag, but I’m still waiting for the hardware to arrive. My hubby is loving rocking this and it will also go well with the waistcoat I made him last year as part of his punk suit.

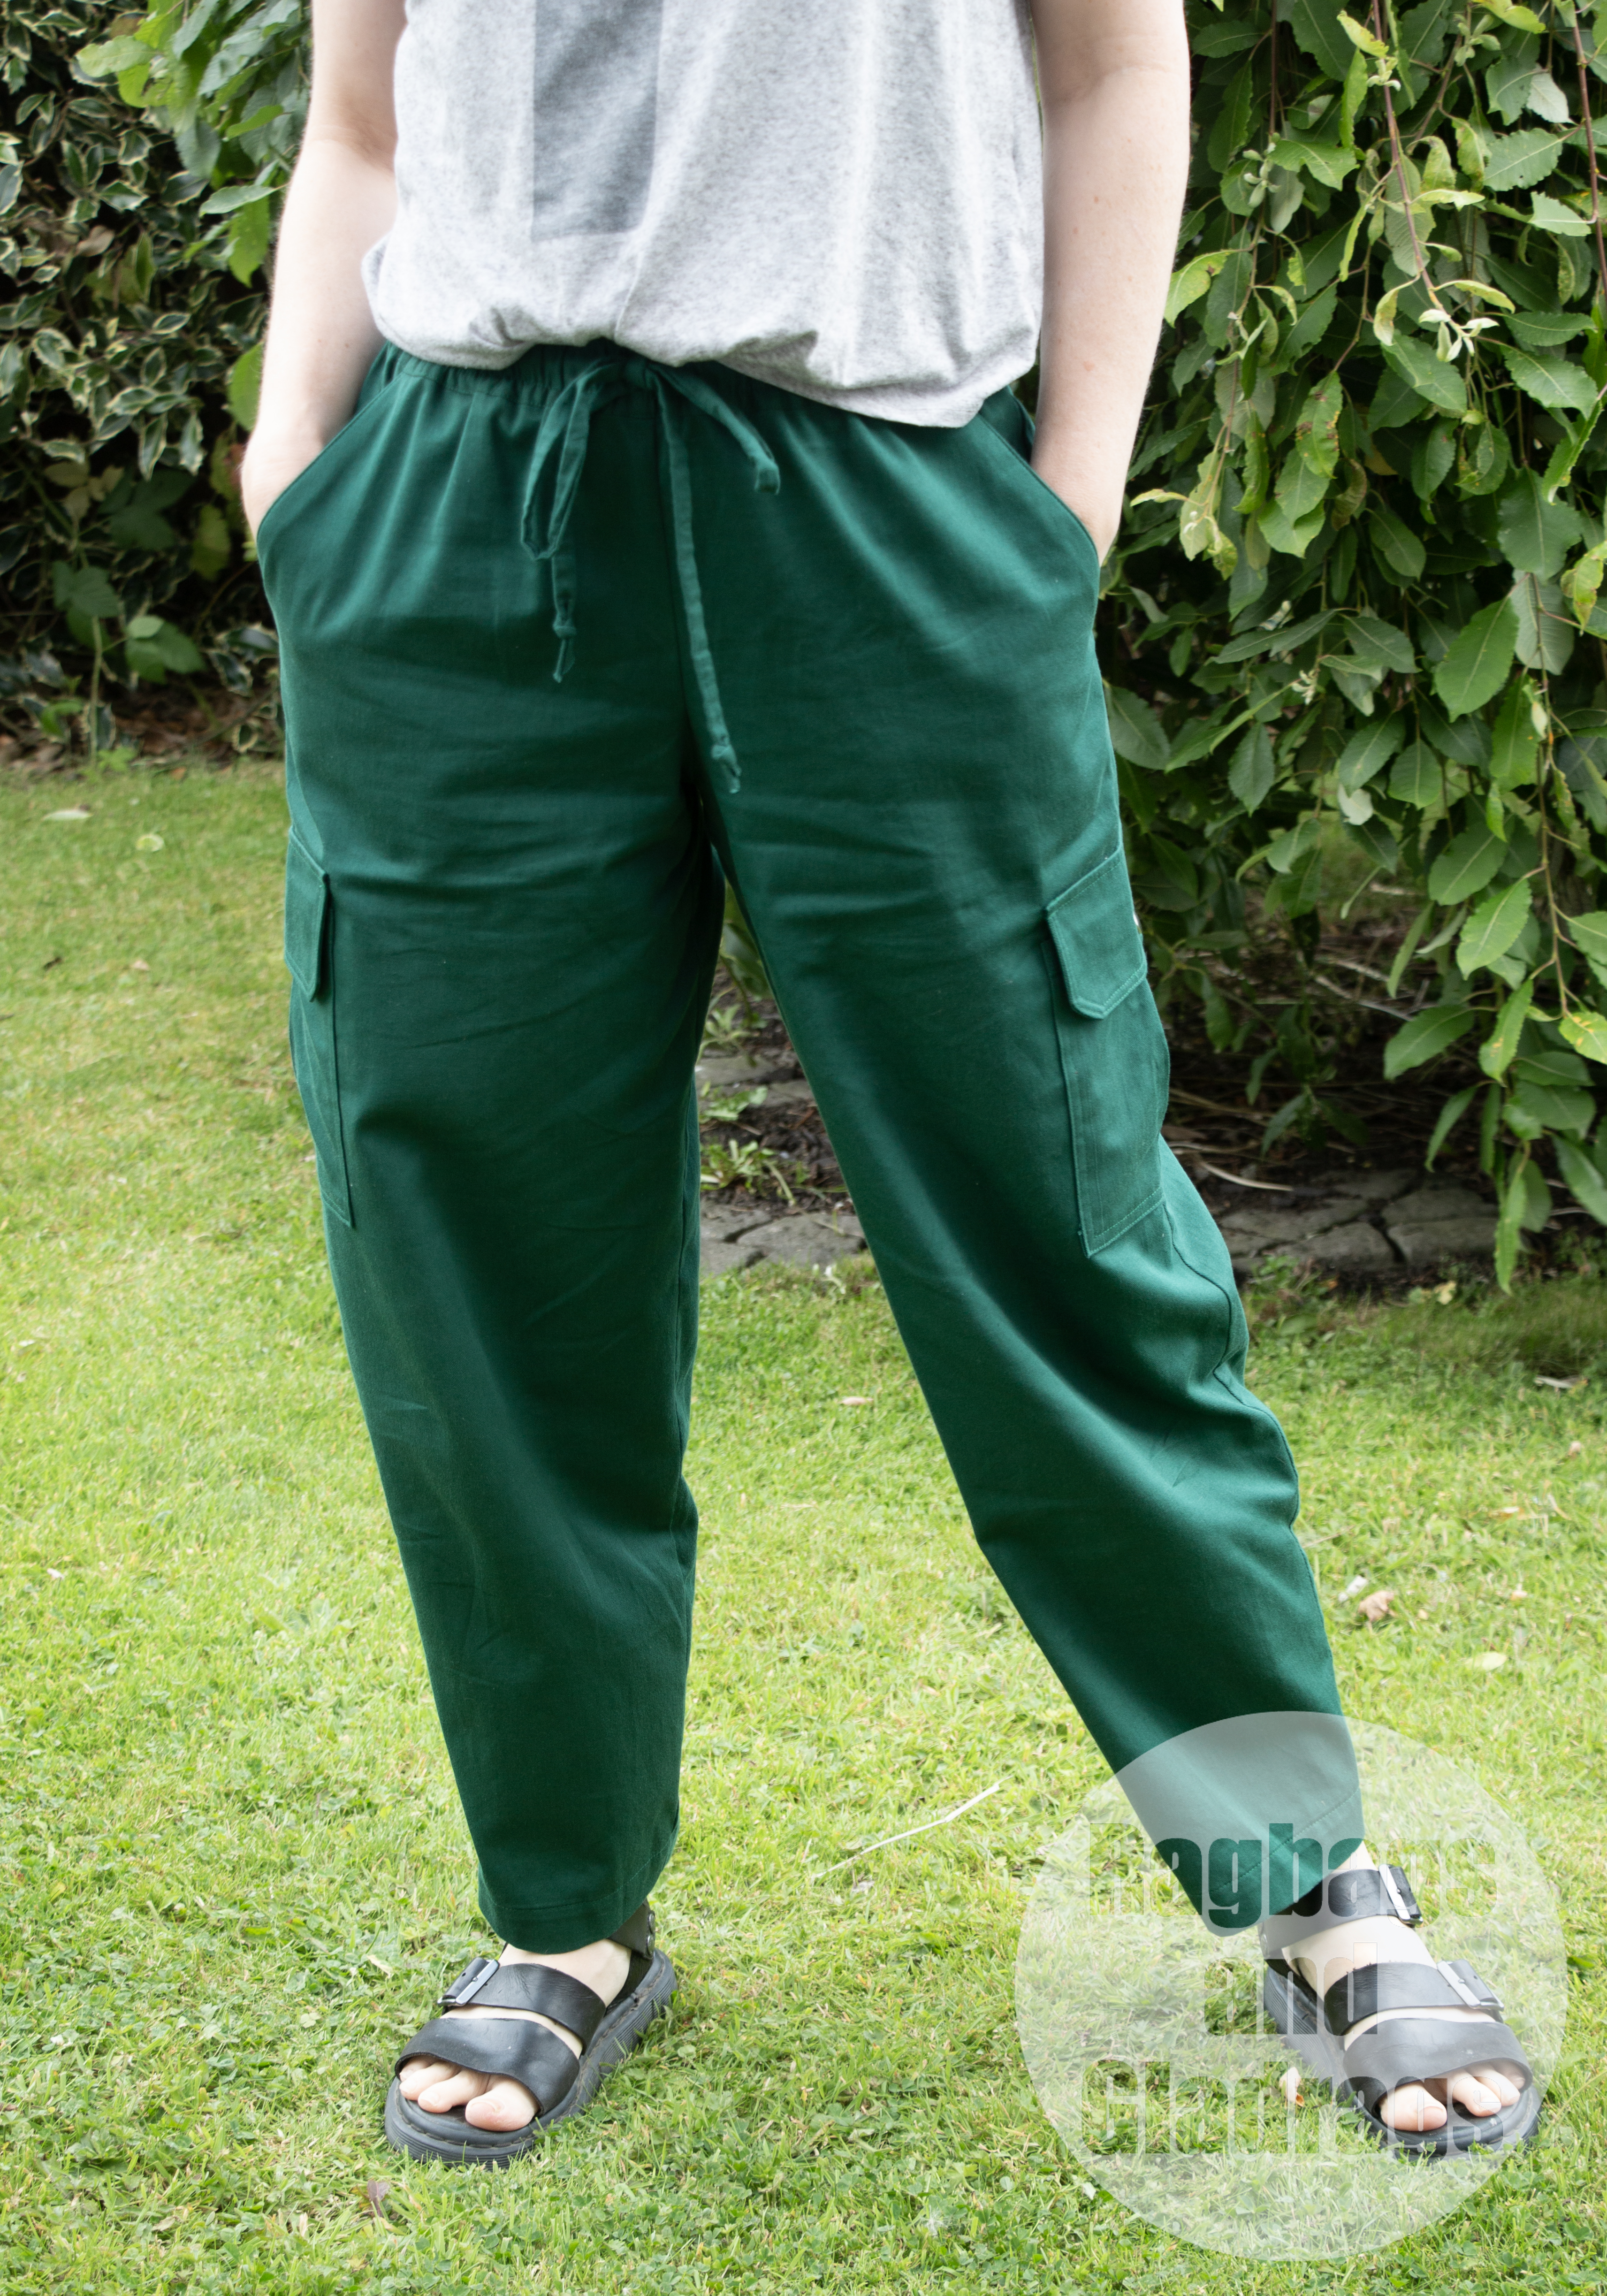
The second make from the bottle green cotton drill is a pair of cargo trousers. I have been loving the cargo pants trend, but I was struggling to find a pattern that suited my needs so I drafted my own.

I had just less than 2m of the fabric left after making the utility kilt. Perfect for a pair of trousers!


Most of the patterns I had seen for cargo trousers were fitted waistbands and wide legs. While I love that aesthetic I wanted something more casual. My aim was to create a relaxed fit with a slight balloon shape and be ankle grazing. I wanted pockets and an elastic waist with a drawcord. 

When the cotton drill first arrived I thought it might be a little too stiff, but once it was washed it softened up really well, while still keeping a crisp pressed edge, which made these a dream to sew.

I had never drafted and sewn up a pattern without checking it and doing at least 3 toiles. However, I was confident that my drafting was good I decided to take a risk and go for it!


I used Metric Pattern Cutting for Womenswear by Winifred Aldrich. I drafted the easy-fitting trousers and used my measurements, rather than relying on the standard sizes. These are trousers designed to be made into baggy pants or dungarees.

Once I had the draft I traced the block, lowering the waist by 4cm and shortening the length to be at the high ankle. I added a slight balloon length to the side seams and tapered the ankle by a couple of centimetres. I then measured the waist seam before cutting a waistband. Here I nearly made an error. As I’m not a standard size - my hips are much bigger than my waist - I realised that the waist was not quite big enough for my hips. Not an issue if you are adding a zip but a big issue if the trousers are pulled on. I widened the waist seam by 1cm both front and back with equated to a 4cm increase, which was enough to get these over my butt.

I walked the seams and trued all the measurements, constructed slanted hip pockets and drafted a back patch pocket and an inverted pleat pocket and flap.

I interfaced the pocket flap and buttonholes with some lightweight interfacing. The fabric didn’t need anything in the waist due to it being elasticated. The wide elastic was stitched in place to stop it twisting in the casing and a cord threaded through the buttonholes.

I was actually pleasantly surprised with these. I expected there to be several issues that would need to be sorted, but they are pretty much as I intended. I haven't drafted anything in ages. I think I might try it again soon. Meanwhile, I have a cool pair of cargo trousers that has taken me through cooler summer days and into the autumn.


Friday, 4 June 2021

DIY skate bag


I’ve started a new hobby recently. I’m learning to roller skate. It’s not completely new to me but it has been 30 years since I skated regularly. Back in the day, I had big bulky skates that I used to slip on and off my feet like slippers and NO protective gear. I skated everywhere.

For Mother’s day, back in March, my family bought me a pair of quad skates. I decided, wisely, that I also needed a full set of pads and a helmet (I am not 16 anymore!!!!). Since buying the skates I have been finding local places to skate and some not so local places to skate. I needed a good way to get all my kit there - which is a long-winded introduction to this project. Let me introduce to you my skate backpack.

In all honesty, I could have bought a skate bag, but they are mostly pretty boring and I loved the look of this cotton canvas which I was sent to review as part of my brand ambassador role for Minerva, plus I’m always up for the mental challenge of working out how to make something to suit my needs.


I had a look at a few rucksack patterns and was originally going to make one with a zippered top, but when I couldn’t find quite the right zip I decided on making a roll-top rucksack.

I didn’t use a pattern for this I actually pretty much made it up as I went along and consequently I think it does need a couple of tweaks to the design.

The basic bag is a simple rectangle, with padded straps and a front flap and a horizontal adjustable strap that keeps the skates in place. I included pockets on the side panels. One with a zip and one without. I think these should have been a bit deeper to be really useful. The zippered one comfortably holds my skate tool, so that’s fab. The lining has an inner zippered pocket which is great for keeping valuables safe.


As the skates are quite heavy to carry (around 3KG) plus the skate gear I knew that I’d need to sew the straps in securely and provide padding to prevent the straps from digging in. I don’t think I’d want to carry this lot too far as it’s heavy, but it is at least all contained.


In addition to the cotton canvas that I used as the shell layer, I used some cotton poplin from my stash and some offcuts of quilt wadding and foam wadding to pad the bag. I also used 3 clip fastenings and two strap adjusters and about 4.5m of nylon webbing, Which I bought locally from The Sewing Machine Guy.

The straps were sewn inside out with a double layer of wadding and then turned and sewn into the back of the bag along with the hanging loop.


The back of the bag also had a double layer of wadding for back protection as did the base.

Rather than padding the entire shell, which would have been incredibly tricky to sew through. I padded the lining instead, which still gives structure, but allowed me to reinforce the seams with double rows of stitching.


The horizontal strap is sewn through the back of the bag, which means it encapsulates the contents of the back and the skates on the outside. The padded flap then secures the skates in place. In retrospect. I should have integrated the horizontal strap with the front flap which would have given more stability.


The bag is super roomy and I can comfortably get all my gear inside and room to spare. It would actually make a good overnight bag too.


I’m so happy to finally have a bag that ALL my gear fits into!

Saturday, 13 February 2021

Butterfly Hoodie


Well, here it is! The garment I didn’t plan on making. 

I was seriously looking forward to sewing up this beautiful french terry fabric. It was gifted to me by Minerva in return for a review - All opinions are my own. You can read about it and find a link to the fabric here. I washed it as soon as it arrived and while it dried I planned what I would make with it.


All sorts of ideas presented themselves. The Ruska Dress from Breaking the pattern; another Hoodie Dress by The Assembly Line; a pyjamas set; jogging pants, a hoodie for me; I was busy asking the family what I should make when my eldest piped up, “A hoodie for me.” At first, I wasn’t sure he was serious, but he was.


I didn’t have a suitable pattern, so I asked him for one of his hoodies that fitted well and took a rub-off pattern from it. I adapted this as the one he gave me was a little too wide for him (his words). I used a combination of different tops to judge the right width and shoulder length. 

The front and back body pieces are essentially the same shapes, with a different neckline. The sleeve is a simple draft, again symmetrical in design. The hood is in two pieces, seamed down the centre and then a band is used for the faced edge. Of the whole thing, I think the hood could have done with being taller as it does pull a little when up. I don’t think it will be worn up much.


I had already cautioned him that there might not be quite enough fabric as many patterns that I’d seen for men’s hoodies in his size required more than 2m, which is what I had. However, the pattern fitted comfortably on the 2m of fabric. I cut out in the morning and had completed most of the construction by mid-afternoon. The hem and cuff bands I added the following day, simply as the light was becoming poor in my sewing space.


Sewing this up was a breeze. I constructed this on my Pfaff Select 3.2 sewing machine, which is a mechanical machine, with a selection of stretch stitches. I used a triple straight stitch for the constructions seams and this worked very well, providing enough stretch in the stitch to avoid any popping, but a strong and secure seam. It looks good too. The seam allowances were 1cm and once the seams were sewn I overlocked the raw edges. You don’t really need to do this on this fabric, but it has a tendency to roll on the cut edges, so finishing them helps keep them flat. Instead of inserting eyelets for the cord to go through I used a strip of interfacing and created a buttonhole. My son said he had a suitable cord and would put this in but he hasn't done so yet.


I cut the hem and cuff bands from the same fabric, at 85% of the length of the lower bodice edge and lower sleeve edge. For this fabric, this was the perfect amount as they eased in well and don’t stretch out.


I had never sewn with this type of fabric before, despite sewing for nearly 10 years and I was pleased with how well it behaved, being sewn and pressed. It’s a great option for a snuggly top, but it still lightweight enough not to be too heavy and a good choice for those new to sewing knit fabrics due to its stability. I used a Schmetz Jersey needle and Guttermann polyester thread to sew this up.


It’s already been worn several times this week and I hope it becomes a firm favourite for my son. My hubby says it’s a bold choice! What do you think?


And if he doesn't wear it I think I'll be refashioning it into something for me. There are a few scraps left over. I hate wasting fabric, so I'm planning what I can use these small pieces for. What are your go to scrap busters for this type of fabric? Or do I just go Zero Waste Daniel and piece them into another garment?

Friday, 13 April 2018

Sewinspiration - I need your help.


I've just had a delivery of the most gorgeous cornflower blue poly slinky jersey from Minerva Crafts.
I have 3m of it.
I was going to make a Kielo wrap dress, but now I'm not so sure.

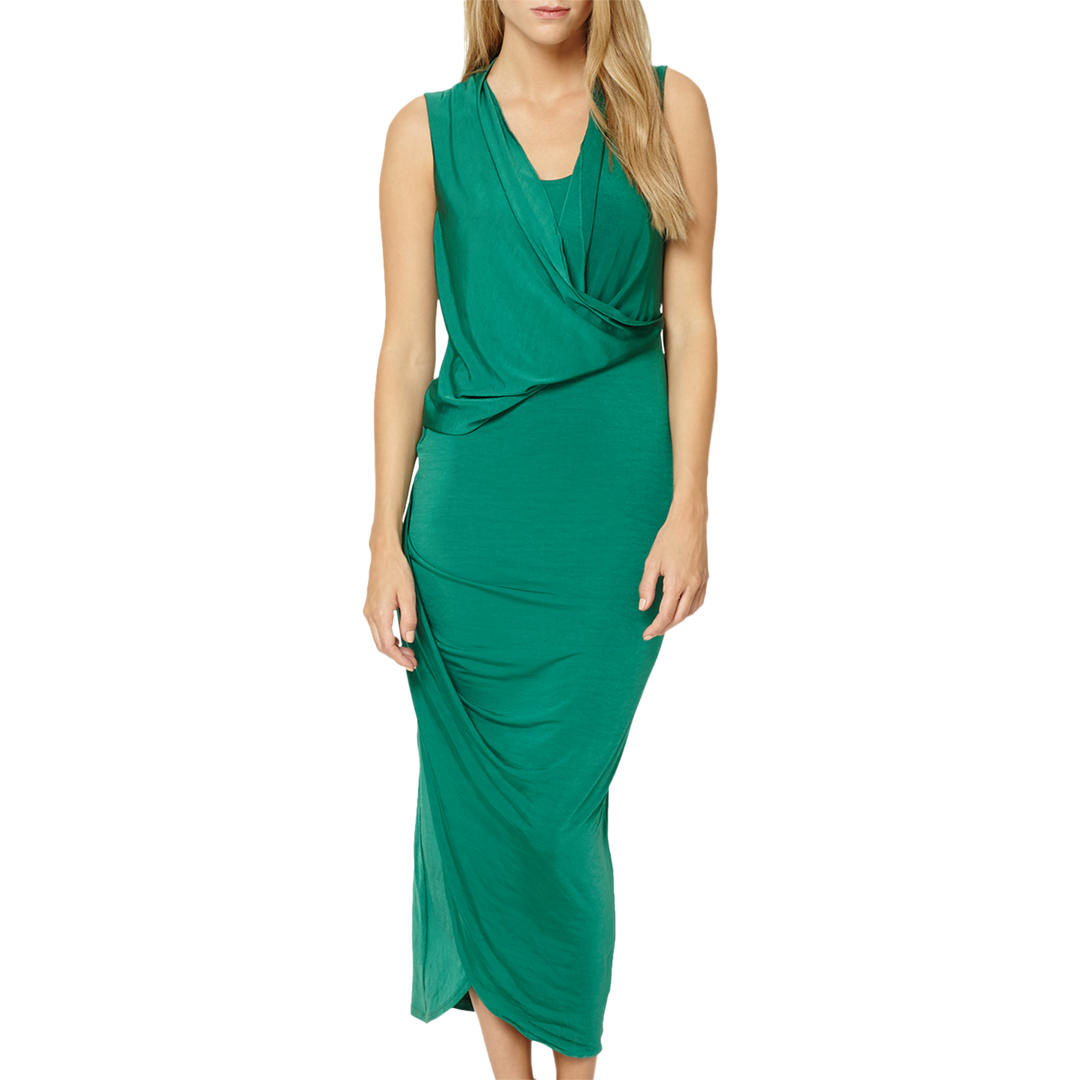
Damsel in a Dress from John Lewis
The fabric is of a similar drape and look to this dress. I LOVE THIS DRESS, but something like this would just show off every lump and bump.  So I want something that shows the lovely drape of the fabric, but is not too form fitting as it's polyester and I sweat!

Here is where I need your help. I just can't make a decision would you help me make it? I've narrowed it down to a short list of options - many are from Burdastyle as I have loads of magazines. I'm also a fan of Vivienne Westwood's draped dresses and this could be a fantastic fabric for one of these.

Are you ready? Here we go?
(Don't forget to vote for the one you think I should do in my poll - It's in the sidebar!).

1. (the original idea) Kielo wrap dress  - Named Patterns

Named Patterns

2. The bowfront dress from Pattern Magic


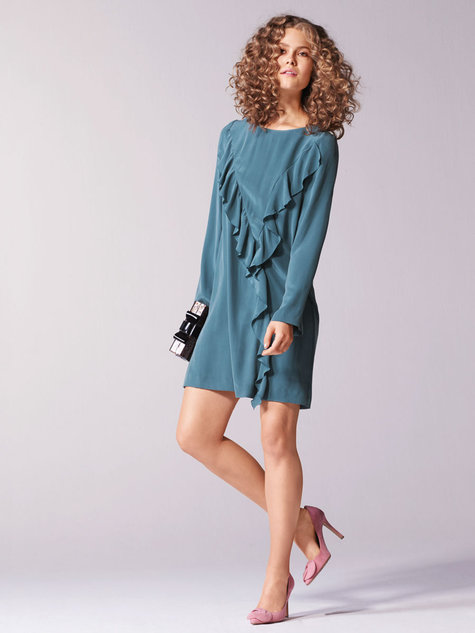
3. Long Sleeve flounce Dress Burdastyle #112 01/2017


4. Gathered Blouse Burdastyle #123 09/2016


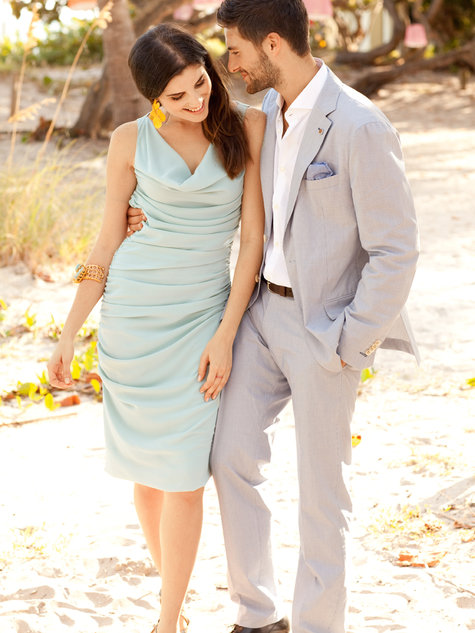
5. Gathered Tube dress Burdastyle #101 06/2013


My other options require me to do a bit of drafting.

6. My asymmetric dress. I made this in a woven and it will need a bit of work to make it succeed as a knit dress.

The rest of my options are based on pattern puzzles from Studio Faro - these really do lend themselves to a drapey dress.

7. The Drape shift  dress from Studio Faro

Studio Faro
8. The Wrap Drape Tunic from Studio Faro

Studio Faro
9. Cowl Tee from Studio Faro

Studio Faro
Which would you make - don't forget to vote!


LinkWithin

Related Posts Plugin for WordPress, Blogger...