Showing posts with label cotton sateen. Show all posts

Friday, 27 October 2023

Long Shirt


This is one of those patterns that I have had on my ‘to make’ list for quite some time.
Since 2012 in fact. It’s pattern 117 from the 04/2012 issue of Burdastyle Magazine.

It’s a tunic-length shirt with a gathered flounce at the back. So it’s business in the front and party in the back. I’ll put it out there that it needs a much thicker belt - I’m going to make an obi style one to go with it and I think it will look fab with my pinstriped waistcoat. I also think it would benefit from being worn with slim trousers or leggings and a high heel. The length does shorten my already short legs!!!!! And accentuating the waist more will help balance my long torso. However, styling issues aside this is an absolute winner, mainly down to the fabric.


The fabric is a stable cotton sateen, which I have heard referred to as the dressmaker’s shirting, and I can see why. The hand of the fabric is smooth and silky to the touch. It’s light but keeps its shape and is a perfect transitional fabric. Light enough for cooler summer days and perfect for spring and autumn. I think you all owe me a huge shoutout today. It was the first time I wore this to work. I’m an art teacher and today involved clay, 3D modelling, acrylic paint, lino printing, painting and ink drawing and I still came home with this shirt clean - not sure how!


I love the weave on this fabric, it adds to the feel of luxury. It sews and presses beautifully, but I do recommend using a microtex needle to avoid any unwanted puckers.


As with most Burdastyle magazine patterns the instructions are minimal; for most patterns, I don’t use them. I normally cut a size 38, but for this shirt, I went down to the size 36 and I’m glad I did - the 38 would have been too big. The collar and cuffs and the top part of the back ‘skirt’ section are interfaced with iron-on interfacing. This is to support the weight of the ruffles, and it does pull back a little here, so it’s definitely needed. The collar is a flat collar designed to be worn open at the neck. I’m not a huge fan of this collar style and prefer a proper shirt collar, but I quite like it here.


I didn’t make any alterations for the main body, but I did flatten the sleeve cap and widen the sleeve a little as the original was very slim and I have wider biceps. The hem was sewn using a 3 step baby hem method, which I love to use on curved hems or fine fabric as it gives a nice flat finish.


I think this would make a good shirt to wear over the top of a slip dress or beach wear as it’s so light and airy.  Here’s waiting for my holiday to arrive!


Friday, 28 August 2020

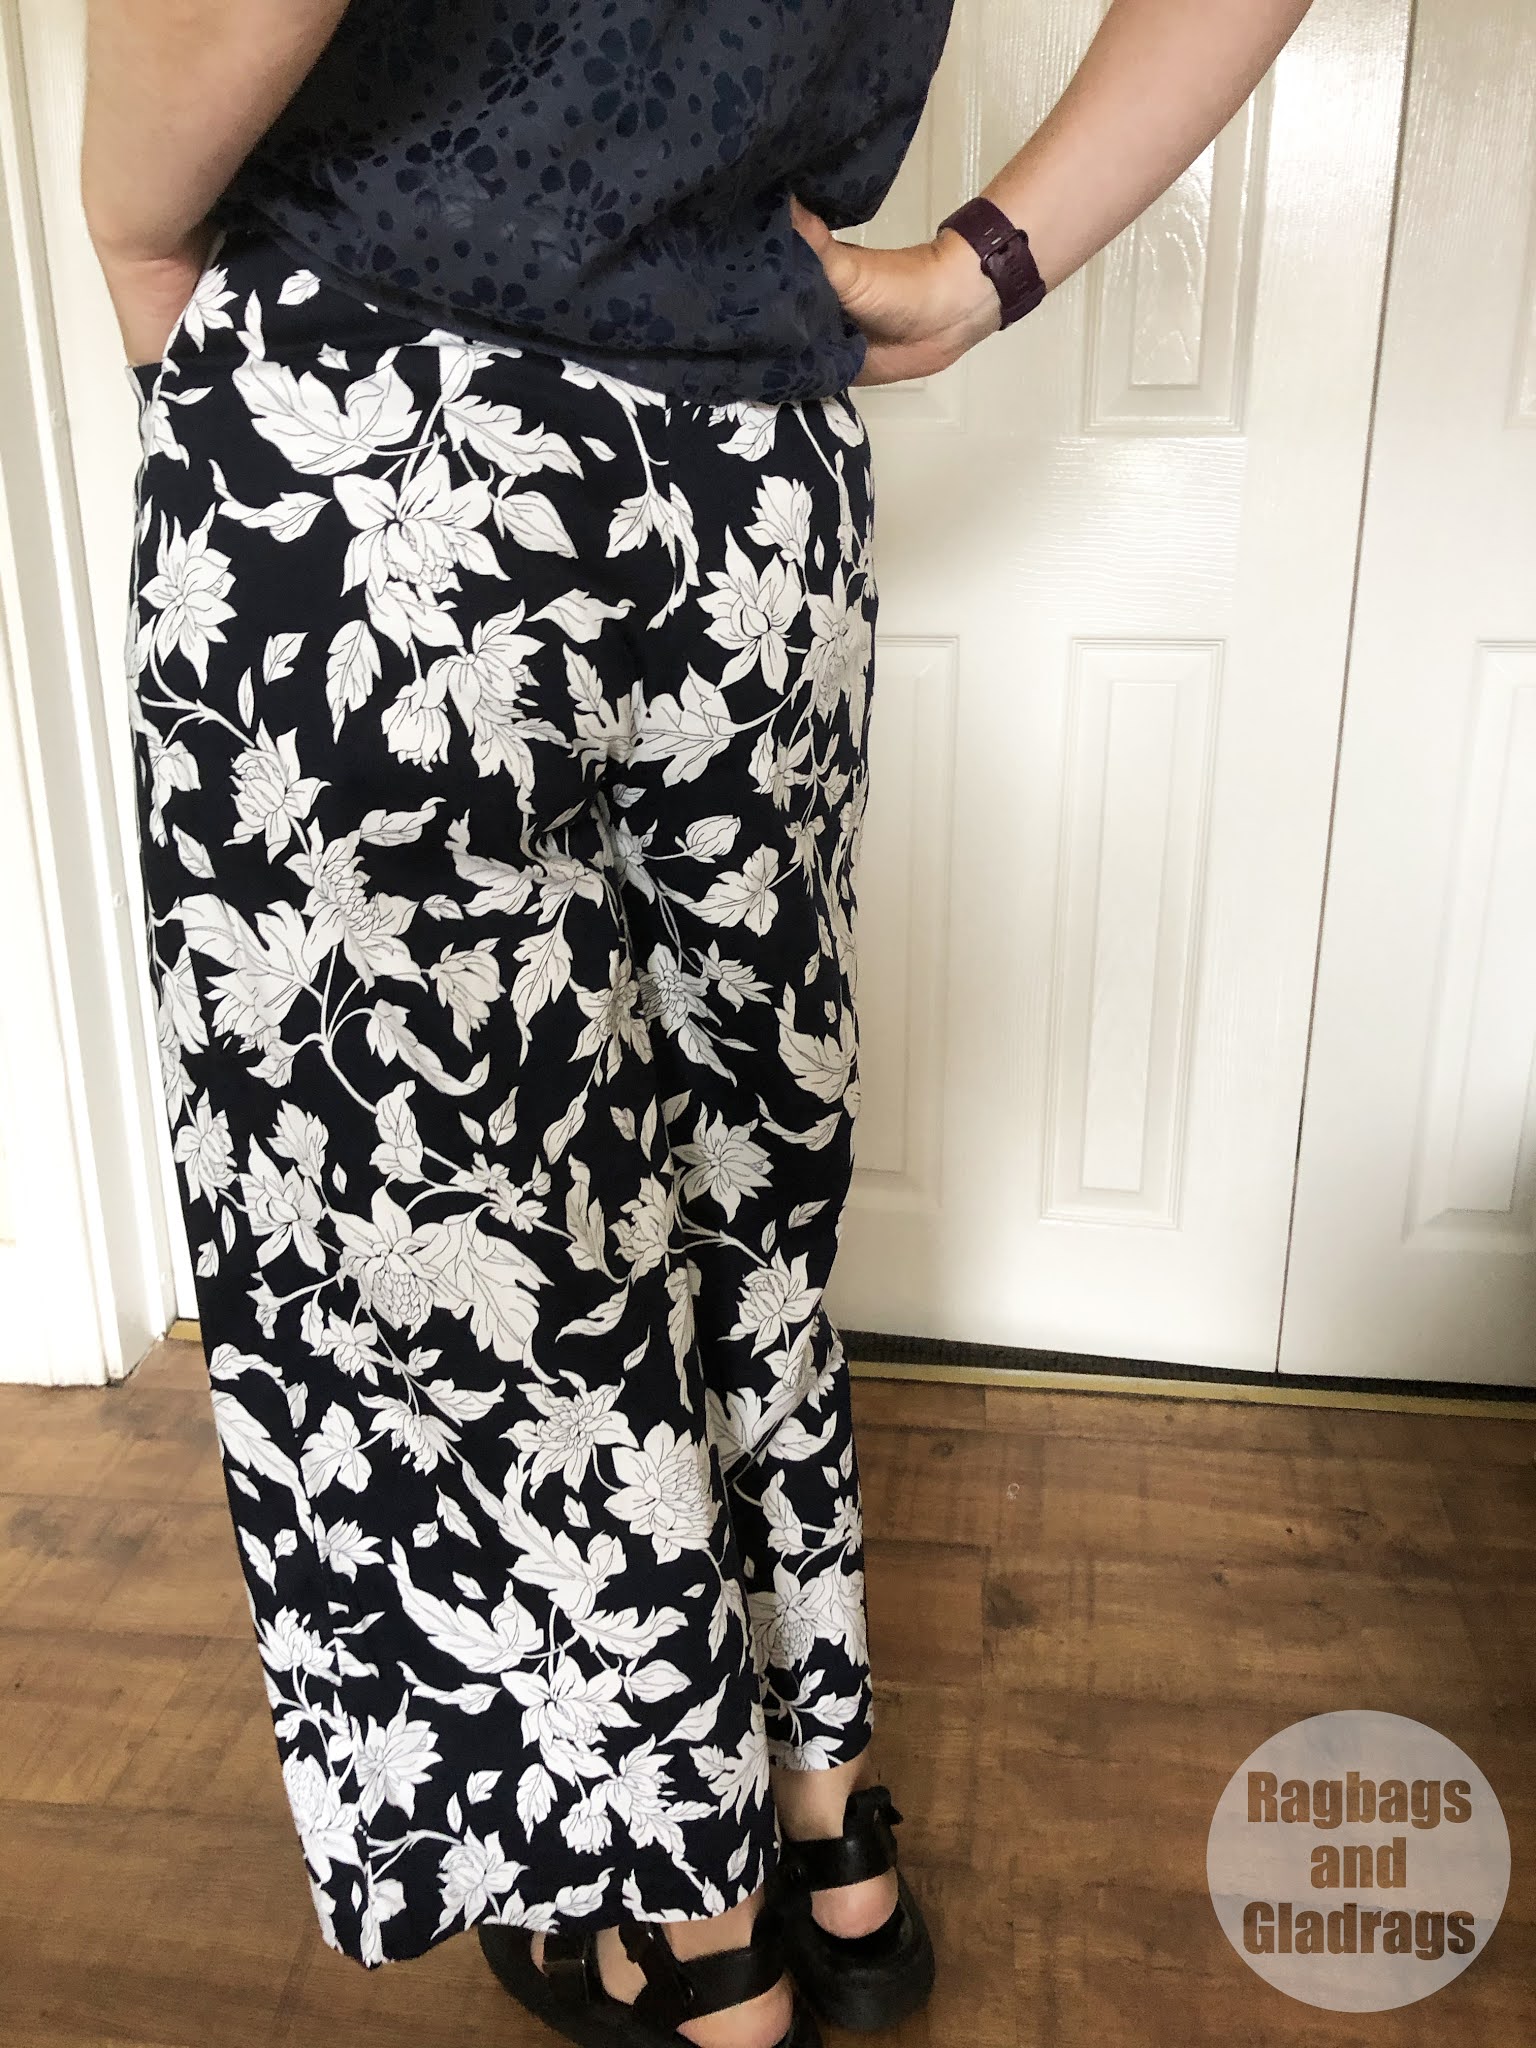
Peppermint Wide legged Trousers - Free Pattern Review

 
I really did want to create a sew-a-long for these as a few of my friends have started sewing and I know they like a bit of advice as they go, but my phone completely died and I ended up just getting on with it and the instructions are pretty good anyway.
 
 
So this is the Peppermint Magazine sewing school pattern in collaboration with In The Folds. You can download this pattern here.

The pattern comes in a wide range of sizes and what is great is that the PDF has layers so that you can select just the sizes that you need, which makes cutting out so much easier. The instructions are thorough and clear with good quality images.
 
 
This pattern is designed for a stable woven fabric without stretch. True to form, I decided to use a stretch fabric. I had recieved this beautiful stretch cotton sateen from Minerva - in exchange for a review, which you will be able to read on their blog soon. I didn't make any alterations to the pattern to accomodate this, but made sure I interfaced all the areas which would potentially stretch out and stay stitched all the waistline edges to prevent stretching.
 
 
The pattern calls for 2m of fabric for this garment. I had about 1.7m, but with some creative pattern placement and on a single layer of fabric I managed to squeeze in all the pattern pieces, I did shorten the legs by 2 cm though!
 
 
Based on my measurements I cut a size D and graded to a C at the waist. This fit really well and I only pinched out a little extra on the back darts, again, mainly because this is a stretch fabric - If it had been a stable fabric I don't think I'd have needed to do this.
 
 
This pattern is superbly drafted, everything matches perfectly, but I did have a couple of issues. First up - the fly shield pattern piece indicates that you only need to cut one, but you actually need two. In addition I prefer to sew a zipper fly where the fly extensions are part of the main front pattern - like the ginger Jeans from Closet Core Patterns. It's an easy alteration to make to a pattern - unless you're playing pattern tetris. I had no way to do this as I was struggling to fit my pattern pieces on the fabric.
 

Most of the instructions are superb, but the fly construction section is awful! It's so fiddly - so my advice to you would be to add the fly extension and follow the tutorial from Closet Core patterns which you can find here.
 
 
I have had these on my to make list for a long, long, long time and I'm so glad I've finally made them. I think there will be more of these now I've finally printed and assembled the pattern and made my first version. I can see a pair in corduroy or a heavier weight wool/blend for the winter.
 
 
I made these to wear with my peppermint wrap top in the same fabric as a faux jumpsuit, which I'll post details of soon, but love that I can wear both pieces separately.

LinkWithin

Related Posts Plugin for WordPress, Blogger...