Showing posts with label Minerva. Show all posts

Friday, 30 April 2021

Burnsides - take two


A couple of years ago I made the Sew House Seven Burnside Bibs for the first time. I love the styling and the cut and the fact that they are just super cool and very easy to wear.  and you can read my post about them here. However, I found I had a couple of issues with the ones I had made.

The fabric was a stretch twill from Minerva. Quite utilitarian and I liked it. The stretch made these super comfy and very forgiving on fit. I made the slightly fitted waist version with the zip[ and had graded from a 6 at the waist to an 8 at the hip. perfect in the stretch fabric, butI found I wasn't 100% happy with the fit across my hips, it seemed to pull when first worn, but then did relax after a bit. Second issue - leg length. I'd hemmed these too short and I really did want full length versions! Everytime I wore the I always felt a tad uncomfortable! and finally I have a long body and always felt that the bib was a little bit low for my liking.

Said twill Burnside Bibs were donated to my friend who is a little shorter that me - she loves them!!!! I have just made version 2 and in the interests of recording my alterations I'm writing about it here.

First up - Fabric choice. This is John Kaldor Salso Linen Cotton from Minerva and I ordered 3m. This is one of the recommended fabric choices for this pattern and it's defo summer weight!

I slashed and spread the bib on the lengthen and shorten line and added about 5cm to the height. As I had already cut the pattern to a size 6 on top and an 8 from the hips I kept the top and the waist as they were and when my pattern pieces were placed on the fabric I used taillors chalk to draw in the size 10 line from the hips to the hem on the outside leg seams only - grading to the 6 at the waist. I also added 3 inches to the length.

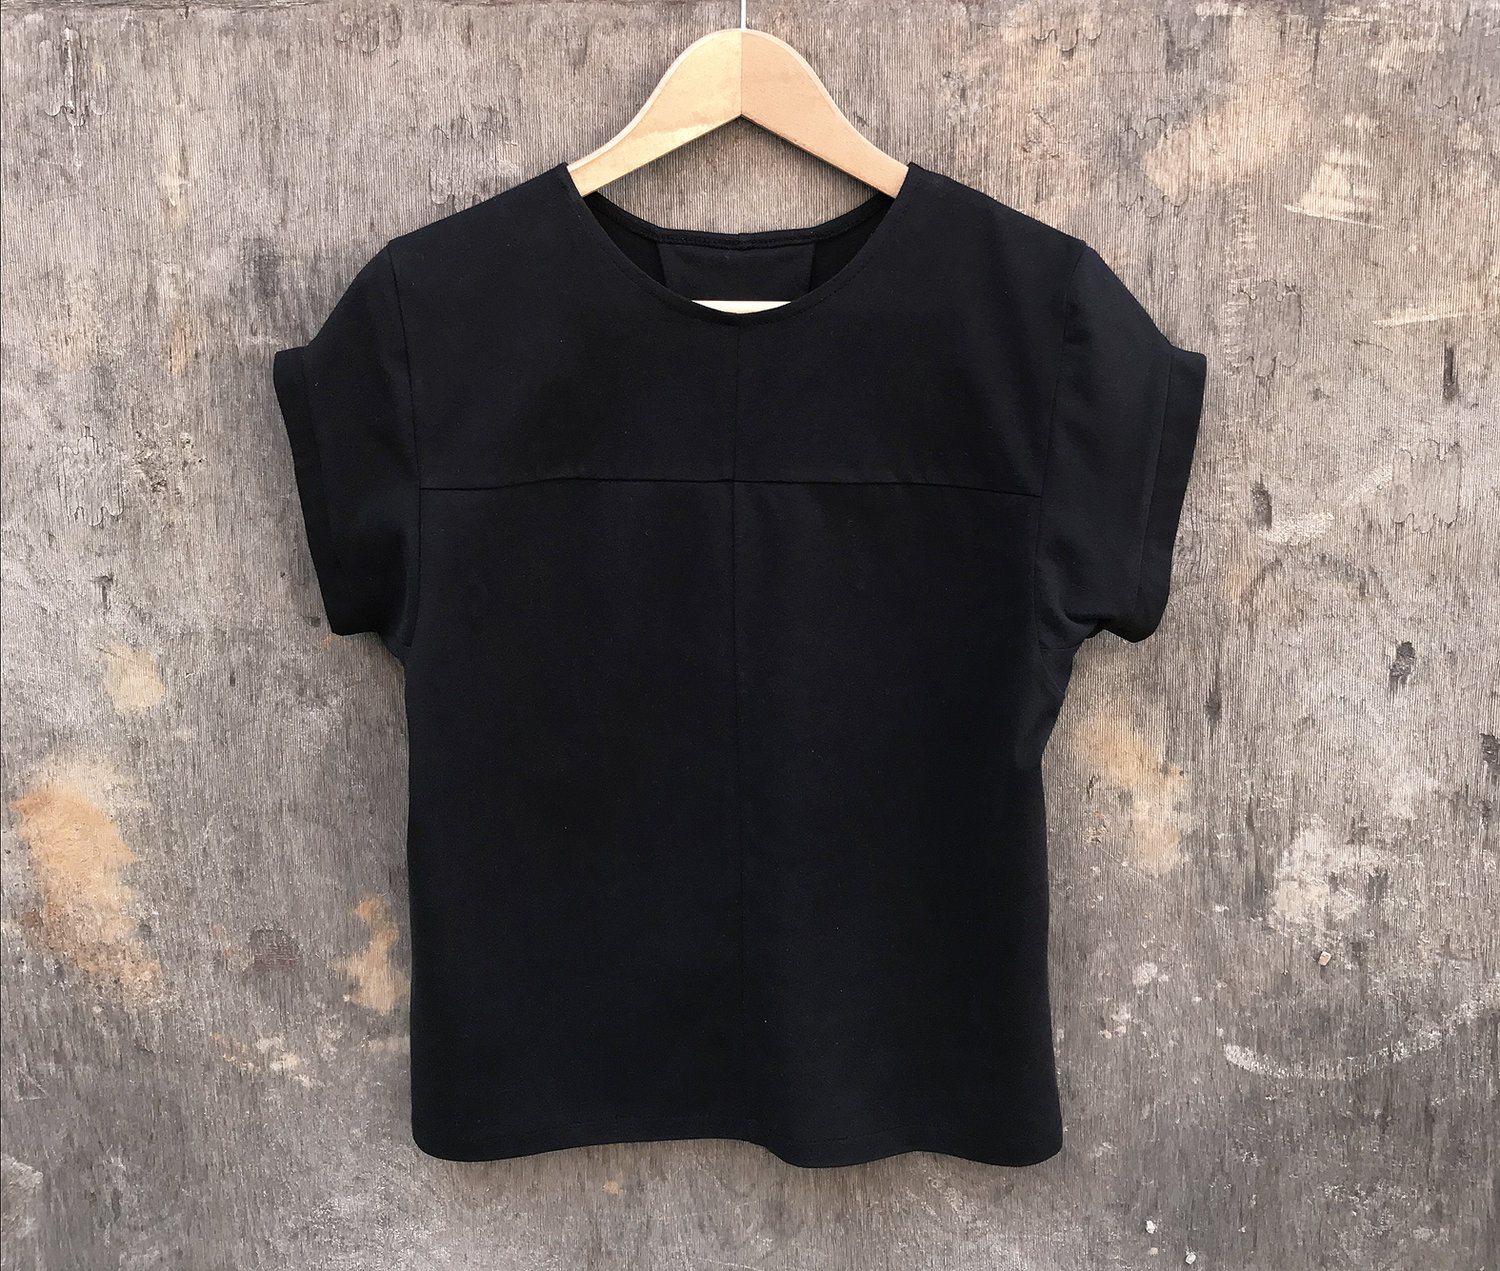
I was very economical with my pattern cutting and had very little wastage. There was enough left to cut out a linen t shirt, which will get a lot of wear over the summer months. I love it when I get a bonus make out of my fabric.

I think that this version of this pattern is a much better fit and more me. It gives the impression of height and creates a long line - useful when you have short legs!

I followed the instructions as the pattern does have a few interesting construction notes, which I wanted to make sure I got right!

I love the flowy feel, but I'll need a but warmer weather before I wear them, rather than the snow we've had this week!!!


I also fancy making a shorts version to wear when skating in the summer - need to raid my fabric stash!!!!!!

Sunday, 25 April 2021

Review: The Assembly Line Apron Dress


*** I had this post ready as a draft, weeks ago. I've only just managed to get my backside in gear and get some photos taken, so it's a little late ***

I first became aware of The Assembly Line patterns when I was on holiday on the south coast a few years ago. Their patterns weren't widely available in the UK then. I bought a single sized copy of the Hoodie Dress from a little shop not far from Lyme Regis (I can't remember the name of the store), they stocked some lovely sustainably sourced fabrics and a few of the TAL patterns. I very nearly bought the Apron dress then, but I didn't and it made it's way on to my ' want to make' list.

My mum bought me the pattern for Christmas and as I had also recieved some gift vouchers for Minerva, I splashed out on some nice weight indigo denim with a touch of stretch. I bought some top-stitching thread locally from The Sewing Machine Guy. It was lockdown, so I called by phone ordered what I needed and Ian, who owns the shop, very kindly dropped the supplies through my door on his way home - now that is customer service.

Anyway, on with the pattern. After checking the measurements I decided to make a size small. My measurements put me at the top of a small, but having made both the Hoodie Dress and Hoodie Parka in the small size I was confident that it would fit fine. It's not a tight fitting garment anyway.

I cut all the pieces from the denim. I thought a double layer for the facing might be a bit too thick, but it was fine. I had a few snap fasteners in my stash and they were perfect for the fastening and wen't through the multiple layers of denim really well.

I did all the construction and topstitching on my Pfaff Select 3.2 and the multiple needle positions make getting even rows of top stitching very easy. It also managed all the layers of denim very well. It struggled on one area, but mainly beacuse of the difference in thickness. As soon as I used a small wedge of card behind the foot to make it even it was fine. Note to self - get a jean-a-ma-jig!

As with other TAL patterns I have used, the instructions are clear and well written and very easy to follow so this pattern is suitable for beginners as there is nothing tricky about it.

The dress came together quickly and and sewed it up mostly in one afternoon. In retrospect I would have chosen a stable fabric as the waistband did stretch out a little at the back while I was top stitching.

I love the shape, length and style-lines of this garment. It is easy to wear and comfortable. I think it will be multi-season too. worn with tights and boots in the the autum and winter and with a much lighter blouse or vest top in warmer weather.

I do have a few issues with this pattern though. Nothing that couldn't be solved very easily.

It's the inside finish that I don't like. It's fairly neat and tidy, but I think it could be better. Personally, I would fully line the bib section and enclose the straps between the lining/ facing and shell. This would give a much much neater finish and would not be difficult to achieve.

Despite this, I actually love this pinafore. just like many of the TAL patterns it's simple, but with contemprary design lines that will become classic pieces. I can see me wearing this for a long time to come!


Friday, 16 April 2021

Zero Waste Patterns - are they worth it?


*** Photo heavy post***

I've been trying out a couple of 'zero waste' patterns recently. I'm a great fan of reducing waste. We've been actively trying to reduce our plastic consumption at home and reduce the amount of waste we create. It's been much harder during Covid times as our options have been somewhat limited.

We've almost got the bathroom sorted and since we started to make our own soap the amount of plastics and waste in the bathroom is minimal. We compost a lot of our food waste, which in turn helps us grow food - all good.

But what to do with those fabric scraps? I have always been pained to throw things away, which has meant an ever growing pile of small scraps of fabric. - that are really not much use!

I know that I can use this to stuff toys or the Closet Core patterns pouffe, or piece them together to make a Zero Waste Daniel style garment. (not managed this sucessfully as the pieces don't seem to go together) I've even made a quilt and have pieces cut for the next one, but this only really uses up my cotton scraps. I have even pieced fabric to enable me to cut out a garment from other waste materials - This I have had some success with and you can see the results here, here and here. I recently took part in the ZWDO community call and it was interesting to hear different designers take on creating zero waste designs.

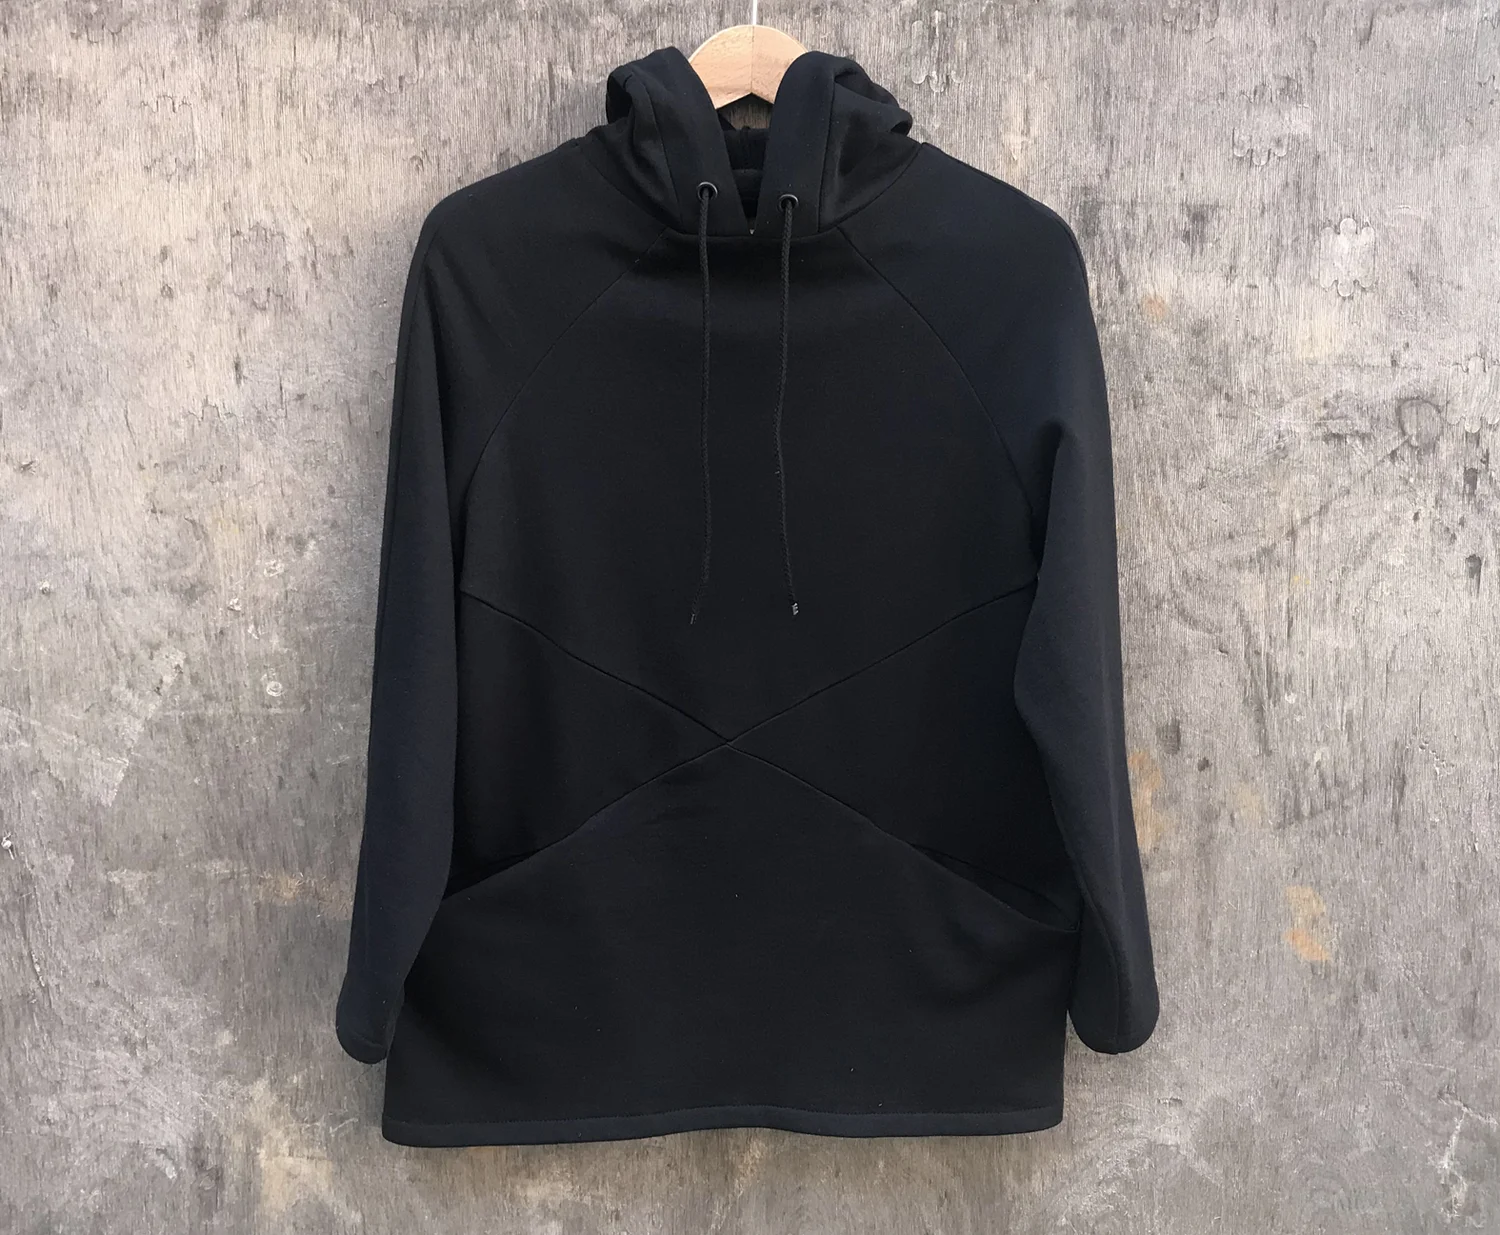
However, the idea of setting out from the getgo to have not waste in my sewing really did appeal and when I saw the Zero Waste Hoodie on Zero Waste Wardrobe I knew I'd need to give it a go.


I had ordered some beautiful fleece backed sweatshirt fabric from Minerva and this warm snuggly fabric arrived a few weeks ago. I pre washed it and got ready to get started.


I checked the body measurements to see if the pattern would fit me and the width of the hoodie corresponded almost exactly with the very well worn one I've been wearing so I decided to go for it.

The pattern calls for 80cm of 180cm wide fabric. I don't think I've ever found fabric that wide for dressmaking and mine was 155 cm wide, so I had to adjust the layout to fit all the pieces on. 

I cut it all out and had enough left over for the t shirt from the same designer. I checked the shoulder width here and added a couple of cm's as I have wide shoulders and got it cut out. I was left with a rectangle of fabric measuring about 45cm wide and 60cm long - not bad.

I loved the design lines of the Hoodie. the construction of the pockets and the body is very well planned. The sleeve are raglan and quite narrow. At first try on I thought they were too narrow, but actually they're fine, but you can't really wear this as a second layer over a long sleeve top. Over a t-shirt is fine.


Once I had constructed the body and sleeves I tried it on and this is where things started going wrong! The shape at the shoulders was just wrong and unless you have a triangular body it's just not right. The neckline was very high and the fabric gaped horrifically. I decided that I would make the hood part and see how adding it on would affect the fit.

The hood is an interesting construction and uses pleats to shape the back of the hood. The hood edge has an eyelet for a cord to go through. I had issues with this as my eyelets would just not go in right. I've done eyelets lots of times and never had them end up bent and out of shape before - yes I did use interfacing. I had to cut a strip away from the edge to get rid of them! This left me with a much narrower hood band and not enough room to add a buttonhole. The hood then gaped and really did need the cord to give it some shape.


Anyway I basted it to the body of the sweatshirt and had a look. It was just not going to work. once the hood had been removed I set about rescuing this top, to make it wearable.

I took a large wedge out of the shoulder seams to make it lie as near as correctly as I could across the shoulders and then lowered and reshaped the neckline. 

From the remaining fabric I cut two hem bands for the sleeves and a band for the neckline. I think It could have done with being a tiny bit tighter as it stands a bit too proud, but I'm not changing it.

The T-shirt sewed up ok. The sleeves are a slightly odd construction, but they work. I also added a neck band to this garment. However I don't think I'd sew it again. The uses of some of the odd shaped pieces of fabric are rather clumsy and would benefit from more thought.

I had very high hopes for these garments and was left frustrated and disappointed that the hoodie was so far off the mark. The idea is great, but the drafting needs some work to make this usable. I was left with rather a lot of waste due to the issues with it. The T shirt is actually quite comfortable to wear.

It's a good few weeks since I finished these and I actually have found myself reaching for the sweatshirt quite a bit. It does have narrow sleeves so I think it will get more wear over the summer worn over verst tops and short sleeves.

For comparison I have just cut out the burnside bibs and a t-shirt based on a lengthened top from the TAL Hoodie dress from a piece of fabric and have less waste fabric left over than was left after this hoodie project. In the future I think I'll just be super economical with my pattern placement and continue piecing fabric to ensure I can cut out all the pieces with very little waste.

What's your thoughts on this? do you have a loved Zero Waste pattern or do you reduce your fabric waste in another way?

Sunday, 24 January 2021

Baggy Trousers

Sing a long with me....

No? Not a Madness fan then?

This post isn't really about songs by Madness, although I do like to relive the 80's and listen to the best of every now and again. It's more about the start to 2021; how we are coping with Lockdown and the most recent of my makes - yes you guessed it - baggy trousers.

2021 didn't start off quite as I envisioned it. I knew before Christmas that it would be strange at work as the goverment here announced, the day before we broke up for the holidays, that schools would be carrying out lateral flow tests in January. This caused a lot of stress for the senior leaders. However by the time new year had passed it was clear that things were going to change rapidly.


My school had a training day on the first day of term and it was virtual. This was a blessing, but before the end of that day we knew that the schools would be closed for at least half a term. Thus started the madness of planning and scheduling lessons for children to complete at home. As an art teacher, this is a bit tricky as many students don't have art materials at home. Some of my students were midway through a ceramics project (which I am now dyring and firing on the days when I'm in school). I have had to rething my curriculum, prepare resources, answer questions online, run live lessons and teach face to face on the days when I'm in school. I have struggled to switch off from work and have found hours in front of a computer draining and more than a bit soul destroying - those of you who work like this all the time - I don't know how you do it.


However, I have tried to get out for a brisk walk early on the days I work from home and try to watch the sunrise over the bay. It sets me up well and helps keep my spirits up. I am turning off my computer at a set time and I haven't put work emails on my phone. I need to switch off!!!!

To keep my mental wellbeing good I need to get outside and excercise and have also started doing some short (30 mins) fitness classes. It's really helping. Having the dog to walk is a positive too. During my weekends I try to do a bit of sewing, but I've decided to keep this slow and steady. In the last month I have completed 3 items. and that's only because of the christmas holidays.


First up is a long sleeved asymmetric t shirt, which I first made several years ago and promised myself another one. The fabric was from Minerva (in exchange for a review, which you can read here) and is navy and white striped. this was a super quick make and I sewed it up on Boxing Day afternoon. It's already been worn quite a few times.
 
 
I've also made the TAL Apron dress, but have only just finished it and have no photos as yet, so more on that in a future post. 


My slow sewing make has been these Burda 6856 trousers. These are also a Minerva Makers project and you can find all the details here.

I planned to make these well over a year ago, I'd bought the pattern and some lovely heavy wool fabric with the intention of making the high waisted version. However after an unsuccessful toile I opted for the wide leg version, which you can read about here. I knew I wanted to try this version, but also knew it would need some serious alterations.

Before beginning I reduced the width of the fron darts by 2 inches - taking out a whopping 4 inches of ease, that I don't really need around my upper thigh. This was a good call and I think the fullness of the resulting trousers is about right.

I basted the waistband together. It fitted perfectly, but didn't have any lining and I would have struggled to wear anything tucked in. So I decided to let the seams out just a mm or two and just at the upper edge - these trousers hit my ribcage, which is quite broad compared with my waist. However, I over did it and they are now a touch too loose. I think in future I will look for a fabric with a hint of stretch to create a snug but comfortable waistband.


The legs are quite long, but I kept them at the original length and just rolled the up - I have a habit of shortening trousers by too much. I actually like these far more than I thought I would, they care comfy and cool and take me back to that 80's vibe, they are also slightly punky, especially when teamed with my vivienne westwood t-shirt and red docs.


Thursday, 19 November 2020

Classy Coat - Burdastyle 119 11/2012


Hold tight, this a photo heavy post! 

I've toyed with a bit of coat making this year and learnt a few skills along the way, but I really wanted to have a go at making a good wool winter coat with proper tailoring and everything!!!! So when Minerva offered me the chance to review this amazing Lady McElroy wool blend coating I jumped at the chance. I recieved the fabric in return for a review, which you can read here.

I don't make coats unless I need them. Last winter I had identified that my smart winter coat was well past it's best. The cuffs were fraying, the lining was worn in places and the faux leather piping had split. The colour had faded a lot too. I knew I needed a replacement, but I'm determined to use the fabric of the old coat in some way too.


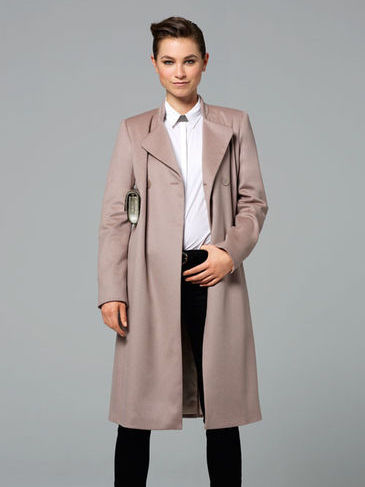
I thought long and hard about the style of coat that I wanted to have. It needed to be at least knee length; have a proper fastening rather than a tie belt; be formal enough to wear for special occassions and also fine to wear casually, if I so wished, and to top it all off a classic style that is not going to date. After browsing my burdastyle magazines and paper patterns, I eventually settled on style 119 from 11/2012. I think I'd ear marked this when the magazine first came out, but never had cause to make it.

This coat is made using some more traditional tailoring techniques to support the fabric. I bought some traditional interfacing and shoulder pads from Minerva and purchased the lining from The Sewing Machine Guy, which is my local fabric store (If you are ever in South east Northumberland do go and check it out!!!). As Burdastyle Magazine instructions are very, very brief I used a range of other resources to help me understand the construction. In short I referred to Couture Sewing Techniques by Claire Schaffer, The coat sew along on Gertie's new blog for better sewing and Gerties's new book for better sewing.


First Up I prepped the fabric. Normally I'd wash my fabrics in the machine, but as this blend has a very high wool content, I used my iron to steam the fabric, just hovering the iron over the fabric to allow the steam to penetrate it. I then let this dry. The traditional interfacing was prepared by soaking in a cold bath for and hour, leaving to dry naturally and then gently pressing.

While I was waiting for the fabric to dry. I traced the pattern - In Burdastyle, I usually cut a size 38, but as this is an overcoat, I decided that I'd go up a size and cut the 40. I did a pin fitting of the tissue before cutting the fabric and decided it was fine. Now the coat is finished I think the 38 would have been a slightly better fit, but the 40 is actually ok. It's not overly big and I'll be able to wear my thick jumpers underneath it!!!!

Once the main pieces were cut out, I cut the interfacing. I completely interlined the front, side front and collars. The back was underlined with cotton and the interfacing was used as a back stay and added at the hem edge and the sleeve cuffs.


The interfacing was permanently hand basted to the wrong side of the fabric. Once the front pieces were interfaced, I added a second layer of the interfacing above the bust as a chest piece to increase the stability in this area. I taped the roll line and pad stitched the lapels. I used Gertie's instructions for this and had a watch of her youtube tutorials. I also made bound buttonholes, which I think I'm getting better at.

Once the bound buttonholes are made, I baste them closed during construction. I also make a matching window in the facing. To reduce bulk I used a small square of organza, which prevents the edges fraying and allows them to be neat. These are then hand stitched in place.

I basted the coat together, without the sleeves in, to check the fit. I ended up taking a little bit off the side back and centre back seams to create a little more shaping at the back as it's quite a straight design. The pockets are easy as they are inseam, so no fussy welt pockets to stress over!

Once I was happy with the fit, I use a catch stitch to secure the seam allowances and then constructed and inserted the sleeves. I don't have a sleeve board but find a suitable alternative is a rolling pin rolled in a towel.

The hems were pressed up and then the collar and facing were attached. Once this was done the hems were catch stitched in place and the shoulderpads and sleeve heads were stitched in. The lining was then constructed and added along the edge of the facing and the sleeves were bagged, which gives a neat finish.

I decided that I would hand stitch the hems so that I had greater control over the vent.


It was finished with 4 buttons (plus one on the inside) and a final steam press.

I really do love the classy lines of this coat. It will be easy to wear in many situations and I hope that it will last for many years to come. 


LinkWithin

Related Posts Plugin for WordPress, Blogger...