Wednesday, 15 April 2020

Pattern Haul

Way way back, in the distant time that was before lockdown - Ok I mean February- I scored a whole lot of sewing patterns on Freecycle. I had a lovely chat to the lady I received these from, only to discover despite living up here in Northumberland, she was originally from a town local to where I grew up, some 180 miles away - it's a small world, isn't it?

Anyway - back to the haul. I was gifted a large plastic bag of patterns mostly from the '80s. But as we are seeing a resurgence of 80's music and fashion I'm pretty sure some of these will come back around very soon, if not already in there. I did give some of the easier patterns to a friend of mine who is just learning to sew. there are some magazine patterns too, mostly from Prima. Also included was the pattern sheet/ instructions from a 1984 edition of Burdastyle magazine.

I thought I'd review these here and ask you for your opinions about them. I may give some of these away as some are not in my size/ not my style. Anyway here goes...

First up - stuff I might actually make.

Vintage Simplicity 7687, circa 1968. I love the simple lines on this one, but its a single size and my waist/ hips don't match this size. I'm going to have a look at grading this to fit.


Vintage Maudella 5812  - 1970's, but not sure which year? (Maudella were the forerunners to New look patterns) I love this but I am gutted that there is a skirt piece missing. I'm sure I can draft one to match - again I need to check the size.


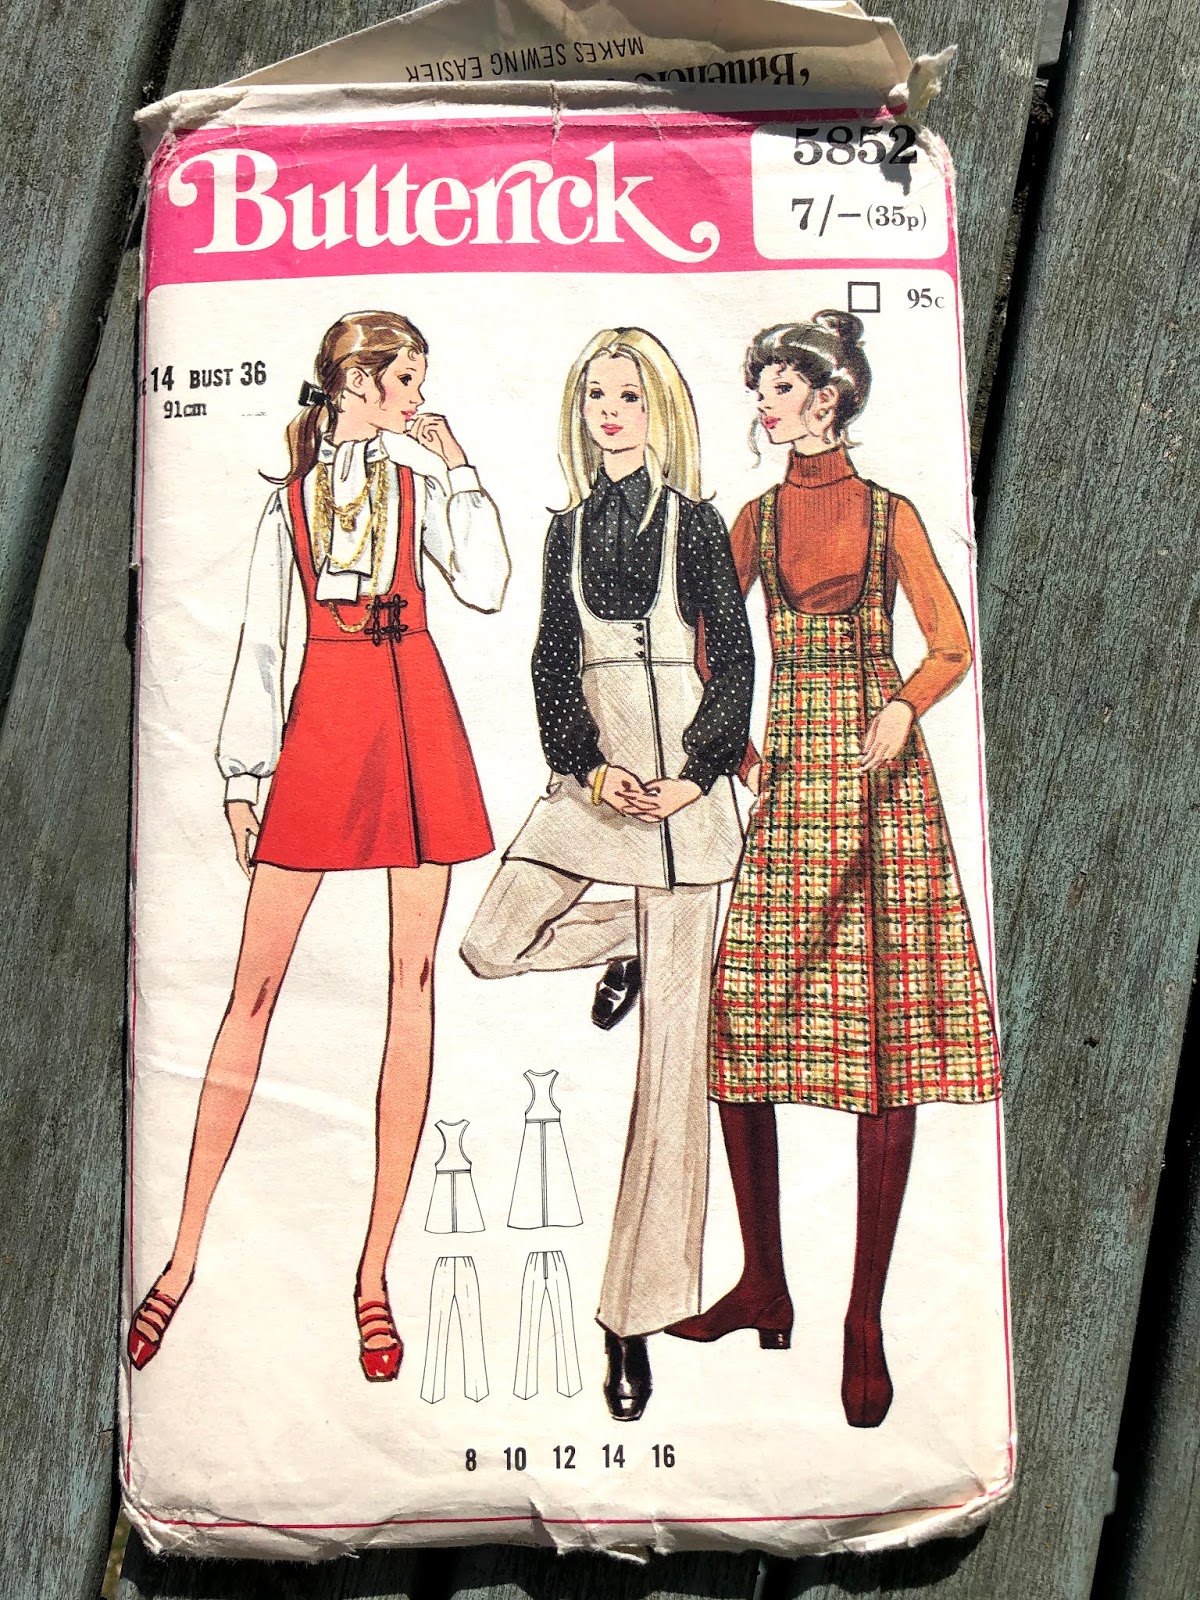
Vintage Butterick 5852, this one is 1972. I love the Jumper dress. Personally, I like the long version, but the short version could be cute too, maybe paired with wide trousers rather than flares. This one should fit.

Vintage Simplicity 7498, 1968. I love this wrap skirt and may have a go with some denim I have in my stash - again I'm going to have to grade up I think. I like the version with the buckles.


Next up are the patterns that I could be tempted into making at some point, but I have some concerns about.

McCalls 8926, 1984. There is definitely a Jumpsuit trend still going strong. I quite like this, but think that it could be a bit too wide across the shoulders. It also reminds me of a uniform I had to wear at work in 1989. 


Maudella 5955, again the 1970's. I quite like empire line dresses, but am always concerned that they can make you look pregnant when you're not - could be a good maternity pattern in the right fabric. - not for me though.


New Look 6277, 1980's Simple shirt dress - nothing wrong with this, I've just got patterns I prefer.
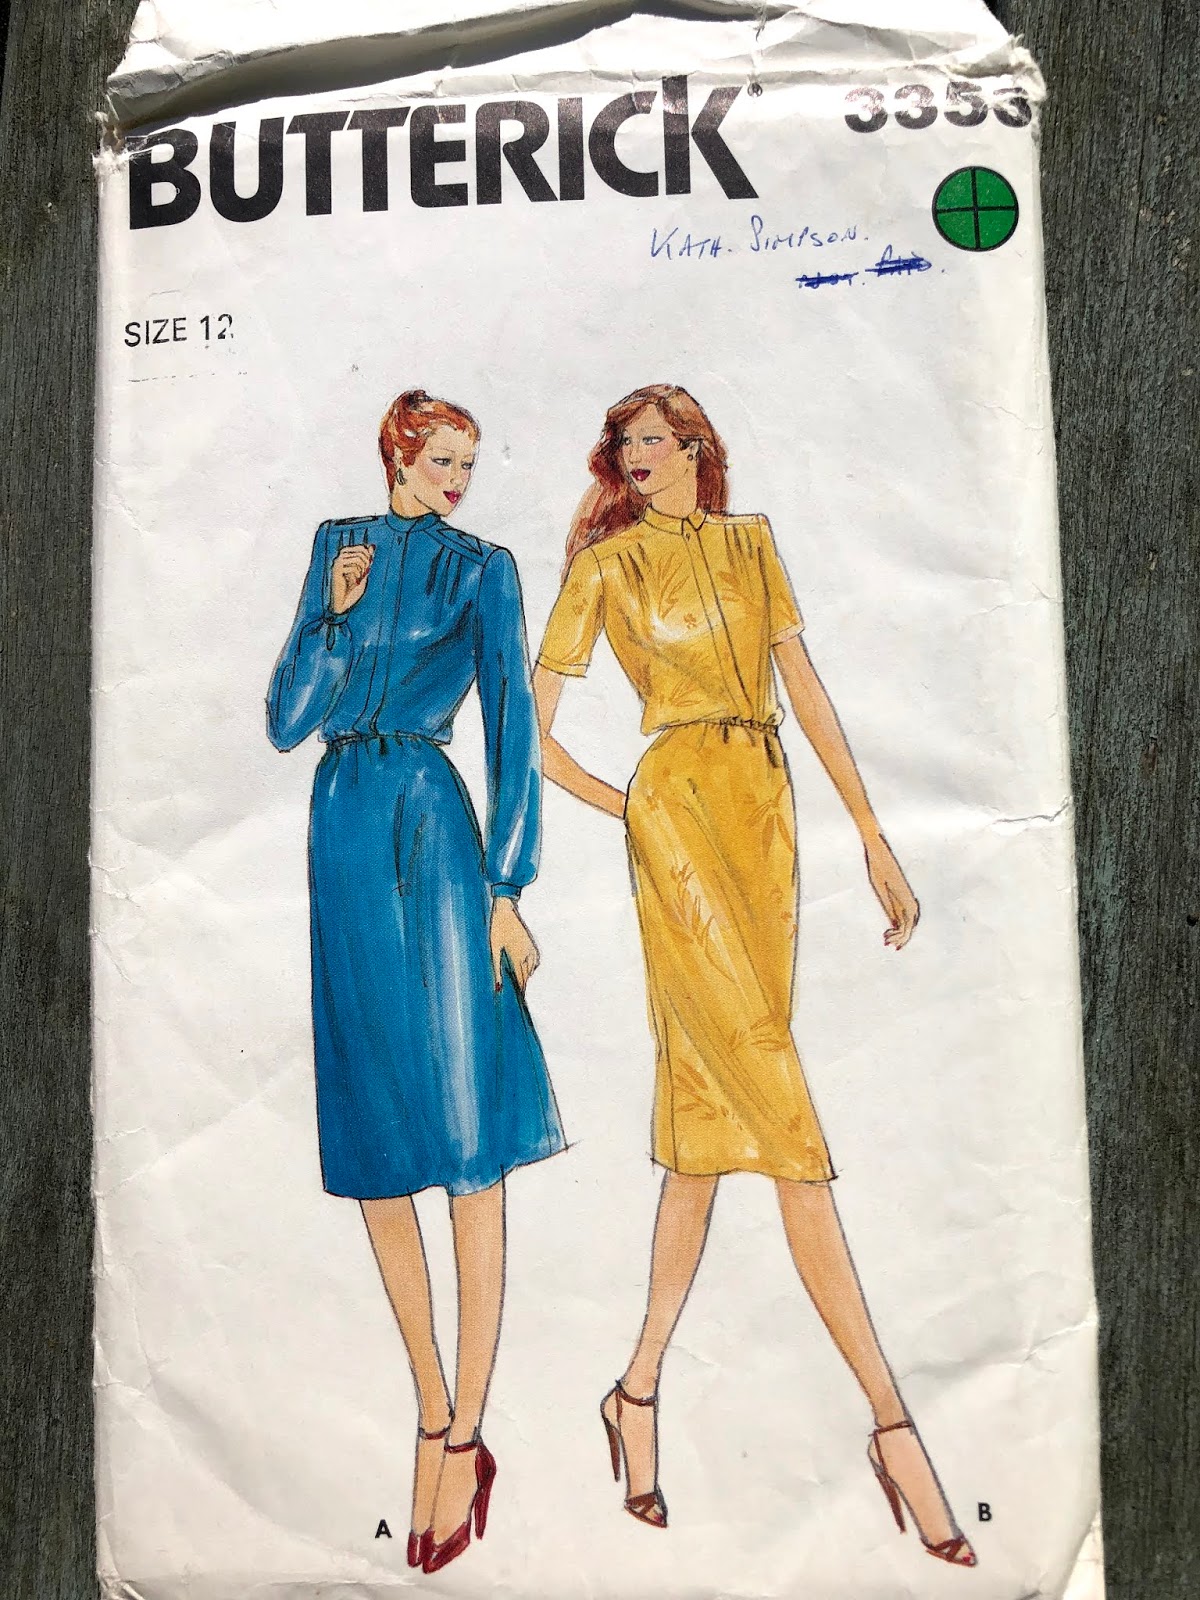
Butterick 3353. The 1980s - the same.

Simplicity 5161, 1981 - This is so on trend - think Wilder Gown. It looks quite nice in the light floaty fabric, but again, unless you want to look pregnant... or you are pregnant...


Simplicity 6395, 1980's Looks a lot like the In The folds jumpsuit from Peppermint magazine. Probably won't make this one.


Style 4092, again 1980's Simple boxy top - good for beginners I think -might make, or use it as a teaching pattern for my daughter. 
 

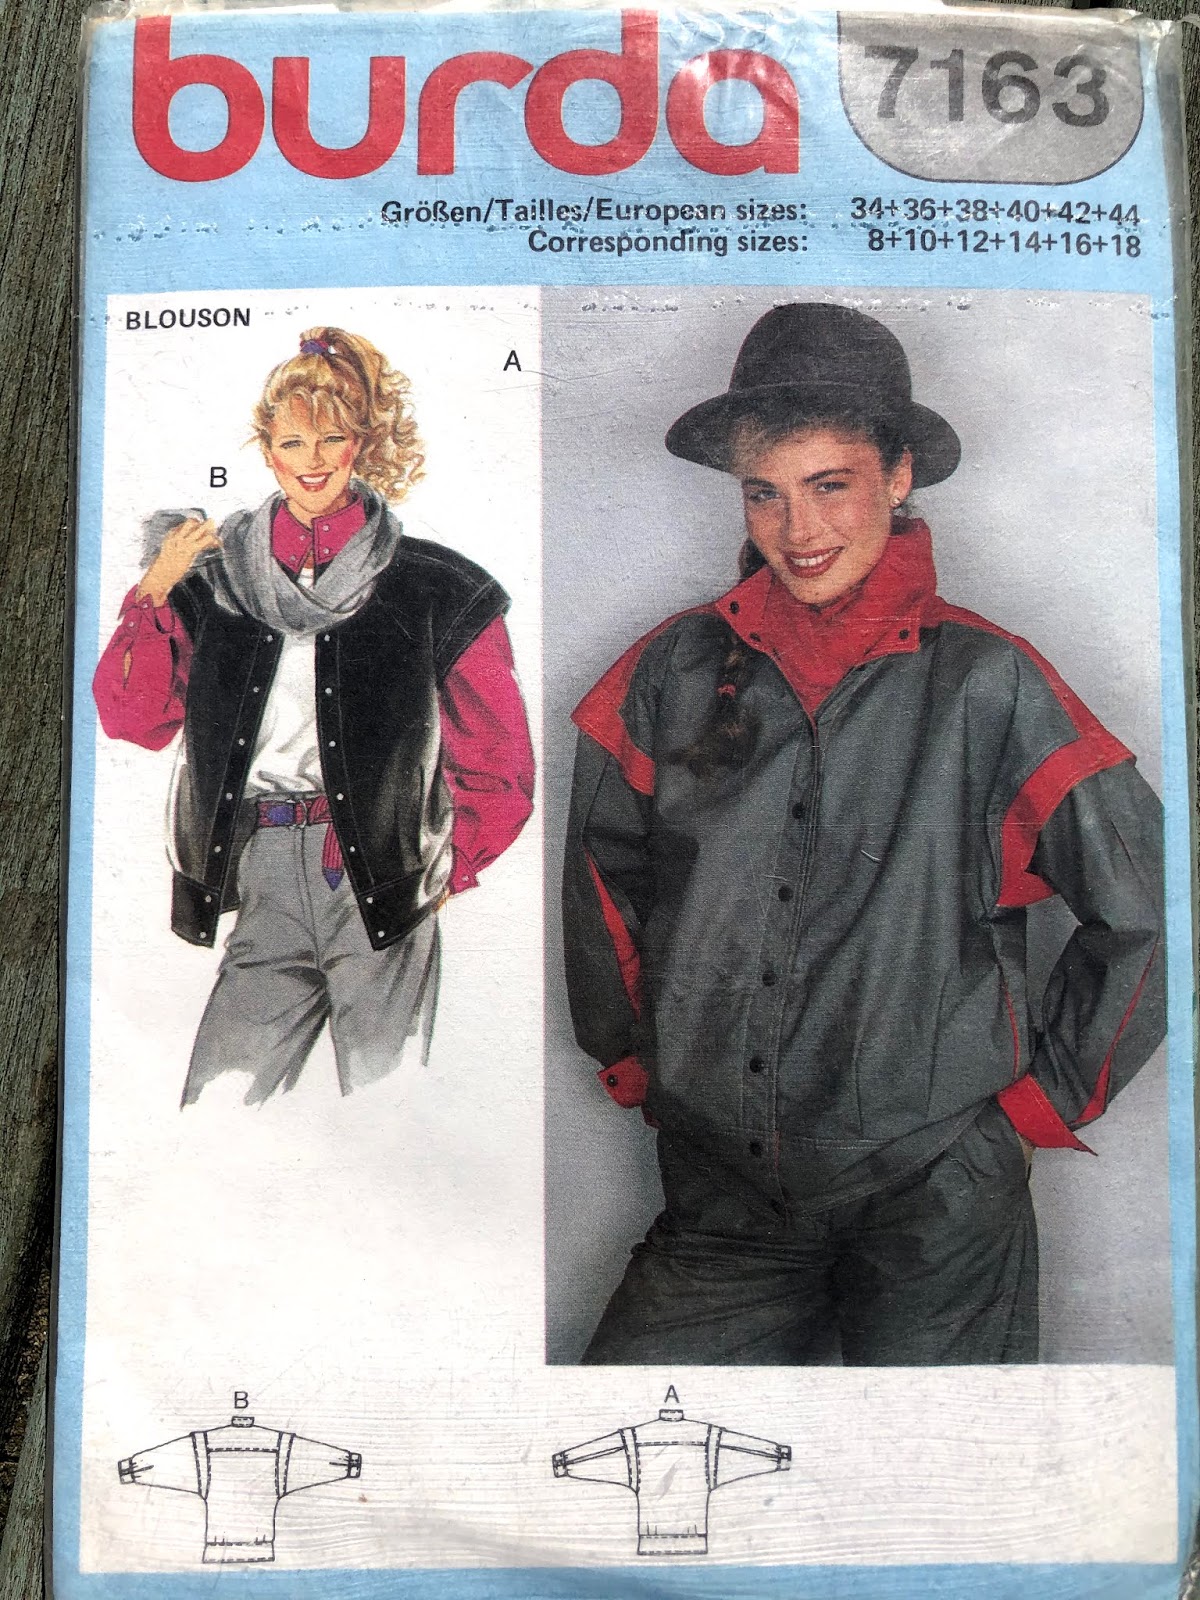
Burda 7163, 1980's - again on-trend, not sure it's my trend but my kids might like this one.

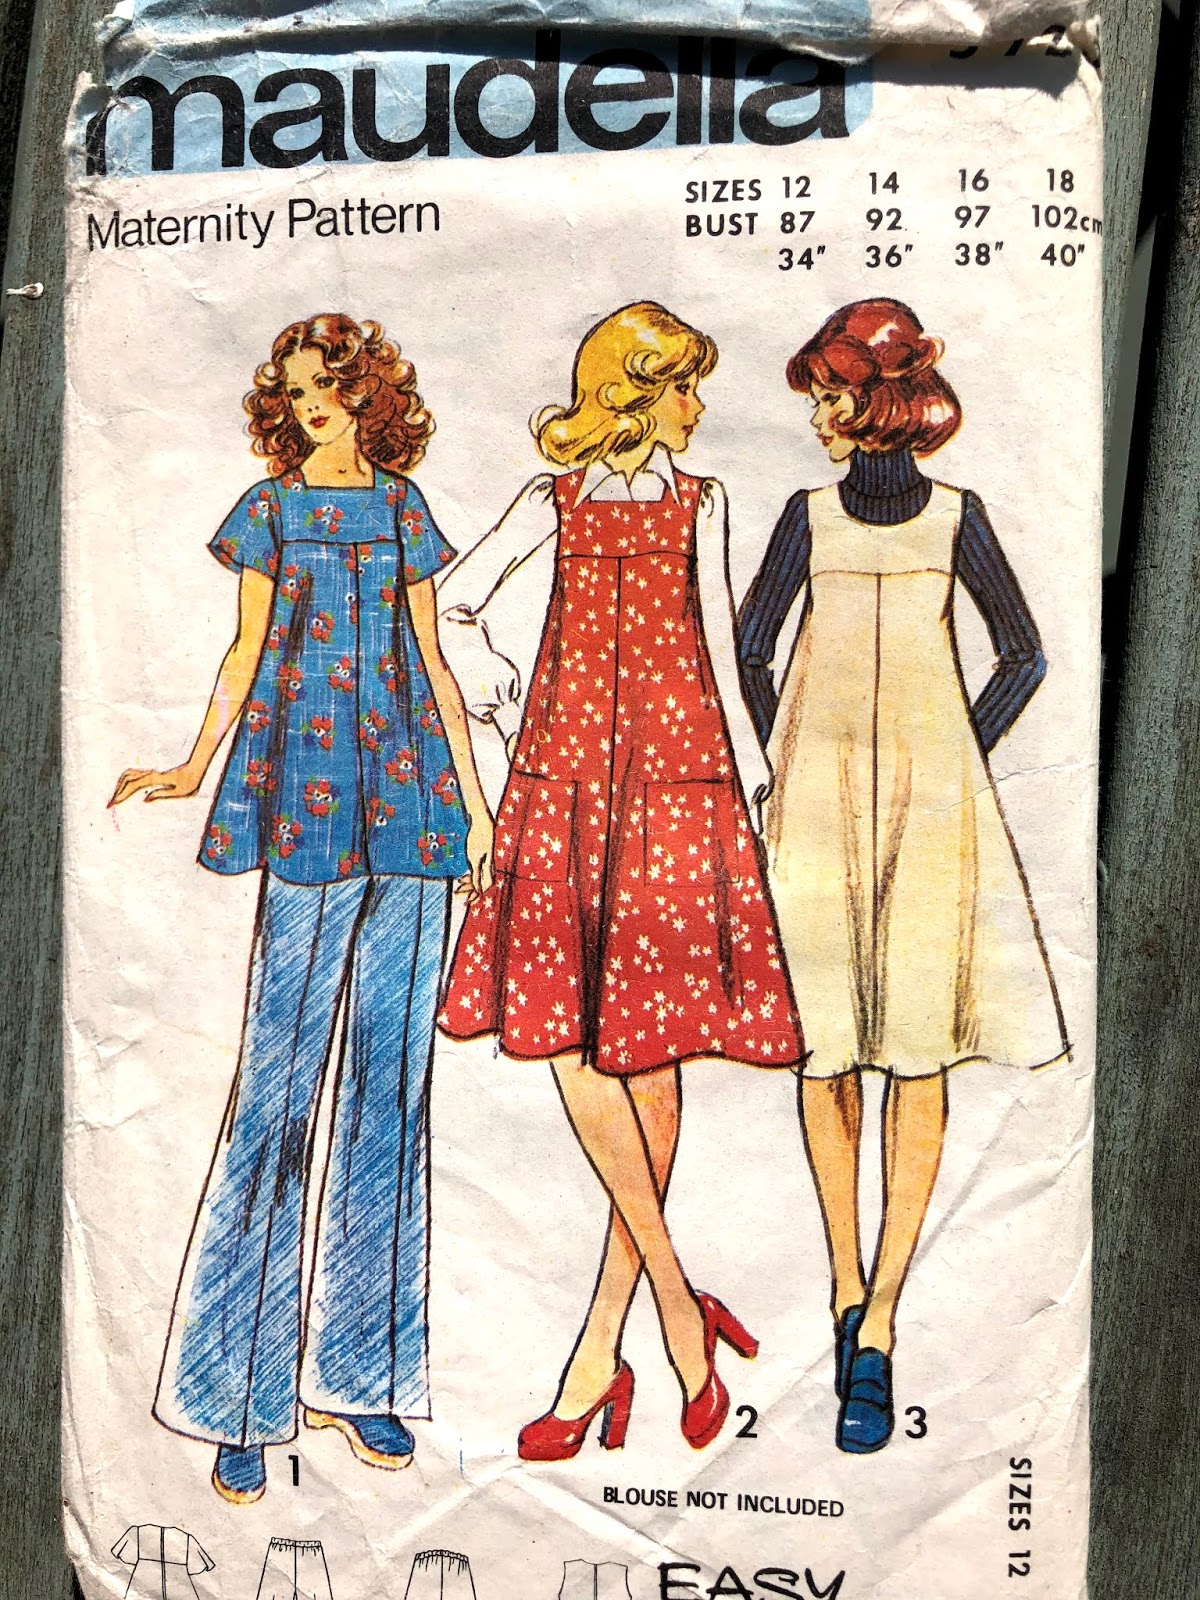
Finally, those that I really wonder why someone would ever make a sewing pattern for. There's a couple of maternity patterns in this lot - if you'd Like them, let me know and I can post them out - UK only.

Maternity Patterns - the Maudella one is ok, but the other one...

No shape patterns - although the cold shoulder is ok.


Shapeless and oversized - love it


Ruffles and gathers and a plunging neckline - no thanks


This is actually ok - but rather shapeless - good for someone new to sewing.
 

Quite like a trenchcoat - but this looks very oversized - I don't think I could cope with those shoulders.
 

 Inoffensive, bland.

So do you have a pattern stash? Any suggestions for what to do with some of these? I feel a trip to the charity shop might be in order once lockdown is over. Can't wait to try some of these though.

Saturday, 11 April 2020

Lockdown creativity


So this week I've only been at work one day and as it's the Easter holiday I've been spending some time being creative and making things and getting some fresh air on my daily exercise - luckily for my the view above is just a 5-minute walk from home. I've had a few things that just needed finishing off sewing wise.


I messed up a welt pocket and ended up having to re-cut pieces but the second attempt was much better. I had a lot of buttons and buttonholes that needed doing. I make buttonholes on my Janome, so I packed the Bernina away (put it on the floor for a bit) and set up the Janome for the one-step buttonhole function and got to work doing all the garments I needed to finish off. I only bodged one buttonhole, but it was on wool fabric and really did take some unpicking. Garments now need a final press and photographing - so expect to see them in the next few weeks up on the blog.

It was my daughter's 17th birthday and I channelled my inner Mary Berry and made her a gingerbread house "cake". I don't think I've ever made anything quite as well when it comes to decorating cakes.


I decided that I'd like to make some portraits and stretched some paper ready to get started. I sat outside in the sun, but it was a bit too bright to see my source images so I decamped inside. I used a very basic grid to get the scale right. I don't always do this, but it can be helpful to work out proportion.


I'm planning on doing a coloured pencil piece and a graphite pencil study. so fay I've sketched the structure in for both and blocked in the tone for the graphite study. Hopefully, I'll start to refine this piece this week.

I've also been helping my hubby with creating the online content for our Church Easter services - mostly keeping quiet, but also doing some reading and setting up some visuals. you can see our Good Friday Tenebrae reflection here.


I started an upcycling project. Our old coffee table had a really damaged top and needed an update. I've been planning to mosaic the top for a while and this week I finally got it gridded and started to stick down the tiles. Unfortunately, I ran out of tile adhesive and need to find some before I can complete this.


My other creative pursuits bring together my love of art and stitch and I've been tackling some hand-stitched art as part of Textile Artist's Community Stitch Challenge.
The first challenge was set by artist Sue Stone and began with experimenting with just one basic stitch.


The second was set by Cas Holmes and involved using applique and hand stitch to create a small piece. Follow on Instagram.


And this week I've been working on an eye study set by Emily Tull. Its an exercise in observation and Emily teaches how to create curved stitches and had us making a drawing using stitch. I used a yellow background for this one and started with the recommended black, white and grey machine thread (never used this for hand embroidery before), but then sent myself down a rabbit hole and started with colour!!!! You can follow Emily on Instagram.


This task struck a chord with me as I've set my students an eye-drawing task for after the holidays. I even attempted a video - Too much noise in my house meant that I used written instructions and music background.

I can't wait to see what next week's challenge is and I'll try to get the mosaic finished. My daughter also wants to do an art day, so it might be time to get out the mono-printing stuff this week too. What have you been doing to keep sane during these mad times?


Friday, 3 April 2020

Spotty Solina


So we're all fans of Breaking the Pattern by Named Clothing right? Me too. It seems like everything I make from this book is great. Yes, there are a few tweaks I'd make, but unless you have a pattern drafted exactly for you there will always be a few adjustments needed. However, as a rule, the patterns from this book fit me pretty much as drafted.


I've made the Sade blouse - great fit, but I'd make it a little longer for my personal taste, same with the Ruska T-shirt. I've made the Saraste shirtdress twice with no alterations and I cut the shirt version out last night.


But let's get back to the Solina dress. Another win from the Book. The whole idea of this book is that you change and adapt the patterns to suit your style and many of the pattern pieces are interchangeable. I was a little unsure about this pattern when I first saw it and it took some time for me to work out what I was concerned about. I came up with three things:- firstly I was worried about the split - it's not really me; secondly I don't like sleeve ties - I'm an art teacher - they just get in the way and thirdly I thought that the dress might have too little shape at the waist and the pleats would look odd on me. What I loved were the high neck and the midi length and long sleeves.


I decided I needed a transition dress that could go from winter into spring/ autumn to winter. Here in the North East UK it can still be quite chilly even in early May, so transition pieces are the way forward.


I did not make any alterations to the drafting of this dress and cut a straight size 3. I did cut the front on the fold, omitting the CF seam and the vent. I didn't cut the sleeve ties and left the sleeves straight.
Other than this I followed the instructions, they are easy to follow.


I made this dress in a spotty viscose from Minerva and it is the perfect weight for a transition piece. This was a very quick make and once I'd traced the pattern I'd made the dress up in a couple of evenings. and wore it to work the day after I finished it.


So what about my concerns? the vent was omitted so no worries there. The sleeves don't really need the ties, they are slim and have a nice shape anyway. The waist if the dress is actually quite fitted The back is shaped really well with darts and the ties are quite flattering, bringing the dress in just enough. Now I have a long torso and wide shoulders so I often struggle to get patterns to fit well in these areas. Not so this. the fit was spot on! Don't you just love it when that happens, and I'm so glad it did, especially when I didn't bother to make a toile.


Have you made this dress? What did you think?

Friday, 27 March 2020

Hoodie Parka - my style of coat


I'm not one to follow fads. I rarely buy patterns when they are first released. I always have a look through my stash to see if I have anything similar I can hack or adapt, or I just draft things myself.


However. I. love. this. pattern. I have loved it since I first saw it on The Assembly Line website well over a year ago. I didn't buy it. When putting my Christmas list together at the back end of last year - on it went and my lovely hubby bought it for me.


I have a long coat, it's one I bought from Next before I started sewing, the piping on it is cracked and it's so old the colour has faded. It's still warm, but I need something a bit more me and this pattern is it. It's completely gift funded - well almost. I had Minerva Crafts vouchers from my sister in law for Christmas and bought some black drill fabric - just enough. She had also given me the fabric I used for the lining for Christmas 2018, which I think she got from the stitching show. There wasn't quite enough for a full lining, so I bought regular black lining for the sleeves. not quite as cool, but much easier to get on and off than lining sleeves with cotton.


A word on fabric requirements; many patterns are generous with their requirements and you can get away with far less. Not so TAL patterns. they are carefully planned and leave you with very little scrap fabric. If it says you need 2.4m then you really do need 2.4m - pay attention!!!!


The pattern is for an unlined coat. It just has a hood and yoke lining but I decided that adding a lining would make it much more effective as a wearable coat and go to planning how I would cut the lining pieces of the coat to make it work. essential I treated the bodice and skirt sections as full-length pieces and cut them less the amount that was folded in for the facing. I did have to think carefully about the order of construction and do things a little differently from the instructions in order to fit the lining in. I constructed the hood lining separately and fully bagged the rest. I also used the lining fabric for the pockets and the underside of the pocket flaps. I also made sleeve heads from some spare fleece fabric, to keep the shape at the top of the sleeves.


The pattern is excellently drafted and is multi-size, which some of the earlier versions of TAL patterns weren't. I made a size small (which is where my measurements put me and the same size I used for the hoodie dress, which is a good fit) and the coat fits, but I think I'd struggle to wear anything thick underneath it. That's ok as I planned this to be a lightweight spring/ summer coat and it's already had a bit of wear. If I was going to make a warmer version I would definitely size up to the medium.


I used Prym snaps for the fastening, but already I've popped one and lost it - thankfully they come in a pack of 10 and I didn't use all of them when first applying them to the coat. It took me quite a while to work out the placement of the snaps as I felt the directions would be unbalanced, so I worked out my own distances between each snap - I think it was about 11cm.


This has to be the coolest coat and now I want to make more. but I have a list of things to make and it will be a while until I finally do that.


Monday, 23 March 2020

Burda 6856 Trousers


Oh My! How long has it been since I posted???? I have stuck to my plans and I have about 5 things on the go all at once. So far 2020 has been hectic as January was panto month and I just don't know where February and March have gone! School is now on shutdown and I'll be in school some days supporting Key Worker's children and working from home on other days - these are strange days indeed. I have been sewing in fits and starts and have completed 4 makes out of 9 from my 2020 sewing plans, plus an extra unplanned make. I'll be posting these over the coming weeks

Anyway on to the latest make...


These could have been a very simple make but ended up being more involved than I really wanted them to be.
I've had these on my radar for well over a year and had planned to make view B with the high waist and pleated front.
I began quite well and made a toile, aren't I good? I cut a 36, which I thought would be ok and actually, the fit wasn't too far off on the waist, although my measurements put me in a 38 I always find I have to remove quite a bit at the waist - not on these. I needed to add a couple of cms to make it a comfy fit. However, this wasn't the deal-breaker. the real issue was that pleat in the front leg - it just looked wrong on me - too much fabric and too much volume. It was going to look wrong, especially in the wool blend fabric I had earmarked for this project.

So instead - desperate to get going on this as it was my first 2020 make, I went for view A. This time I cut a straight size 38, which is my regular size in Burda patterns and straight in my fabric - no toile for this one. As expected I needed to take a great big chunk out of the centre back seam  - about an inch wedge taken out from the waist edge grading to nothing at the crotch curve. It looks a little bagged out here, but the fit is actually good. I've been wearing this all day!


I also found the legs a bit too wide in the wool fabric and took about a cm off the side seams at the waist grading to about an inch from the hip downwards, narrowing the leg slightly.

As my fabric was so thick I decided to sew the pocket bags from some quilting weight cotton and I think that was a good call as the bulk would have been way too much. Once the main part of the trousers were assembled and fitting adjustments made I started on the waistband. It's a curved band cut in the main fabric and a facing. I used the wool for both and in retrospect, a thinner fabric for the facing would have been a better option. I ended up hand stitching the inside waistband as it was just too thick to go through the machine. Plenty of steam and a hammer sorted out the really thick bits, but it was not going to be possible to sew a buttonhole. Instead, I opted for a hook and bar fastening.


I pinned and hemmed the trousers. I used a 2-inch hem and had cut 4 inches off the length before hemming. This was a mistake, as when worn with my docs (which have a heel) they just looked too short. I wore them once and let the hem down. The edge was overlocked already. Thankfully I had kept the pieces I'd cut from the bottom. so I trimmed them to 3 inches wide and overlocked the raw edge, effectively making a new faced hem, which I understitched in order to help keep the fabric and edges sharp. The hems were then sewn by hand - and with this fabric the stitches are invisible.

The length is much better and I love how warm these are - definitely winter wear, but here in the UK, that's exactly what we have at the moment. I think these will get a fair bit of wear before the weather improves. I'm also planning to make a matching waistcoat and I have plans for a shirt with a bow collar too - I have an outfit in my head already, which means I might get around to making something this side of next Christmas, once I've finished all my other planned makes for me and for other people. Next up is the Assembly Line Hoodie Parka. It's already cut out and prepped ready to sew.


Saturday, 11 January 2020

Working it


1st make of 2020 completed - I made the Burnside bibs. They're a bit utilitarian but I kind of like that.

I must be the last person on earth to sew up this pattern. I had spent all of 2019 trying to decide which dungarees pattern to sew up. I trawled sewing blogs, pattern review, Pinterest trying to find the perfect pair.


Eventually, I narrowed it down to The Jenny Overalls from Closet Case Patterns and Sew House 7 - Burnside bibs. I love both of these patterns and spent ages trying to decide which ones to make. In the end, the relaxed look of the Burnside bibs won out and that's what I went with. However, I think my fabric choice might have been better and the twill chosen would have suited the Jenny overalls much better as it was quite thick.


I made the straight bib and the version with fewer back gathers and a concealed zip. The fabric was an anthracite twill from Minerva crafts, which they sent me to review. As the fabric was quite thick I really could have done with using a lapped zipper and I wonder how well the concealed zip will hold up over time.

Unusually for me, I cut the pattern tissue and made no alterations at all. My measurements were spot on for the size 6 - so that's what I cut. In hindsight, I should have lengthened the legs by 5 or so cm. I feel like they are a little short, especially when wearing with my platform docs! perfect to wear with a battered pair of converse hightops though.


I thought that these would look rather sack-like, and would add lots of bulk to the waist, but they are actually quite nice and in a lighter weight fabric they would awesome. I wondered how easy they would be to get on and off to go to the loo - as that is an issue with all one-pieces and the main reason I can't bring myself to sew up a full-on jumpsuit - haha! It's safe to report that these are easy to get on and off, without having to fully undo/ redo the ties - winner!


I have plans to make a lighter version for the summer and will be making the cropped length. but for now, these will see me through the rest of winter and into spring.

(The fabric was sent to me free of charge by Minerva Crafts in exchange for a review, which you will be able to read on their website soon. All opinions are my own)

LinkWithin

Related Posts Plugin for WordPress, Blogger...